How to make an adorable puppy with moldable foam

Hola comunidad de Hive! Para aquellos que aman los trabajos manuales y la creatividad hoy les traigo como hacer un adorable cachorro con foami moldeable
Hello Hive community! For those who love crafts and creativity, today I’ll show you how to make an adorable puppy with moldable foam

A continuación les mostré paso a paso la realización de mi trabajo. Comenzaré mostrando los materiales
Next, I'll show you step by step how I made my project. I'll start by displaying the materials.

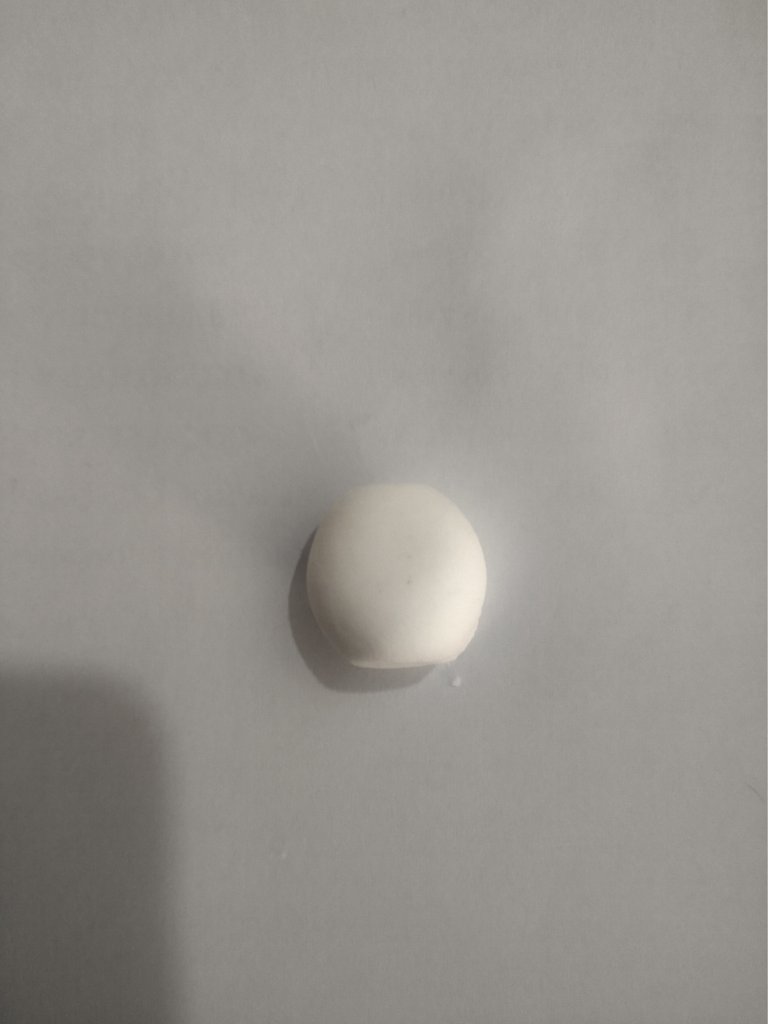
MATERIALES/ MATERIALS
Step / Paso 1
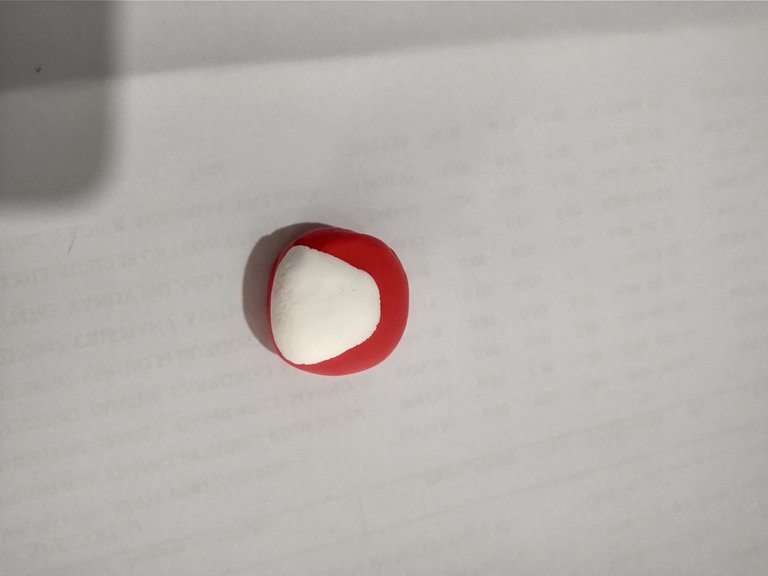
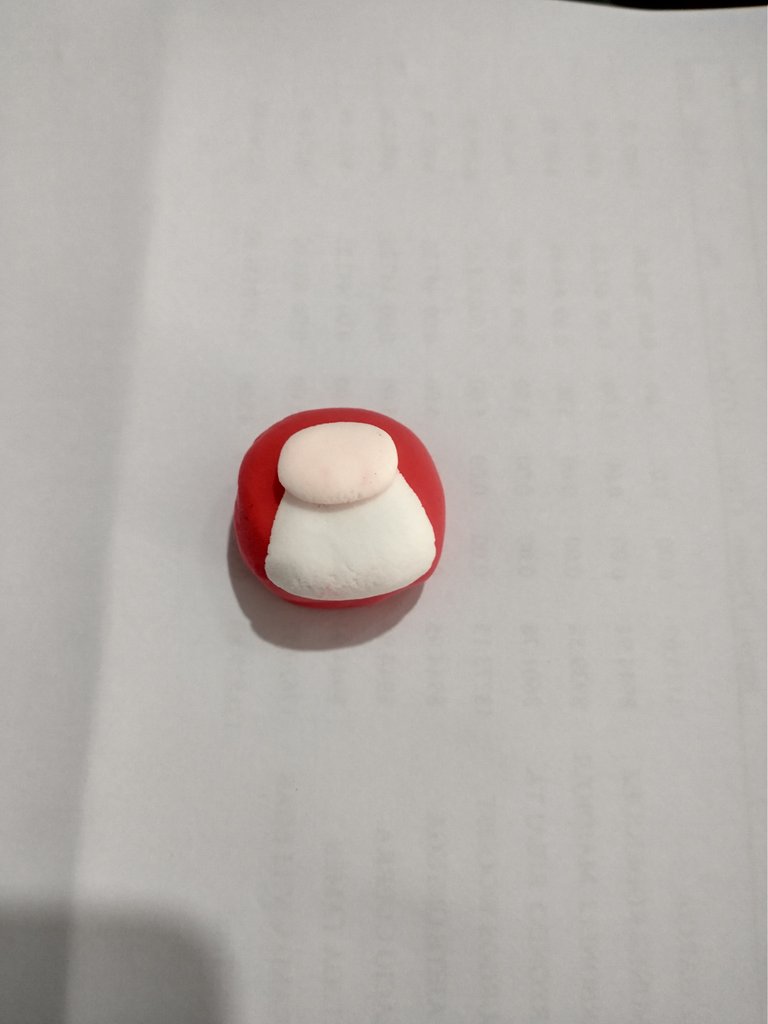
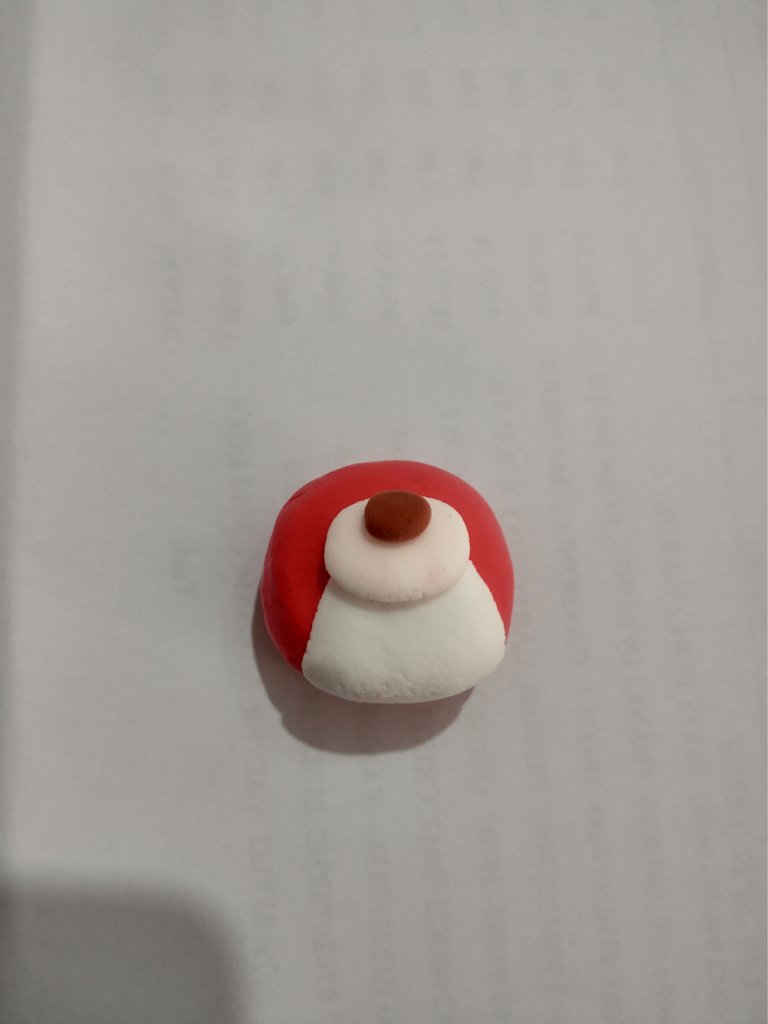
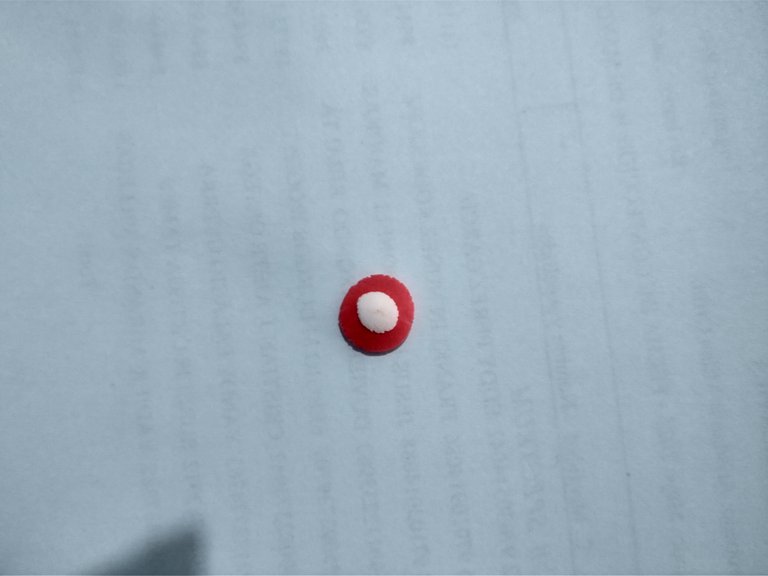
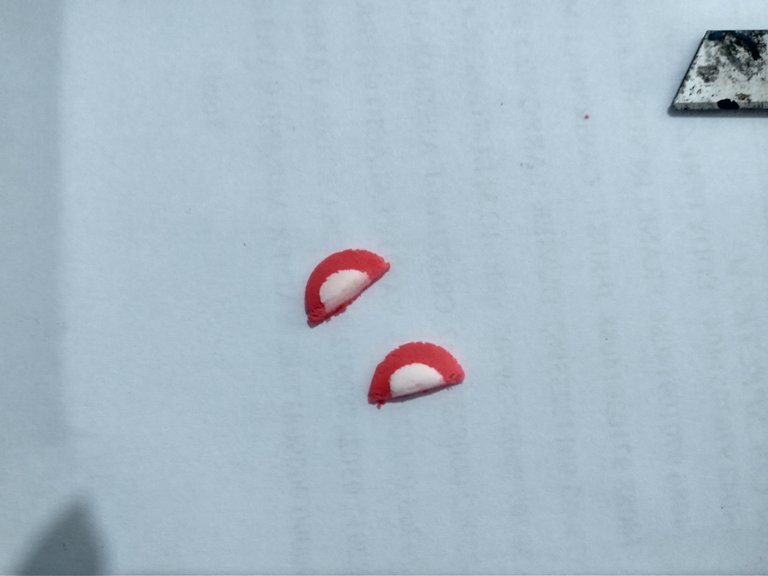
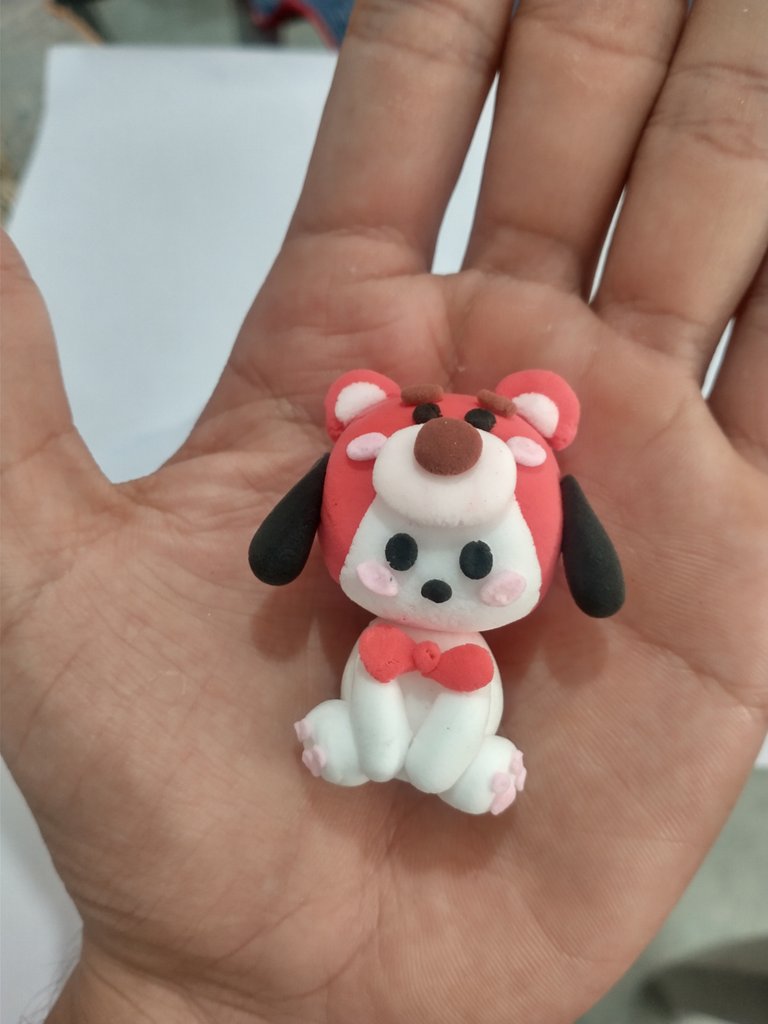
Para crear la cabeza de nuestro perrito con gorro, seguiremos estos pasos. Empezaremos modelando la cabeza con una esfera de color rojo. Sobre esta, colocaremos una zona plana de color blanco que servirá como el rostro del perro. Para el hocico, usaremos una pieza ovalada de color beige, ubicándola justo donde termina la parte blanca y comienza la roja. Encima de este, añadiremos un pequeño óvalo marrón para la nariz. Los ojos se formarán con dos círculos negros, y sobre ellos colocaremos dos pequeñas cejas curvas de color marrón. Para darle un toque tierno, en los laterales del hocico pegaremos dos óvalos rosas que simularán el sonrojo de las mejillas. Finalmente, haremos las orejas del gorro, primero modelaremos un círculo rojo y, sobre este, otro más pequeño en beige. Con ayuda de una herramienta afilada, cortaremos cada oreja por la mitad para darles su forma característica. Con esto tendremos concluido el gorro de nuestra figura.
To create our little dog’s head with a hat, we’ll follow these steps. We’ll start by shaping the head using a red sphere. On top of this, we’ll place a flat white area to serve as the dog’s face. For the snout, we’ll use an oval-shaped beige piece, positioning it right where the white section ends and the red begins. On top of this, we’ll add a small brown oval for the nose. The eyes will be made with two black circles, and above them, we’ll place two small curved brown eyebrows. To add a cute touch, we’ll attach two pink ovals on the sides of the snout to mimic blushing cheeks. Finally, we’ll make the hat’s ears: first, we’ll shape a red circle and, on top of it, a smaller beige one. Using a sharp tool, we’ll cut each ear in half to give them their distinctive shape. With this, our figure’s hat will be complete.

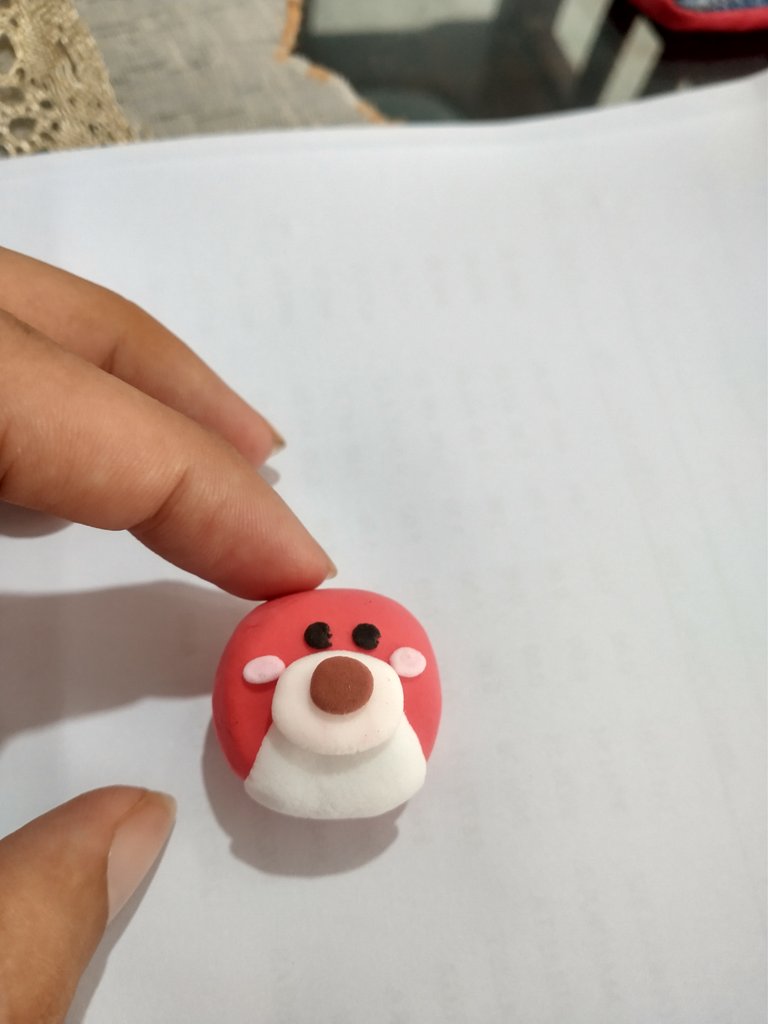

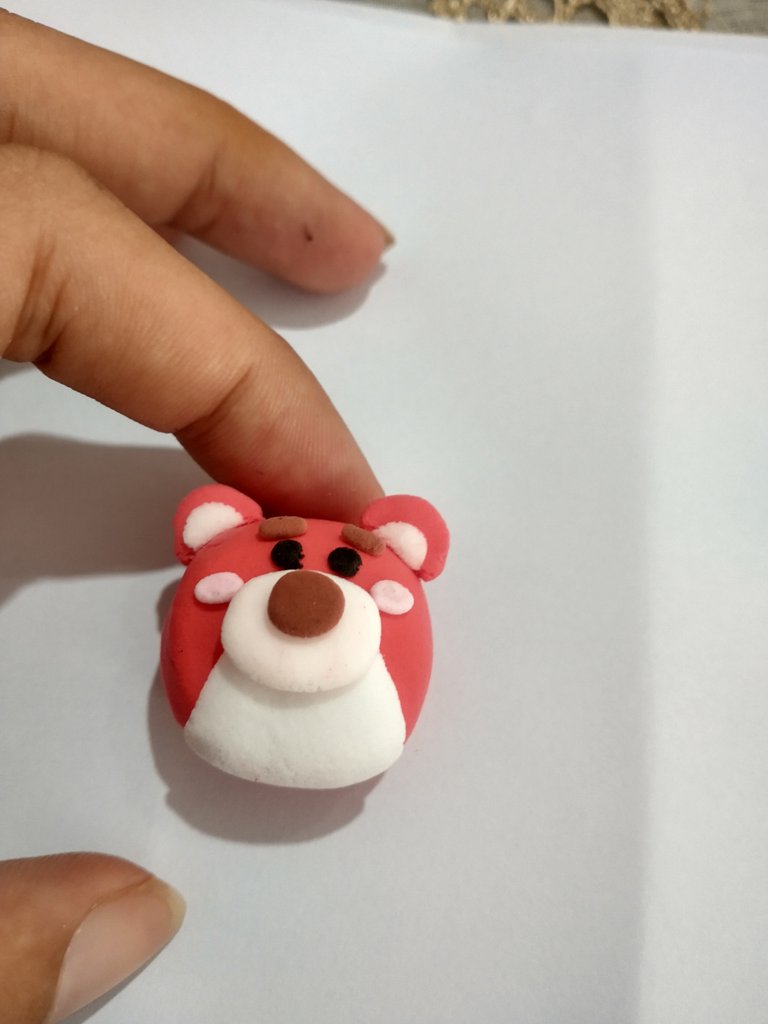
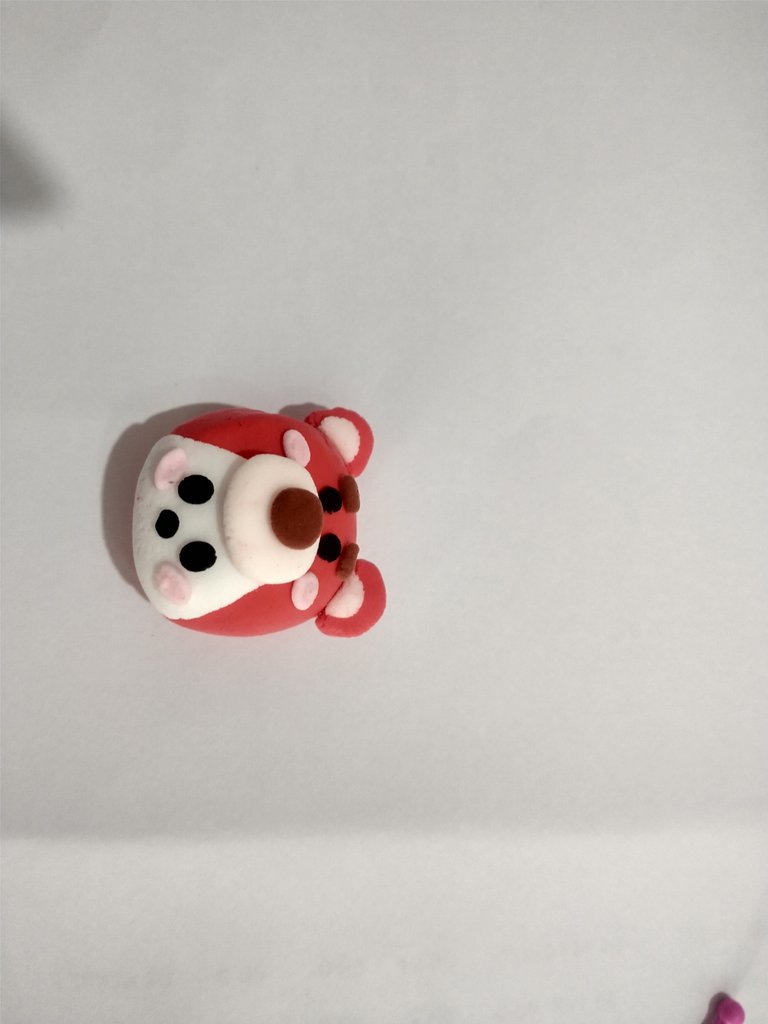
Para finalizar la cabeza del perrito, trabajaremos los detalles del rostro. Comenzaremos colocando dos círculos negros como ojos. Justo debajo, añadiremos un pequeño óvalo negro para formar la nariz. Para darle un toque de ternura, colocaremos dos óvalos rosados a los lados simulando el sonrojo de las mejillas. Finalmente, crearemos las orejas moldeando dos piezas negras en forma de lágrima, que colocaremos a ambos lados de la cabeza, cerca de la altura donde termina el hocico del gorro. Con estos últimos detalles, habremos completado el encantador rostro de nuestro perrito.
To finish the puppy's head, we'll work on the facial details. We'll start by placing two black circles for the eyes. Just below them, we'll add a small black oval to form the nose. To give it a cute touch, we'll place two pink ovals on the sides to create blushing cheeks. Finally, we'll shape the ears by molding two teardrop-shaped black pieces, which we'll position on either side of the head near where the hat's snout ends. With these final touches, we'll have completed our puppy's adorable face


Step / Paso 2
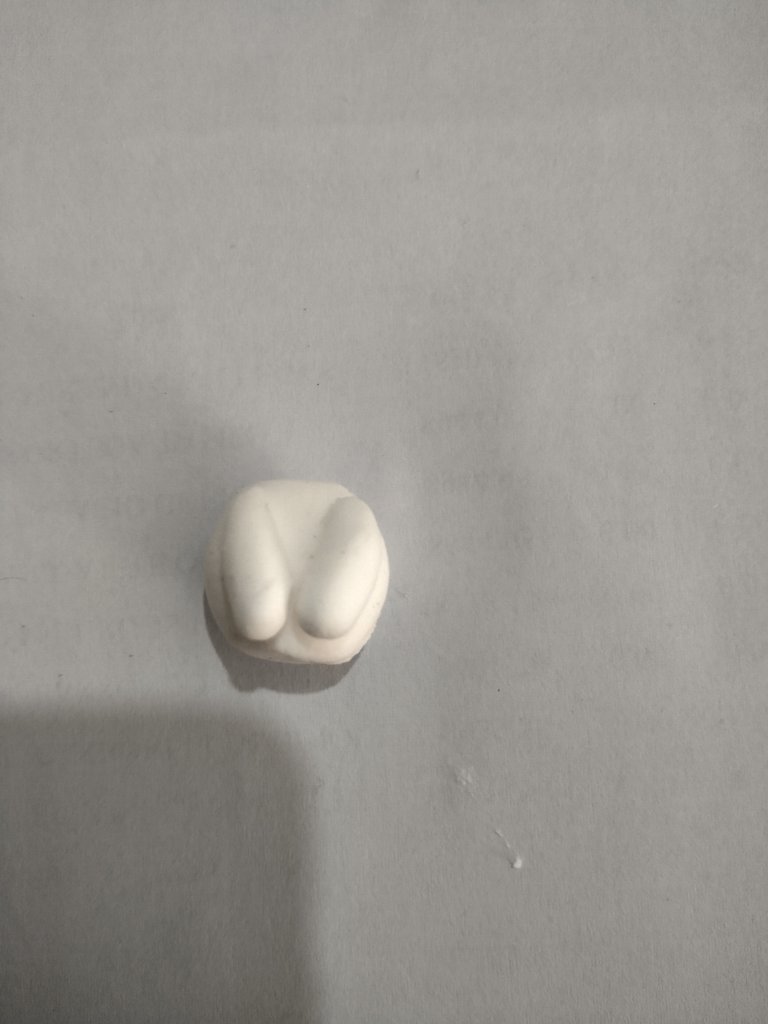
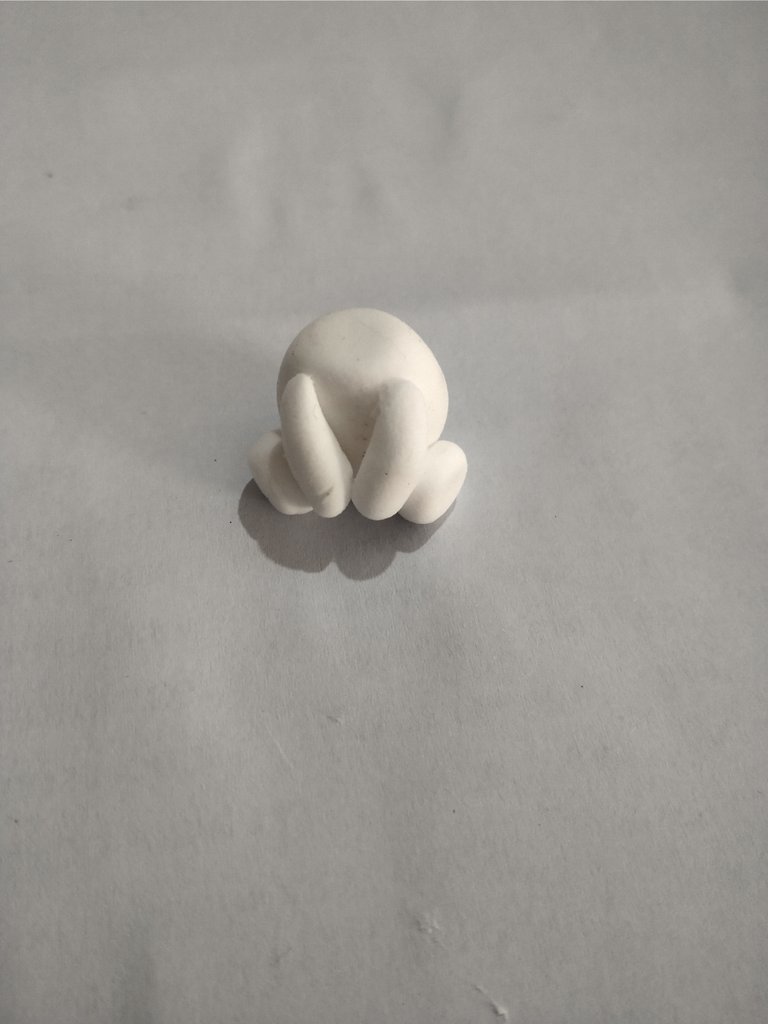
En la segunda fase pasaremos a la creación del cuerpo del perrito. Comenzaremos moldeando el torso como base principal. Para los brazos, daremos forma de lágrima a dos piezas y las colocaremos a los costados frontales del torso. Las patitas se formarán con dos círculos que ubicaremos en la parte inferior lateral del cuerpo. Para los detalles finales en cada patita colocaremos un círculo rosa claro en el centro, con tres círculos más pequeños distribuidos arriba. Usaremos material rojo para crear el lazo, haz dos triángulos y coloca entre ellos un pequeño círculo, luego fíjalo en la parte superior frontal del torso. Con estos elementos, habremos completado el cuerpo de nuestro perrito.
In the second phase, we will move on to creating the body of the puppy. We will start by shaping the torso as the main base. For the arms, we will mold two teardrop-shaped pieces and place them on the front sides of the torso. The legs will be formed with two circles, which we will position on the lower lateral part of the body. For the final details on each leg, we will place a light pink circle in the center, with three smaller circles distributed above it. We will use red material to create the bow—make two triangles and place a small circle between them, then attach it to the upper front part of the torso. With these elements, we will have completed the body of our puppy.
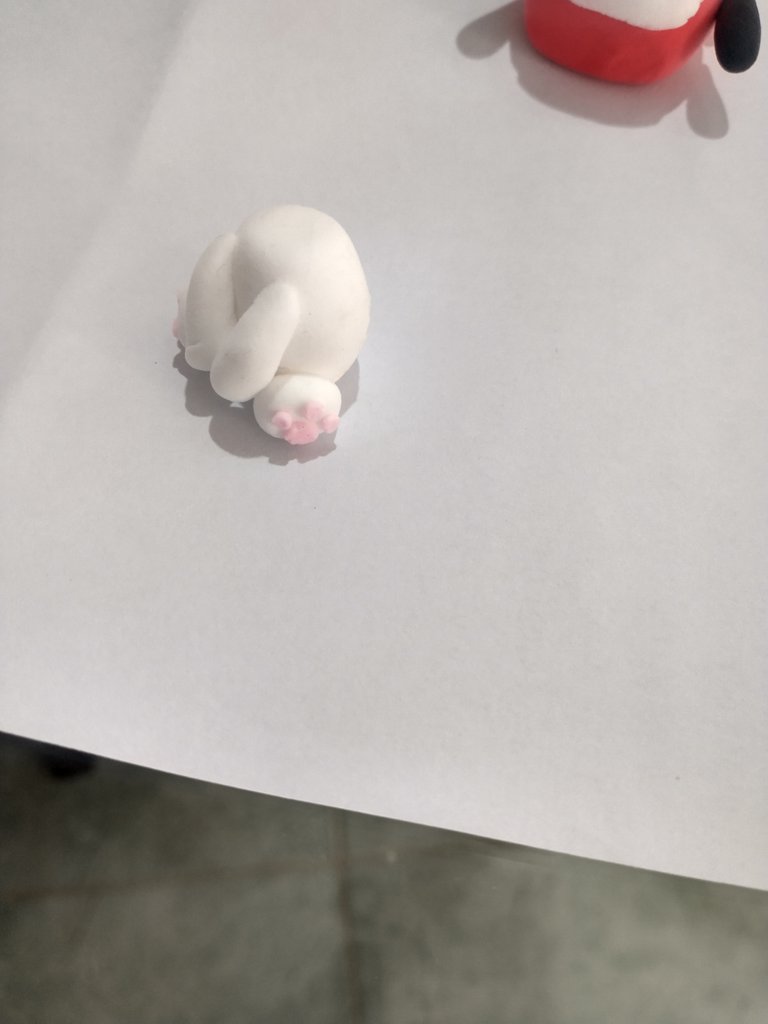
Resultado / Result

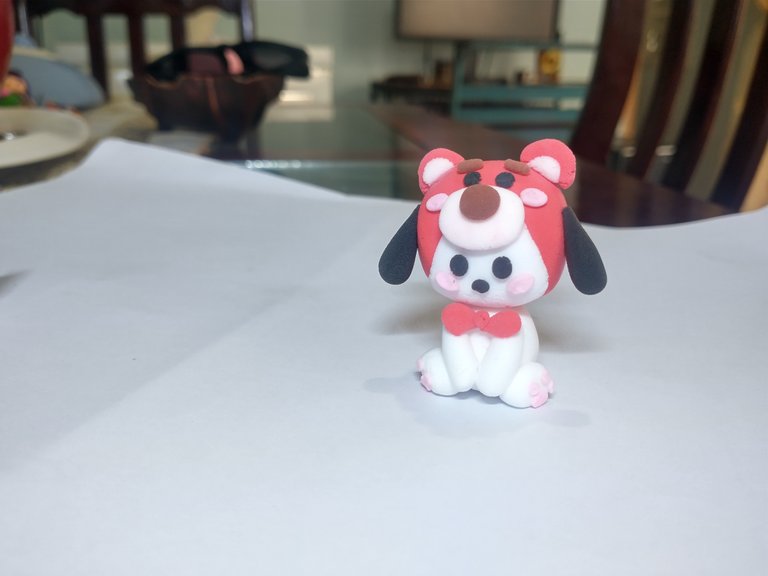
El diseño del personaje, así como la realización y fotografía del proceso, fueron obra mía.
The character design, as well as the production and process photography, were my work.
Si te ha gustado el post, no olvides dejar tu comentario y seguirme para próximas publicaciones. Me encantaría saber tu opinión e ideas para el siguiente. Saludos 😊
If you liked the post, don't forget to leave a comment and follow me for future posts. I'd love to know your opinion and ideas for the next one. Regards
Congratulations @csrlos85! You have completed the following achievement on the Hive blockchain And have been rewarded with New badge(s)
Your next target is to reach 2750 upvotes.
You can view your badges on your board and compare yourself to others in the Ranking
If you no longer want to receive notifications, reply to this comment with the word
STOPCheck out our last posts:
This is adorable. Your puppy was sculpted into perfection and we love it. Achieving this was no easy feat, well done, and thanks for sharing.
selected by @ibbtammy
Thank you so much for your kind words! I’m really happy you love it, it means a lot. Your encouragement makes all the effort worthwhile. Thanks again😁
¡Enhorabuena!
✅ Has hecho un buen trabajo, por lo cual tu publicación ha sido valorada y ha recibido el apoyo de parte de CHESS BROTHERS ♔ 💪
♟ Te invitamos a usar nuestra etiqueta #chessbrothers y a que aprendas más sobre nosotros.
♟♟ También puedes contactarnos en nuestro servidor de Discord y promocionar allí tus publicaciones.
♟♟♟ Considera unirte a nuestro trail de curación para que trabajemos en equipo y recibas recompensas automáticamente.
♞♟ Echa un vistazo a nuestra cuenta @chessbrotherspro para que te informes sobre el proceso de curación llevado a diario por nuestro equipo.
🏅 Si quieres obtener ganancias con tu delegacion de HP y apoyar a nuestro proyecto, te invitamos a unirte al plan Master Investor. Aquí puedes aprender cómo hacerlo.
Cordialmente
El equipo de CHESS BROTHERS