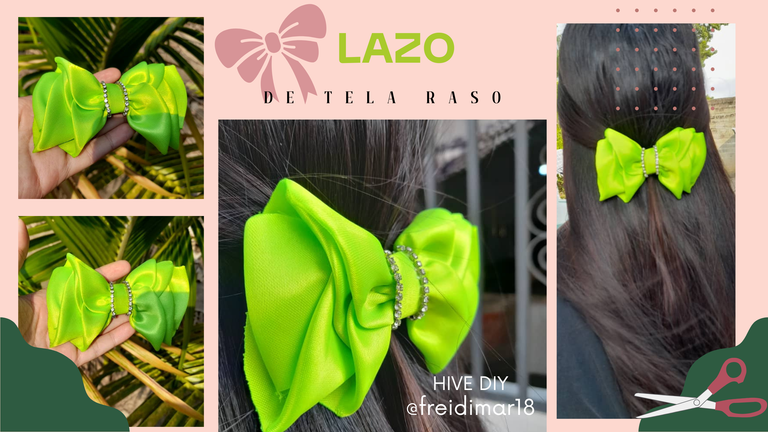
Learn how to make a nice fabric bow - Step by step | Aprende hacer un lindo lazo con tela - Paso a paso [ENG-ESP]
Hello to all the creative hivers of this beautiful community! This craft that I am going to share with you next, I must express that I loved to carry it out, I enjoyed every process and detail. Now, who has had to spend up to 2$ to give a nice bow for the niece, sister? without a doubt, most of them. So, today I am going to show you how to do it in an easy and simple way, you will only need scraps of fabric or ribbon that you haven't used yet or maybe you don't even know what use to give it, here I share this incredible craft. By the way, before I start I must point out that it was an idea that I took from the youtube platform, at the end I will leave the video of the person who guided me to carry out this ingenious bow. Without further ado, I invite you to continue watching the post and you can do it. You will see that, once you do it, you will want to make a few more.
¡Hola a todas los hivers creativos de esta hermosa comunidad! Esta manualidad que a continuación voy a compartir con ustedes, debo expresar que me encantó llevarla a cabo, disfruté cada proceso y detalle. Ahora bien, ¿Quiénes han tenido que gastar hasta 2$ para dar un lindo lazo para la sobrina, hermana? sin duda, la mayoría. Así que, hoy te voy a enseñar como llevarlo a cabo de manera fácil y sencilla, solo necesitarás retazos de tela o cinta que aún no hayas usado o quizás no sabes ni que uso darle, aquí comparto esta increíble manualidad. Por cierto, antes de comenzar debo indicar, que la misma fue una idea que tomé de la plataforma de youtube, al final les voy a dejar el video de la persona que me guio para llevar a cabo este ingenioso lazo. Sin más que acotar, te invito a que continúes viendo el post y puedas realizarlo. Ya verás que, una vez que lo haces, quieres hacer unas cuantas más.
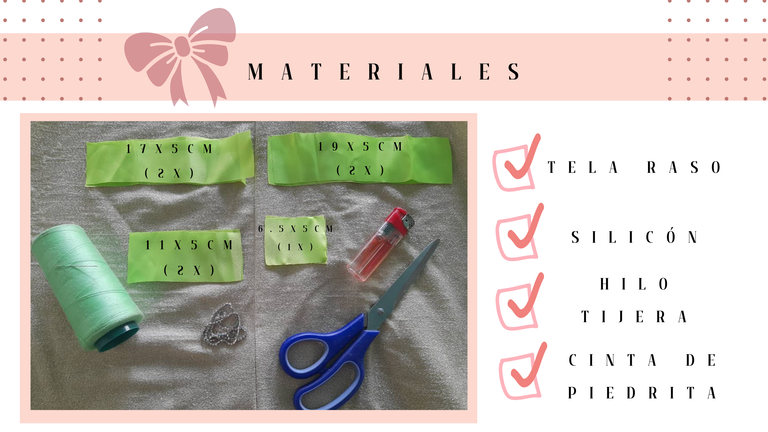
Materials to be used:
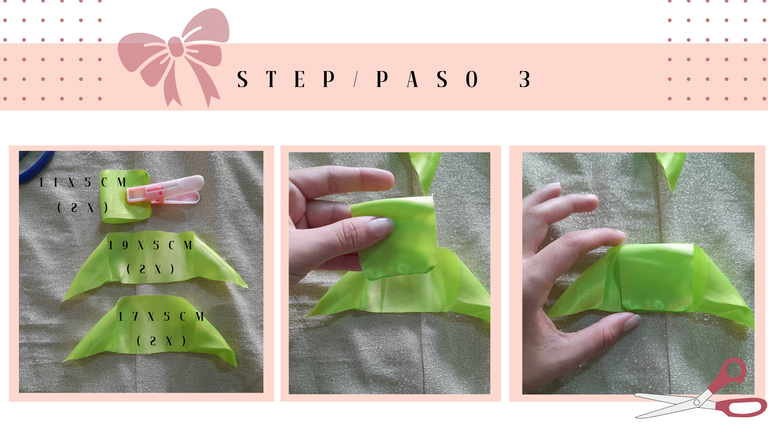
| - Recyclable satin fabric (three sizes: 17x5 cm (2x), 19x5 cm (2x),11x5 cm (2x) and 6.5x5 cm (1x)) | -Tela raso reciclable (tres medidas: 17x5 cm (2x), 19x5 cm (2x),11x5 cm (2x) y 6.5x5 cm (1x) | |
|---|---|---|
| -Yarn color of the fabric | -Hilo del color de la tela | |
| -Needle | -Aguja | |
| -Scissors | -Tijera | |
| -Fancy pebble ribbon | -Cinta de piedrita fantasía | |
| -Lighter | -Encendedor | |
| -Silicone | -Silicón |

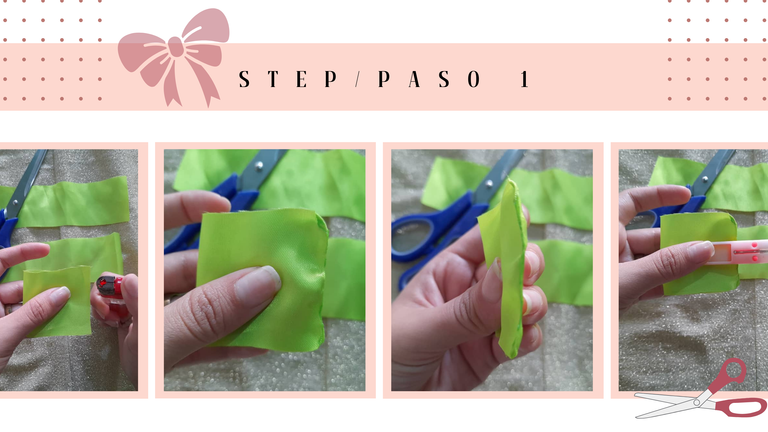
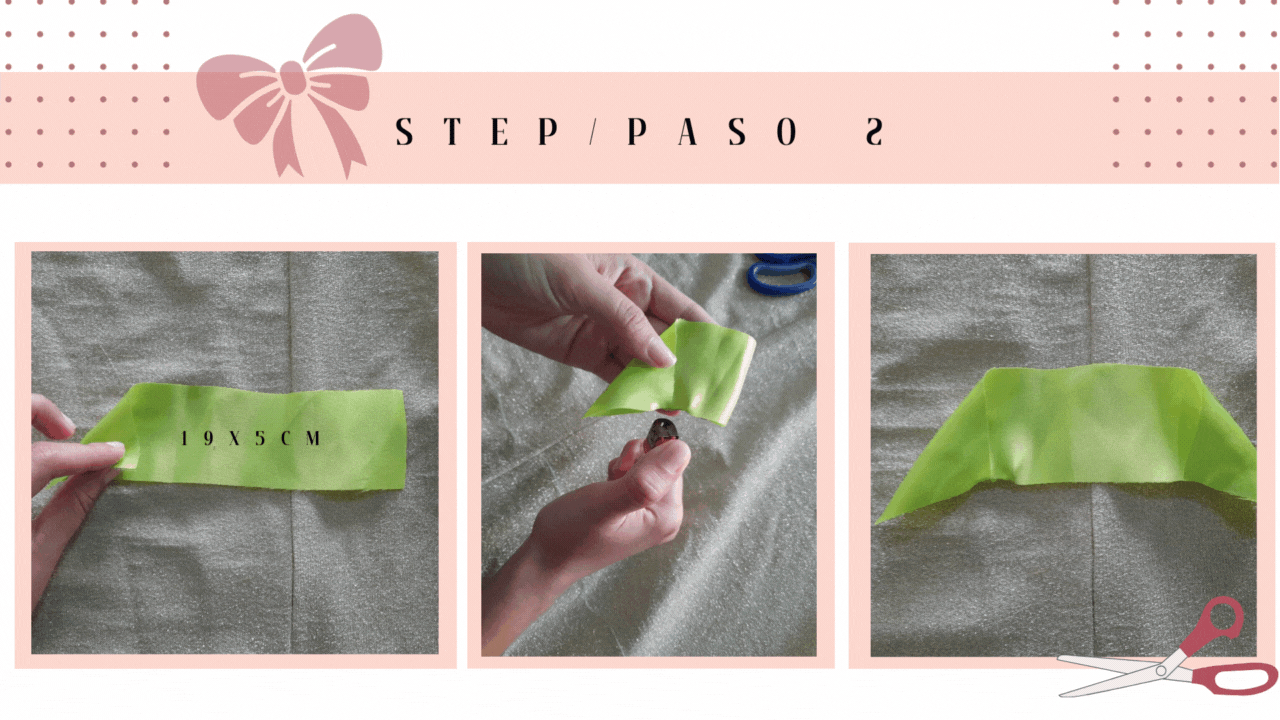
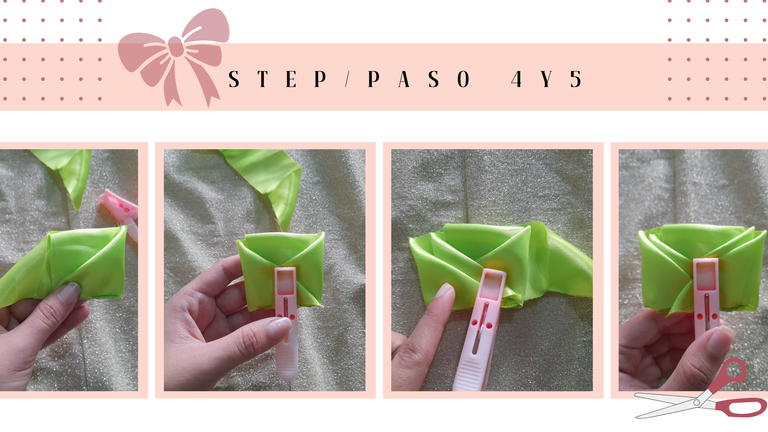
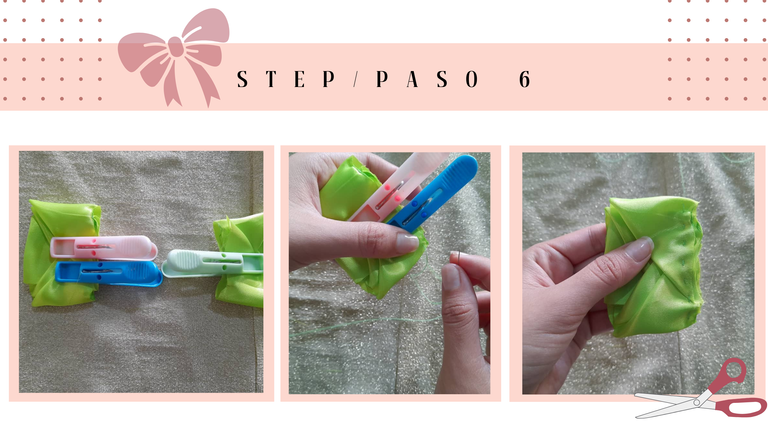
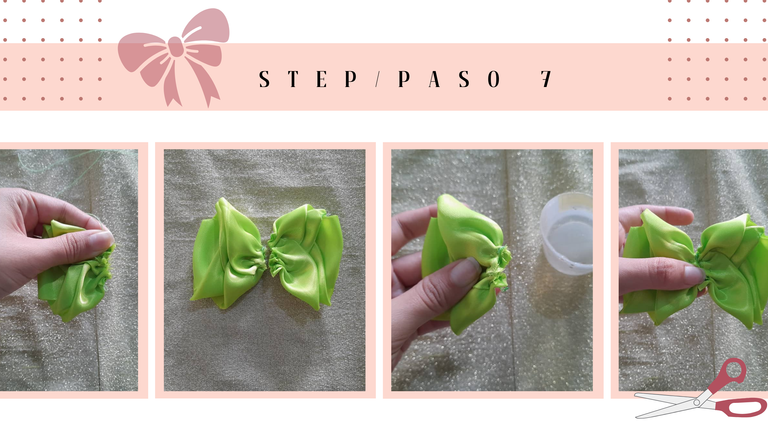
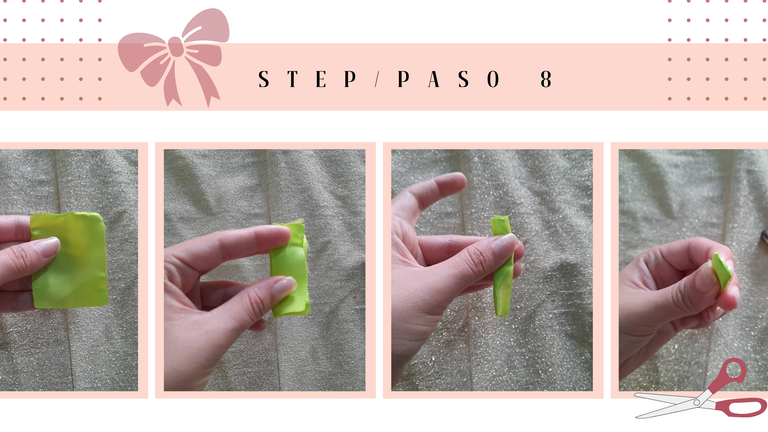
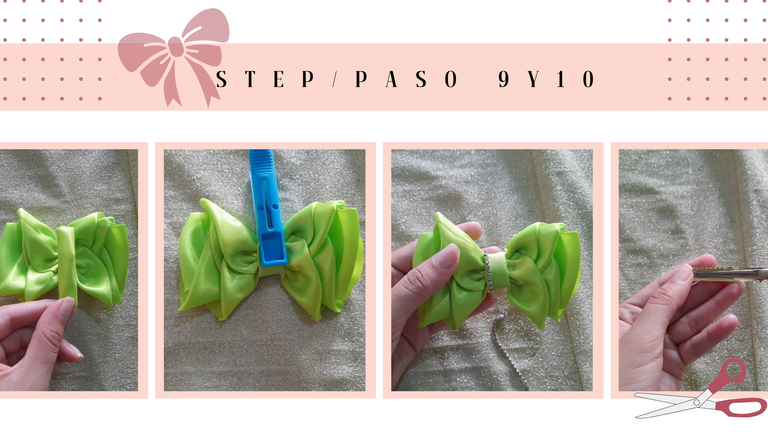
Step by step
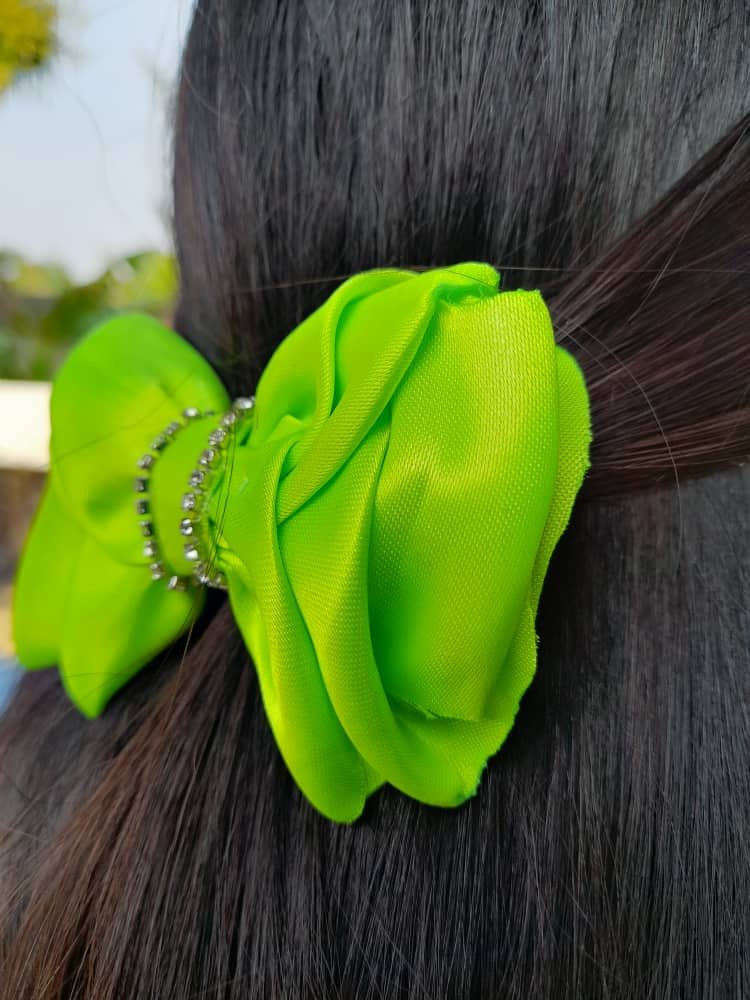
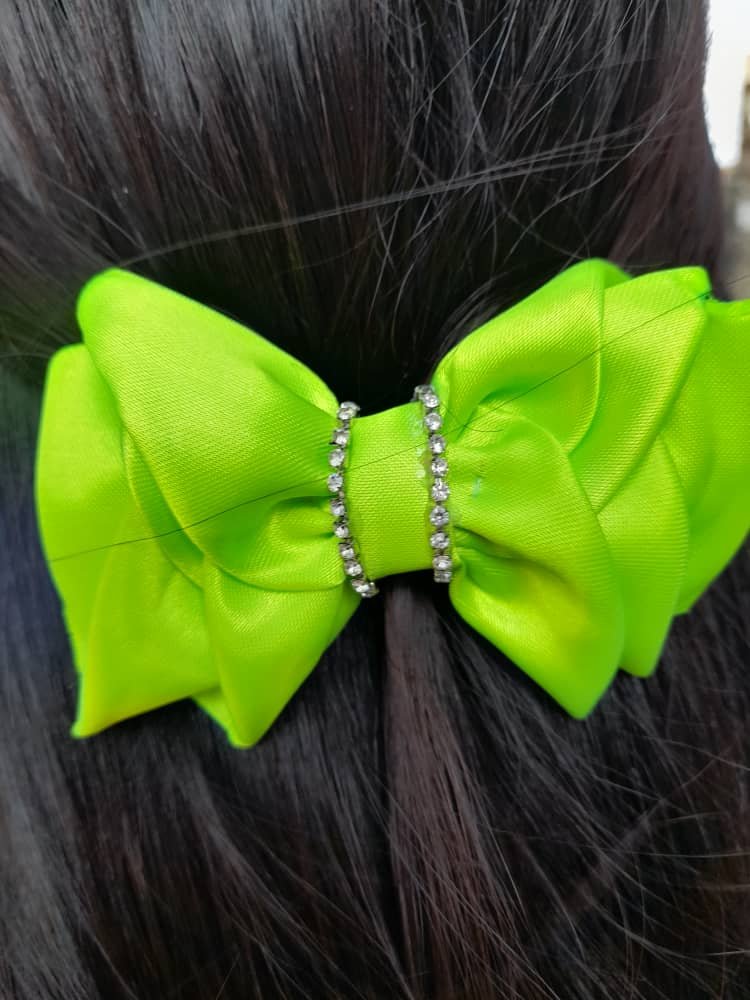
Final result! | ¡Resultado final!

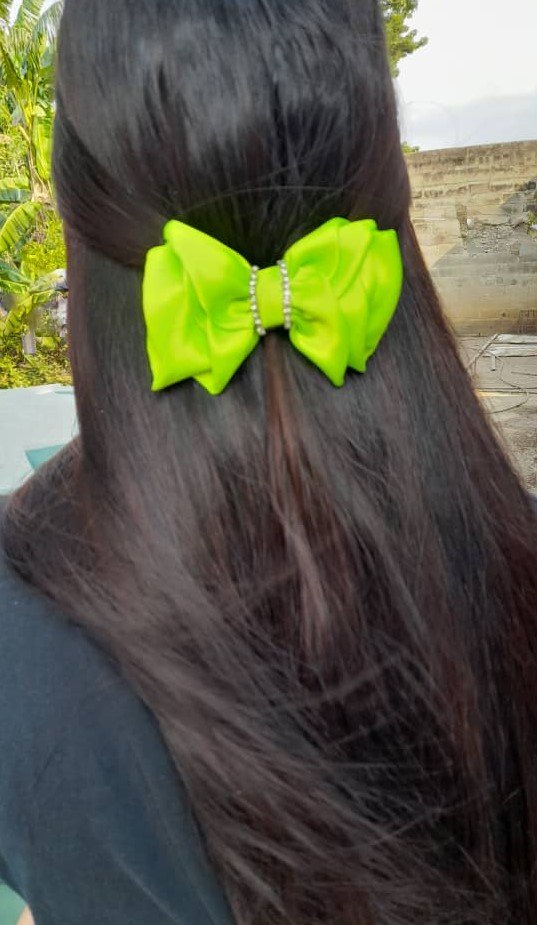

Qué belleza!, me encanta mucho cómo combinan de bonito el color de la tela y los brillitos. Saludos💗
Muchas gracias, gracias por dejar tu comentario. Me alegra mucho que te haya gustado❤️
The bow is beautiful. Saves one cost too.
Bravo.
Thank you, that's right, an easy way to save money. Best regards.
Es un hermoso lazo, algo diferente para emprender nuevas ideas creativas, muchas felicidades se ve genial y el color es hermoso. 💜
Muchas gracias, valoro muchísimo tu comentario. Es un honor dejar buenos contenidos en la comunidad, saludos.
¡Enhorabuena!
✅ Has hecho un buen trabajo, por lo cual tu publicación ha sido valorada y ha recibido el apoyo de parte de CHESS BROTHERS ♔ 💪
♟ Te invitamos a usar nuestra etiqueta #chessbrothers y a que aprendas más sobre nosotros.
♟♟ También puedes contactarnos en nuestro servidor de Discord y promocionar allí tus publicaciones.
♟♟♟ Considera unirte a nuestro trail de curación para que trabajemos en equipo y recibas recompensas automáticamente.
♞♟ Echa un vistazo a nuestra cuenta @chessbrotherspro para que te informes sobre el proceso de curación llevado a diario por nuestro equipo.
🏅 Si quieres obtener ganancias con tu delegacion de HP y apoyar a nuestro proyecto, te invitamos a unirte al plan Master Investor. Aquí puedes aprender cómo hacerlo.
Cordialmente
El equipo de CHESS BROTHERS
¡¡¡Buen trabajo!!! Gracias por publicar tu excelente contenido en Hive Diy, pero qué lazos tan hermosos y llamativos, el verde atrae a la suerte, me quiero hacer unos así, son muy hermosos.
Tu comunidad artesana ahora es testigo
