Building an ODR (Outdoor Ice Rink)
Last winter my son started to learn ice skating. On Sundays at 10am the local ice skating arena is open for beginners and they supply these chair like helper things the kids can push to have something to hold on to. He liked it so much, for this season we bought our own skates to save the 4€ rental fee each week.

Sadly we can only go on ice once per week for two hours because all the other opening times is for more advanced skaters. I think he would make much better progress if he went daily even if it's only for 30 minutes. My son agreed with this and suggested we build our own ice skating rink.
I did some research (yep, google) and found out that there are a lot of people building their own "Outdoor Rink" or ODR for short. After reading a lot and seeing many pictures I decided to try to copy them. The costs are roughly what we will save this season on rental fees and the material is supposed to be reusable. So basically a one time investment and then I can build an ODR each winter.
This winter is said to get very cold compared to the last few years. And it's starting soon. Even now. Well, tonight. The current forecast is -7°C, that is roughly 19 or 20F. So we had to hurry. Off to the hardware store we went and put it all together.
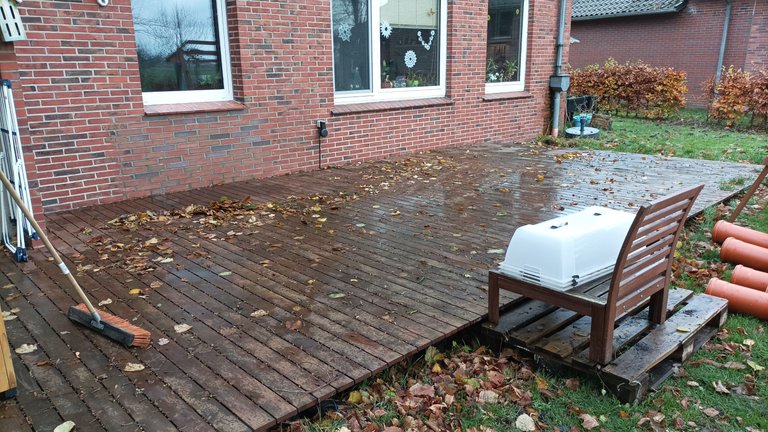
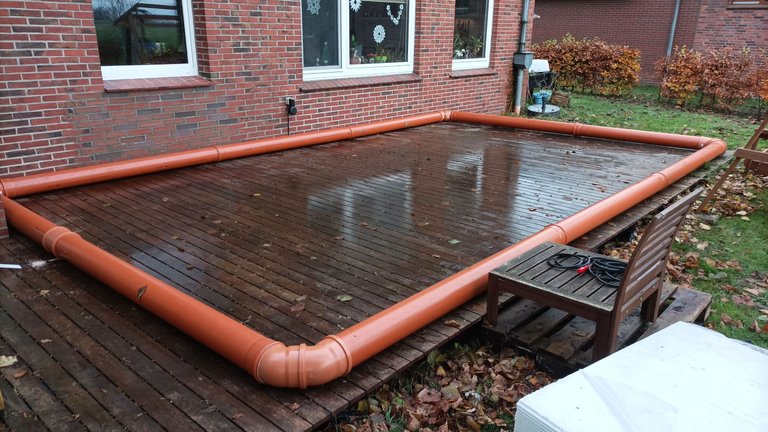
We removed all the stuff on our backdoor terrace. Picking up a broom and cleaning it up. Then I bought some sewer pipes, about 16cm in diameter (little bit more than 6 inch). That will be the edge.
Using the terrace was the best option since we do not have any level area big enough on the gras. Even though the terrace is not exactly level as well, it's as close as we can get.
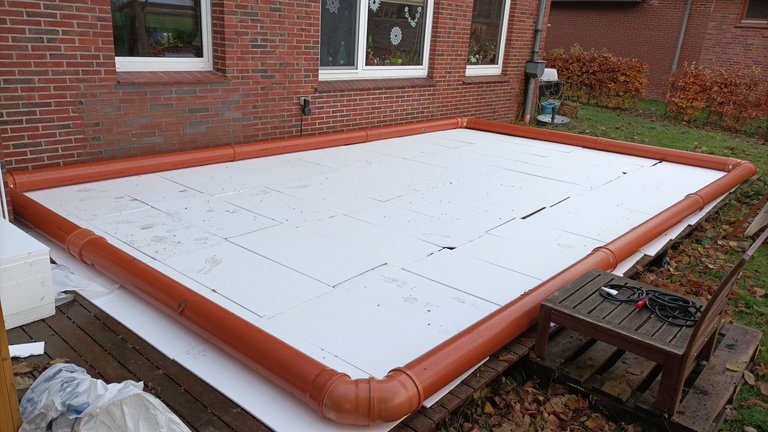
For additional protection of the ice we put some isolation boards down. By putting additional boards at the lowest points we also tried to get the area a little more into level.
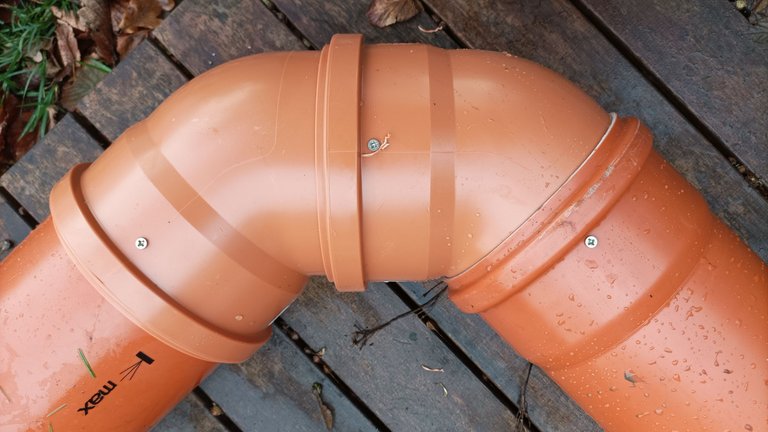
The pipes come with sealing rings. Since we do not plan to put water into the pipes but use them as a border, we removed the sealing rings. That way they are very easy to put together. On the other hand it would allow the weight of the water to push them apart again. To fix them into place we put screws where they join.
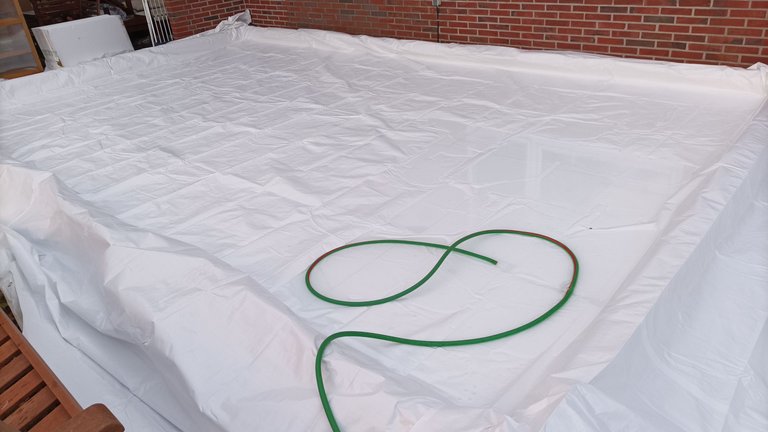
The tarpaulin does not have to be very thick but water proof. And it should be white. Most people using black or other colors reported they lost the ice much earlier than others. The sun will heat it up pretty fast.
Now all that is left to do is fill it up with water and wait for the cold weather to do its thing. we need 5 to 6 cm at the thinnest point, that's 2 inches or a little bit more.
At this very moment the water is in but it is too dark to take any picture. Over the next few days it should all turn to ice.
I will keep you up to date and hopefully will have some pictures of us skating, soon.
All pictures taken by me. Slothbuzz logo in divider free usage from slothbuzz community discord
That's pretty cool. I have some friends at work that build a rink each year for their kids to do their hockey practice on. When I was a kid we had a big backyard that would always flood. We would often go ice skating back there if we got enough rain in the fall.
Oh, how I envy you for that :-)
Hopefully I can give my son a similar experience :-)
Kann man mal machen. Hat nicht jeder. 😁
!BBH !WITZ !SLOTH
@hannes-stoffel! Your Content Is Awesome so I just sent 1 $BBH (Bitcoin Backed Hive) to your account on behalf of @dotwin1981. (21/50)
lolztoken.com
den Flächeninhalt eines Kreises genau zu berechnen? - Weil sie Piraten.
Credit: lammbock
@hannes-stoffel, ich habe dir im Namen von @dotwin1981 einen $LOLZ Token gesendet
Verwende den Befehl !WITZ oder !LOOL, um einen Witz und ein $LOLZ zu teilen.
NEW: Join LOLZ's Daily Earn and Burn Contest and win $LOLZ
.(6/10)
Learn more about the SLOTHBUZZ Token at Sloth.Buzz and consider sharing your post there or using the #slothbuzz next time
(1/3)
Congratulations @hannes-stoffel! You have completed the following achievement on the Hive blockchain And have been rewarded with New badge(s)
Your next target is to reach 4250 replies.
You can view your badges on your board and compare yourself to others in the Ranking
If you no longer want to receive notifications, reply to this comment with the word
STOPCheck out our last posts:
Congratulations @hannes-stoffel! You received a personal badge!
Wait until the end of Power Up Day to find out the size of your Power-Bee.
May the Hive Power be with you!
You can view your badges on your board and compare yourself to others in the Ranking
Check out our last posts:
How cold is your weather? We are -1 at night and +2 in the day, unusually cold.
I love all your "inventions" your son is going to love it!
Thanks, much appreciated.
At the moment we have between -3 and -5 at night and around -1 during the day.
Got around 4cm of ice already, if this keeps up we can use it on tuesday I hope.
Congratulations @hannes-stoffel! You received a personal badge!
Participate in the next Power Up Day and try to power-up more HIVE to get a bigger Power-Bee.
May the Hive Power be with you!
You can view your badges on your board and compare yourself to others in the Ranking
Check out our last posts: