(ESP/ENG) Conejita a Crochet Vintage || Vintage Crochet Bunny |
¡Hola a todos! 👋
Hoy quiero compartirles mi último proyecto, el cual terminé hace unos días. Ha sido un proyecto especial para mí, ya que lo empecé hace algunas semanas, aunque hubo momentos en los que tuve que dejarlo de lado por algunas circunstancias. Recientemente, he estado preocupada y triste debido a que mi gatito está enfermo. El es mi viejito de casi 14 años, y verlo enfermito ha sido bastante doloroso para mí. A pesar de todo, he encontrado en el tejido una forma de distraerme un poco, aunque sinceramente, la mayor parte del día estoy pendiente de el porque lo quiero muchísimo.
Adoro a los animales, y obviamente a mi gatito mucho más. Saben disfruto mucho haciendo amigurumis tiernos; para mí, representan todo lo hermoso que los animales traen a nuestras vidas. En esta ocasión, he creado una conejita vintage con diferentes accesorios.
A continuación, les compartiré cómo la hice, eso sí les digo que es un proyecto detallado y bastante largo...
Hello everyone! 👋
Today, I want to share my latest project, which I finished a few days ago. This has been a special project for me since I started it a few weeks ago, though there were moments when I had to set it aside due to certain circumstances. Recently, I’ve been feeling worried and sad because my little cat is sick. He is my old boy, almost 14 years old, and seeing him unwell has been very painful for me. Despite everything, I’ve tried to distract myself with crocheting, although, to be honest, I spend most of my time taking care of him because I love him so much.
I adore animals, and of course, I love my cat even more. I really enjoy making cute amigurumis; to me, they represent all the beauty that animals bring into our lives. This time, I created a vintage-style bunny with different accessories.
Next, I'll share with you how I made it. I must say that it's a detailed and rather lengthy project...
Materiales / Materials
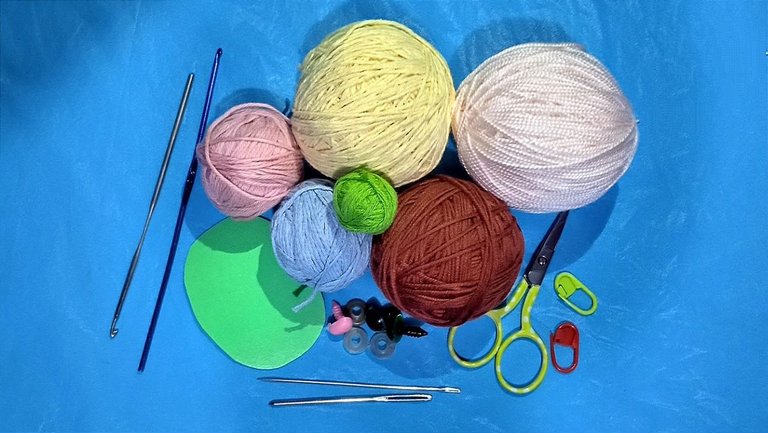
- Hilos de algodón (pueden ser de cualquier color).
- 2 crochet o ganchillo (en mi caso, usé de 3 y de 2.5 mm).
- Tijeras.
- Aguja para Soft (larga y con punta, ideal para detalles).
- Aguja lanera
- Algodón sintético para el relleno.
- Ojos de seguridad.
- Nariz de seguridad
- Cinta
- Marcadores
- plástico o cartón para base de zapatos
- Cotton yarn (can be any color).
- 2 crochet hooks (I used 3 mm and 2.5 mm).
- Scissors.
- Soft needle (long and pointed, ideal for details).
- Tapestry needle.
- Synthetic cotton for stuffing.
- Safety eyes.
- Safety nose.
- Ribbon.
- Stitch markers.
- Plastic or cardboard for the shoe base.
Elaboración / Elaboration
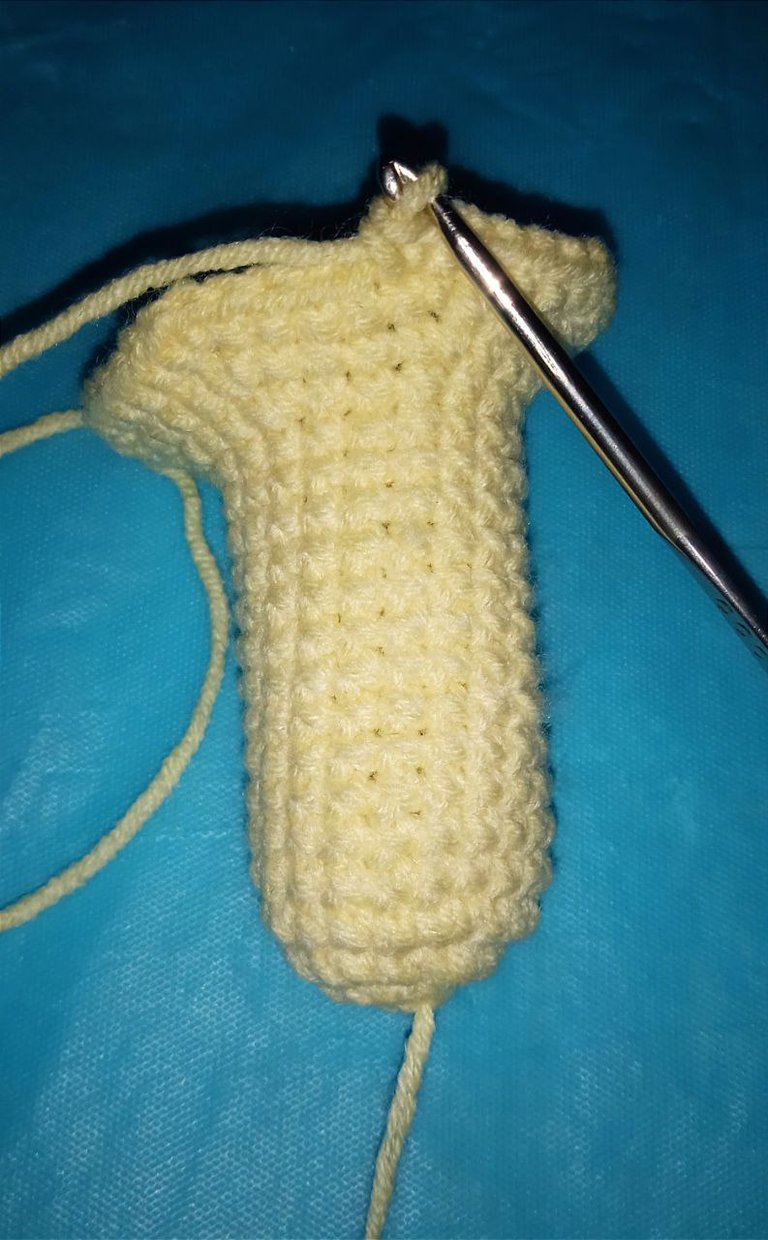
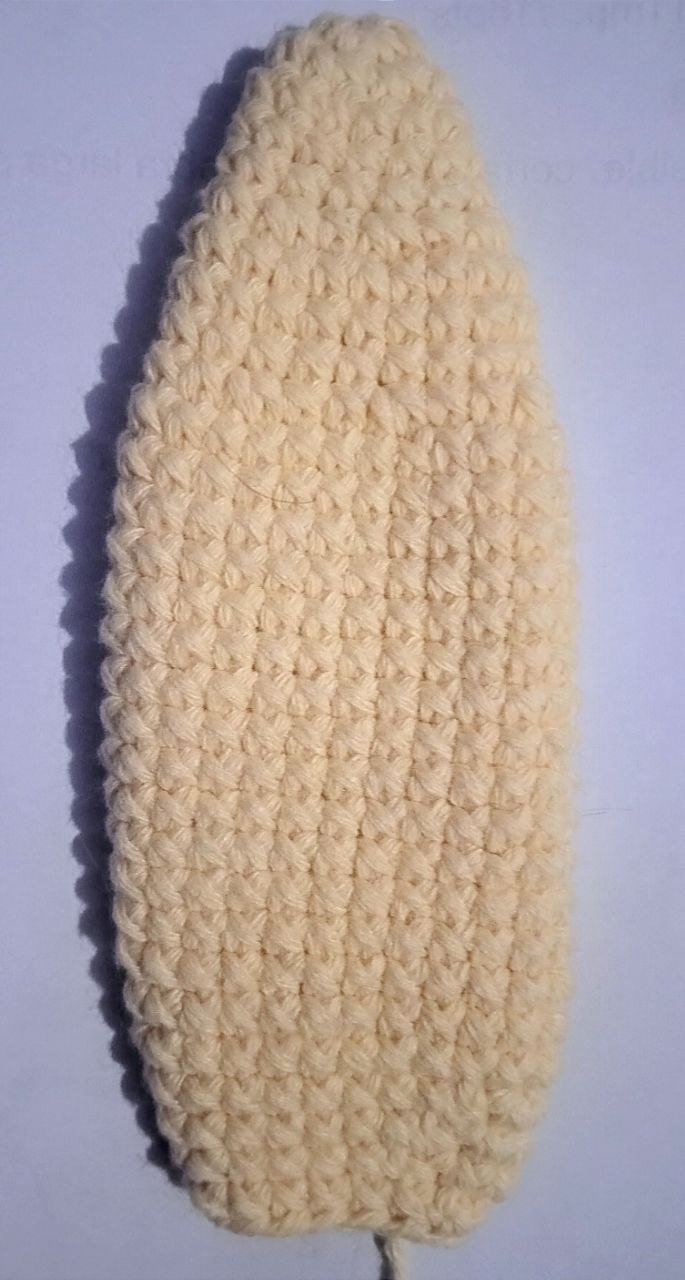
Cuerpo / Body

|
|
|

|
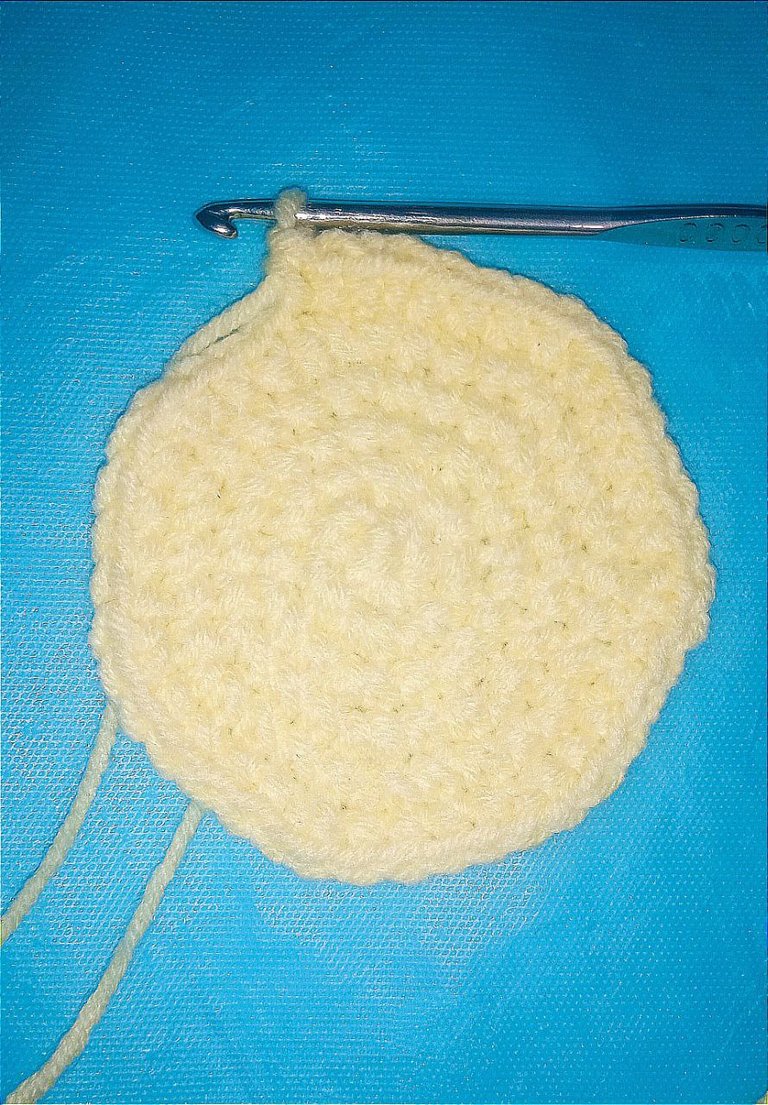
Fui tejiendo en espiral con el color amarillo lo siguiente:
Comencé con un anillo mágico de seis puntos bajos.
Luego, tejí seis aumentos.
Desde la vuelta 4 a la 14, tejí solo puntos bajos.
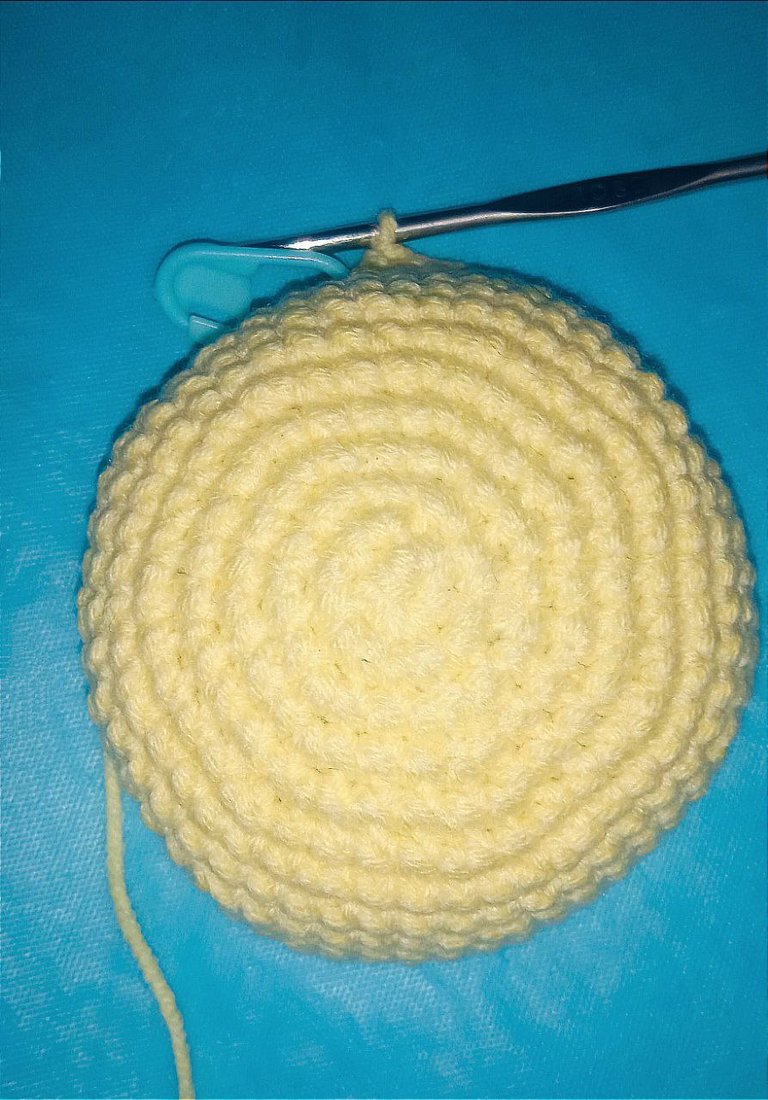
Continué con la siguiente secuencia:
- Un punto bajo, un aumento (lo repetí siete veces).
- Después, tejí tres puntos bajos, un aumento (lo repetí seis veces).
- Luego, hice cuatro puntos bajos, un aumento (lo repetí seis veces).
Para la siguiente vuelta:
- Tejí diez puntos bajos, un aumento, luego veinte puntos bajos, un aumento, y terminé con diez puntos bajos.
En la siguiente vuelta:
- Hice cinco puntos bajos, un aumento, repitiendo esta secuencia siete veces. Después continué con solo puntos bajos durante diez vueltas.
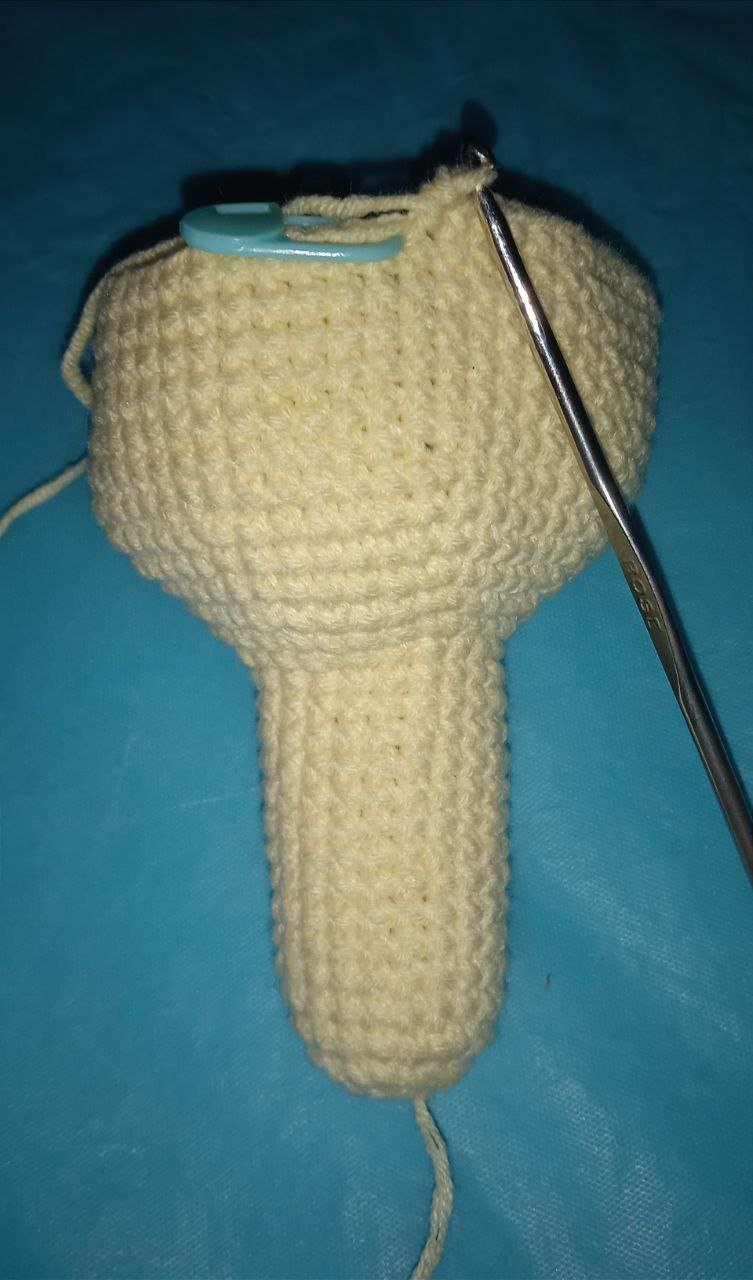
Luego cambié al color celeste y tejí solo puntos deslizados por toda la vuelta, usando la hebra trasera.
Después, tejí ocho vueltas de solo puntos bajos.
En la siguiente vuelta, tejí:
- Seis puntos bajos, una disminución (lo repetí siete veces).
En la siguiente vuelta: - Cinco puntos bajos, una disminución (lo repetí siete veces).
Luego continué con:
- Un punto bajo, una disminución, luego cuatro puntos bajos, una disminución (lo repetí seis veces) y para terminar, hice dos puntos bajos.
Para continuar, hice:
- Tres puntos bajos, una disminución (lo repetí seis veces).
En la siguiente vuelta, tejí: - Dos puntos bajos, una disminución (lo repetí seis veces).
En la siguiente vuelta:
- Un punto bajo, una disminución (lo repetí seis veces).
Finalmente rellené, tejí solo disminuciones y cerré los últimos puntos con aguja.
I crocheted in a spiral with the yellow color as follows:
I started with a magic ring and six single crochet stitches.
Then, I crocheted six increases.
From round 4 to round 14, I crocheted only single crochet stitches.
I continued with the following sequence:
- One single crochet, one increase (I repeated this seven times).
- Then, I crocheted three single crochets, one increase (I repeated this six times).
- Next, I made four single crochets, one increase (I repeated this six times).
For the next round:
- I crocheted ten single crochets, one increase, then twenty single crochets, one increase, and finished with ten single crochets.
In the following round:
- I crocheted five single crochets, one increase, repeating this sequence seven times. Then, I continued with only single crochets for ten rounds.
Next, I changed to the light blue color and crocheted only slip stitches around the whole round, using the back loop only.
After that, I crocheted eight rounds of only single crochet stitches.
In the following round, I crocheted:
- Six single crochets, one decrease (I repeated this seven times).
In the next round:- Five single crochets, one decrease (I repeated this seven times).
Then, I continued with:
- One single crochet, one decrease, then four single crochets, one decrease (I repeated this six times), and to finish, I crocheted two single crochets.
To continue, I crocheted:
- Three single crochets, one decrease (I repeated this six times).
In the next round, I crocheted:- Two single crochets, one decrease (I repeated this six times).
In the next round:
- One single crochet, one decrease (I repeated this six times).
Finally, I crocheted only decreases and closed the last stitches with a needle.
Tejer brazos / Crocheting the Arms
|
|
Con el color amarillo:
Tejí 3 cadenas. A partir de la segunda cadena, hice:
- 1 punto bajo,
- Un aumento de 3 puntos bajos en el mismo punto,
- 1 punto bajo,
- Un aumento de 3 puntos bajos en el mismo punto.
Vuelta 2:
Hice 1 punto bajo, luego realicé 3 aumentos de puntos bajos (uno en cada punto siguiente),
- Hice 1 punto bajo,
- Y repetí 3 aumentos de puntos bajos.
Vuelta 3:
Hice 1 punto bajo,
Luego, tejí la secuencia de (1 punto bajo, 1 aumento) x3,
- Hice 1 punto bajo,
- Repetí la secuencia de (1 punto bajo, 1 aumento) x3.
Vuelta 4:
Tejí 5 puntos bajos,
Luego hice 2 aumentos,
- Tejí 8 puntos bajos,
- Hice 2 aumentos,
- Luego, tejí 3 puntos bajos.
Vueltas 5 a 7:
Continué tejiendo solo puntos bajos en cada vuelta.
Vuelta 8:
Hice 1 punto popcorn (tejiendo 4 medias varetas en el mismo punto),
- Luego, hice 1 disminución,
- Tejí 7 puntos bajos,
- Hice 2 disminuciones,
- Terminé con 3 puntos bajos.
Vuelta 9:
Tejí solo puntos bajos,
- Hice 1 disminución,
- Tejí 8 puntos bajos,
- Hice 1 disminución,
- Terminé con 3 puntos bajos.
Continué tejiendo solo puntos bajos hasta alcanzar el largo deseado para el brazo.
Corté la hebra rellené y cerré.
With yellow color:
I crocheted 3 chains. From the second chain, I did:
- 1 single crochet,
- 1 increase of 3 single crochets in the same stitch,
- 1 single crochet,
- 1 increase of 3 single crochets in the same stitch.
Round 2:
I did 1 single crochet, then made 3 increases of single crochets (one in each following stitch),
- I did 1 single crochet,
- And repeated 3 increases of single crochets.
Round 3:
I did 1 single crochet,
Then, I worked the sequence of (1 single crochet, 1 increase) x3,
- I did 1 single crochet,
- Repeated the sequence of (1 single crochet, 1 increase) x3.
Round 4:
I crocheted 5 single crochets,
Then, I did 2 increases,
- I crocheted 8 single crochets,
- I did 2 increases,
- Then, I crocheted 3 single crochets.
Rounds 5 to 7:
I continued crocheting only single crochets in each round.
Round 8:
I did 1 popcorn stitch (crocheting 4 half-double crochets in the same stitch),
- Then, I did 1 decrease,
- I crocheted 7 single crochets,
- I did 2 decreases,
- I finished with 3 single crochets.
Round 9:
I crocheted only single crochets,
- I did 1 decrease,
- I crocheted 8 single crochets,
- I did 1 decrease,
- I finished with 3 single crochets.
I continued crocheting only single crochets until I reached the desired length for the arm.
I cut the yarn and closed the piece.
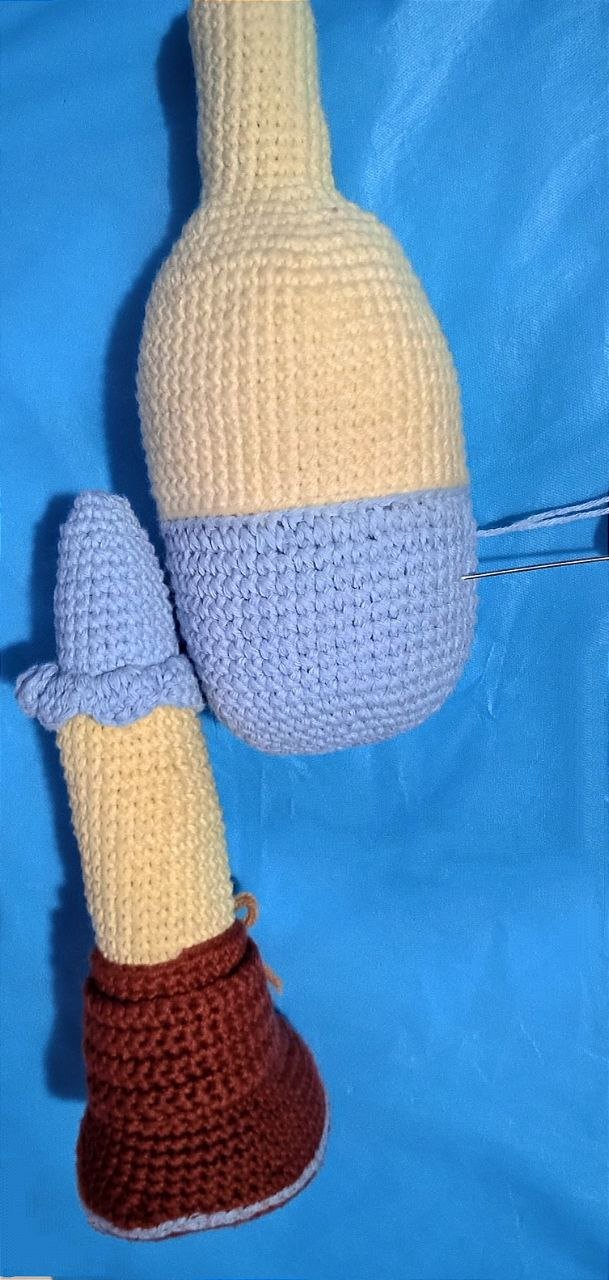
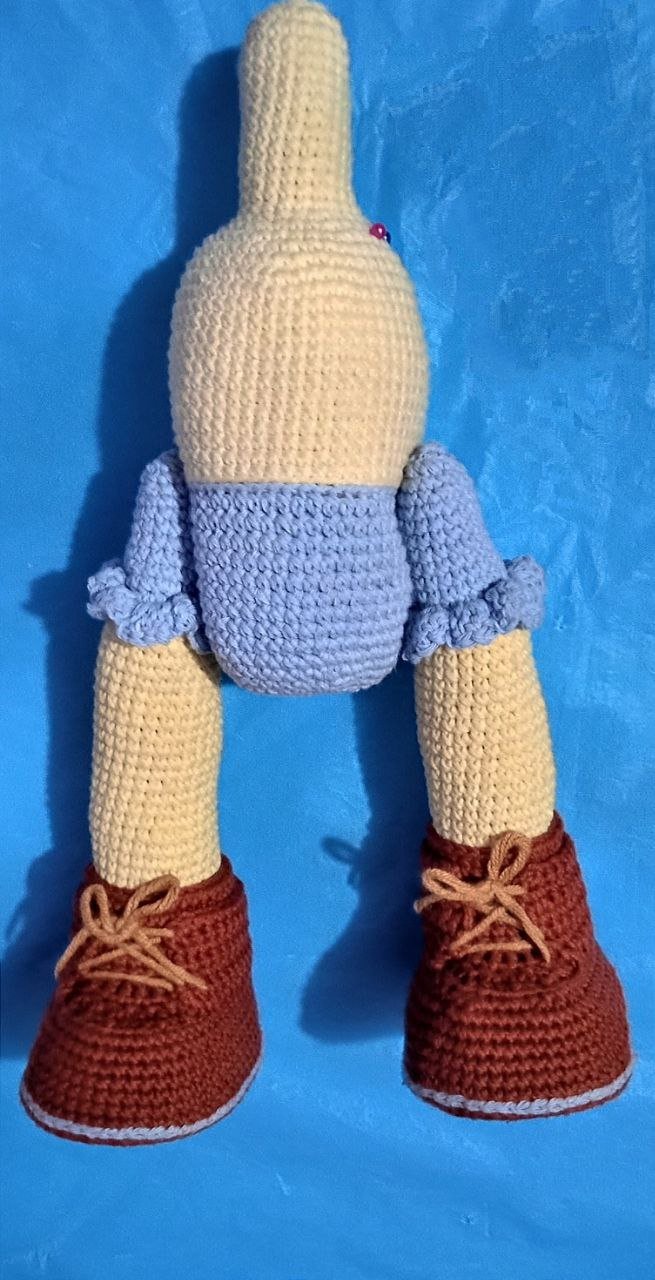
Tejer zapatos y piernas / Knitting shoes and legs
|
|
|
|
|
|

|
|
|
|
|
|
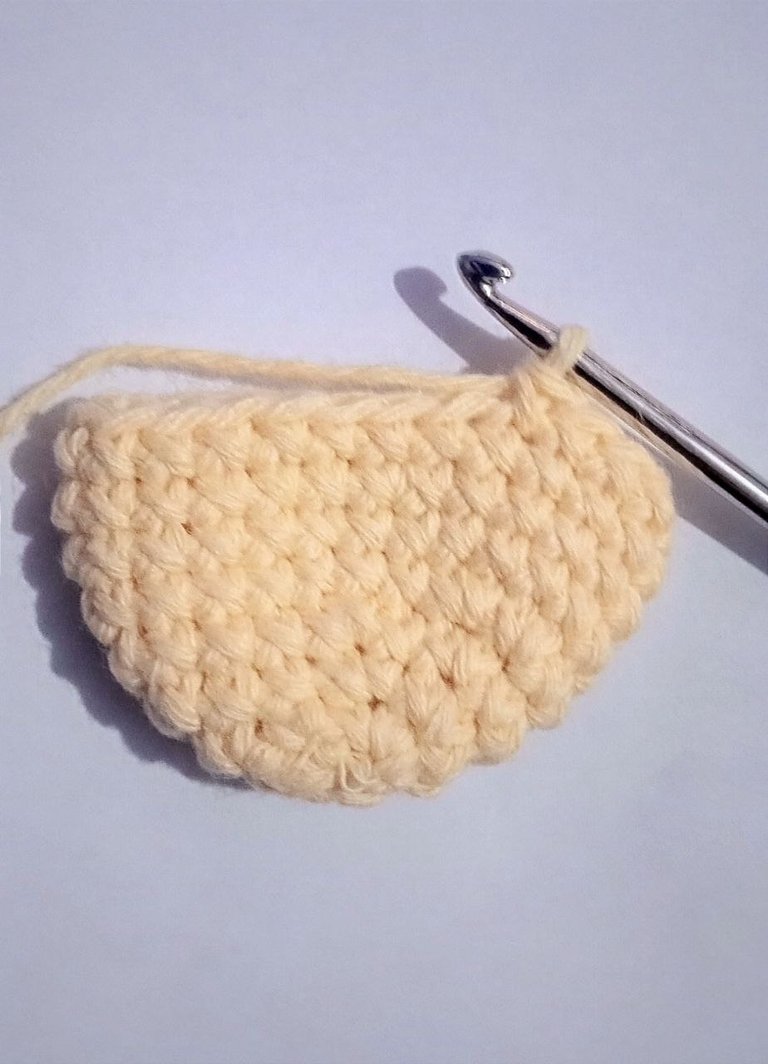
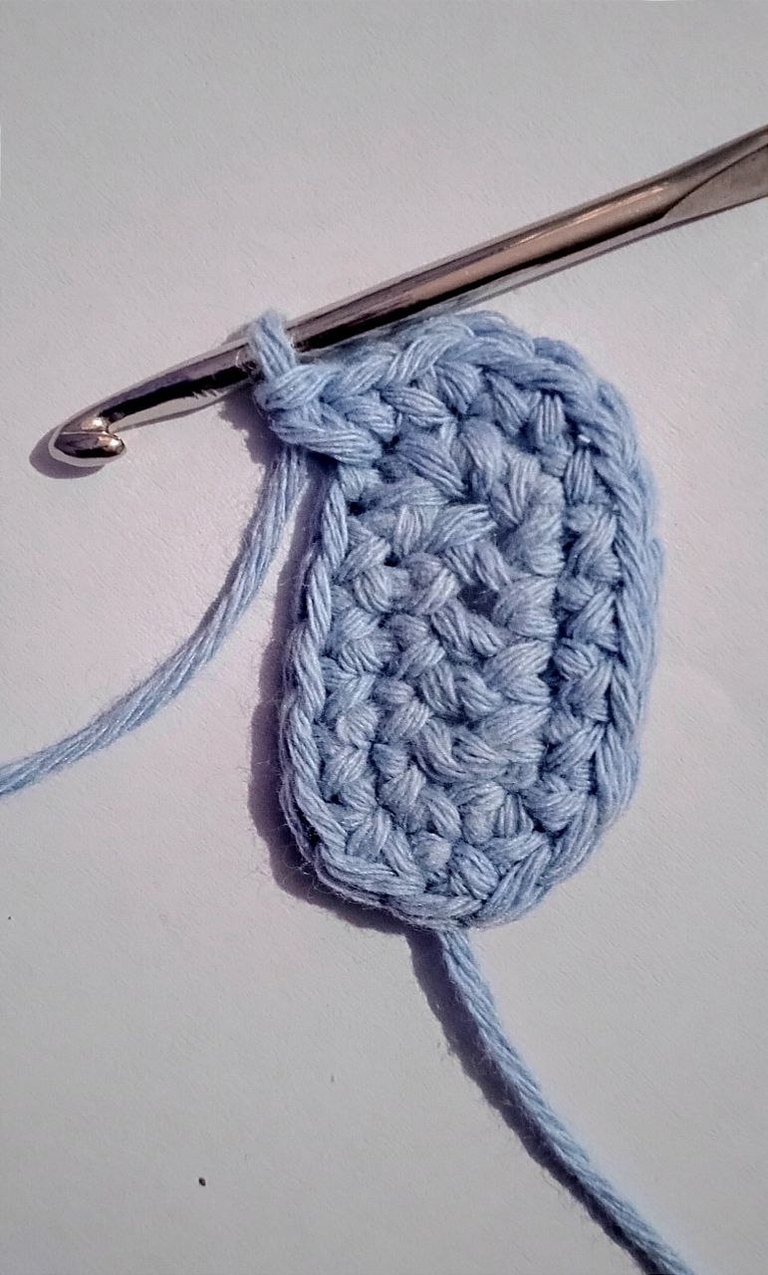
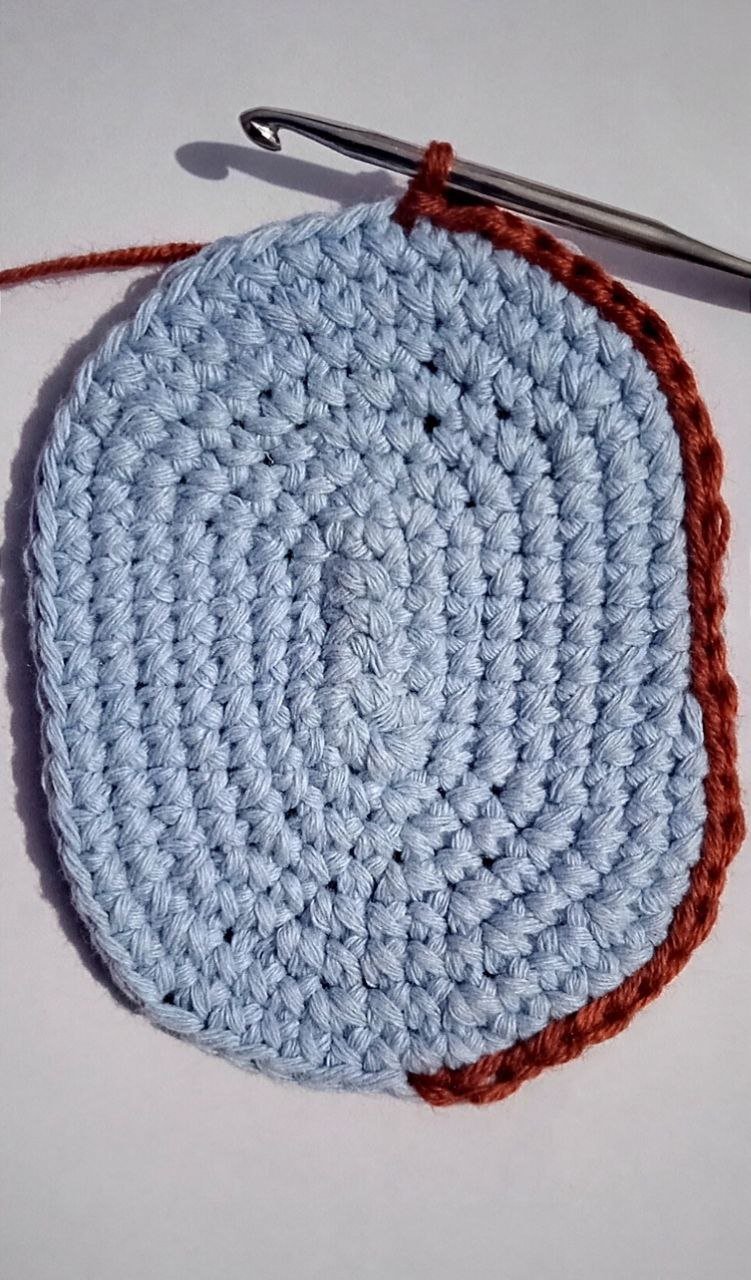
Para hacer las suelas, usé hilo café y un crochet de 3 mm. Comencé haciendo nueve cadenas. En la segunda cadena desde el ganchillo, hice un aumento, seguido de seis puntos bajos. En la siguiente cadena, tejí un aumento triple (tres puntos bajos en el mismo punto). Luego, continué con seis puntos bajos más y, al final, otro aumento triple. De esa manera, se forma una especie de óvalo.
Seguí con la siguiente vuelta, haciendo un aumento, luego siete puntos bajos, un aumento triple, un punto bajo solo, otro aumento triple, siete puntos bajos y un aumento.
Después, en la siguiente vuelta, tejí un aumento, nueve puntos bajos, un aumento triple, un punto bajo, otro aumento triple, nueve puntos bajos y un aumento.
Continué con un punto bajo, luego un aumento, cuatro puntos bajos, un aumento, tres puntos bajos y una secuencia de (un punto bajo y un aumento) dos veces. En la siguiente vuelta, repetí la secuencia de (un punto bajo y un aumento) dos veces. Luego, hice cuatro puntos bajos, un aumento, tres puntos bajos, un aumento y otra secuencia de (un punto bajo y un aumento) dos veces.
Después, tejí una vuelta de solo puntos bajos.
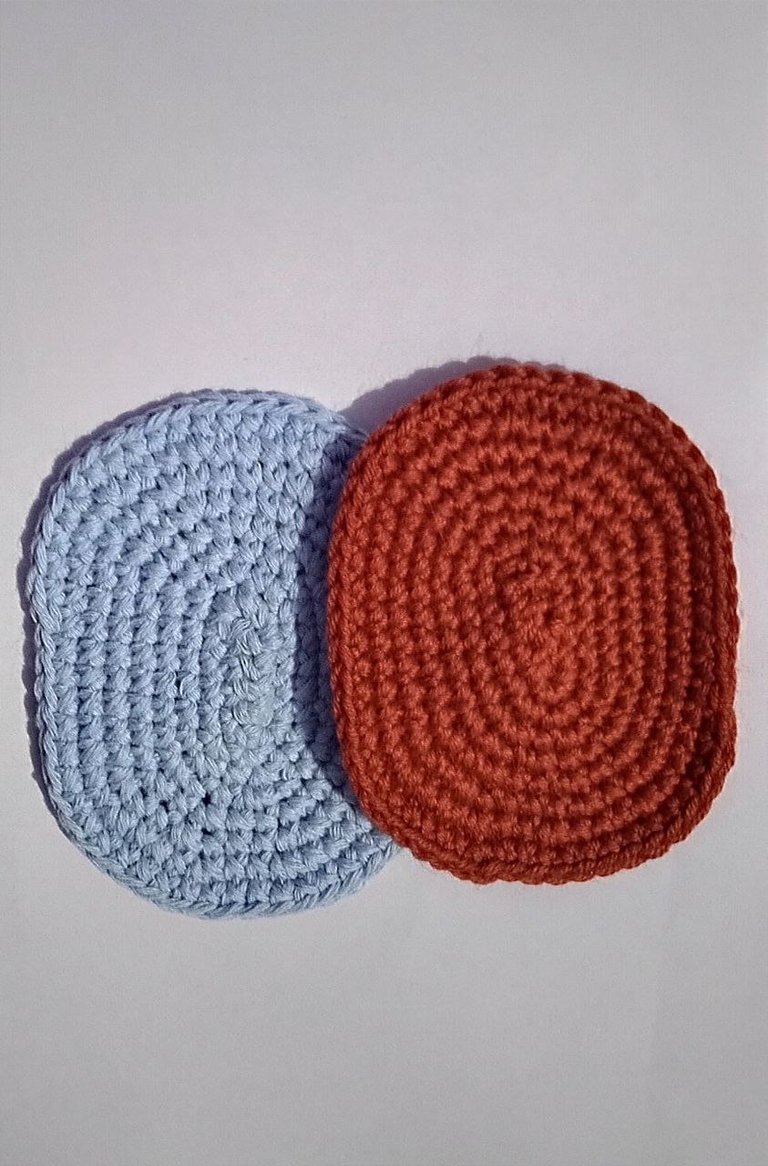
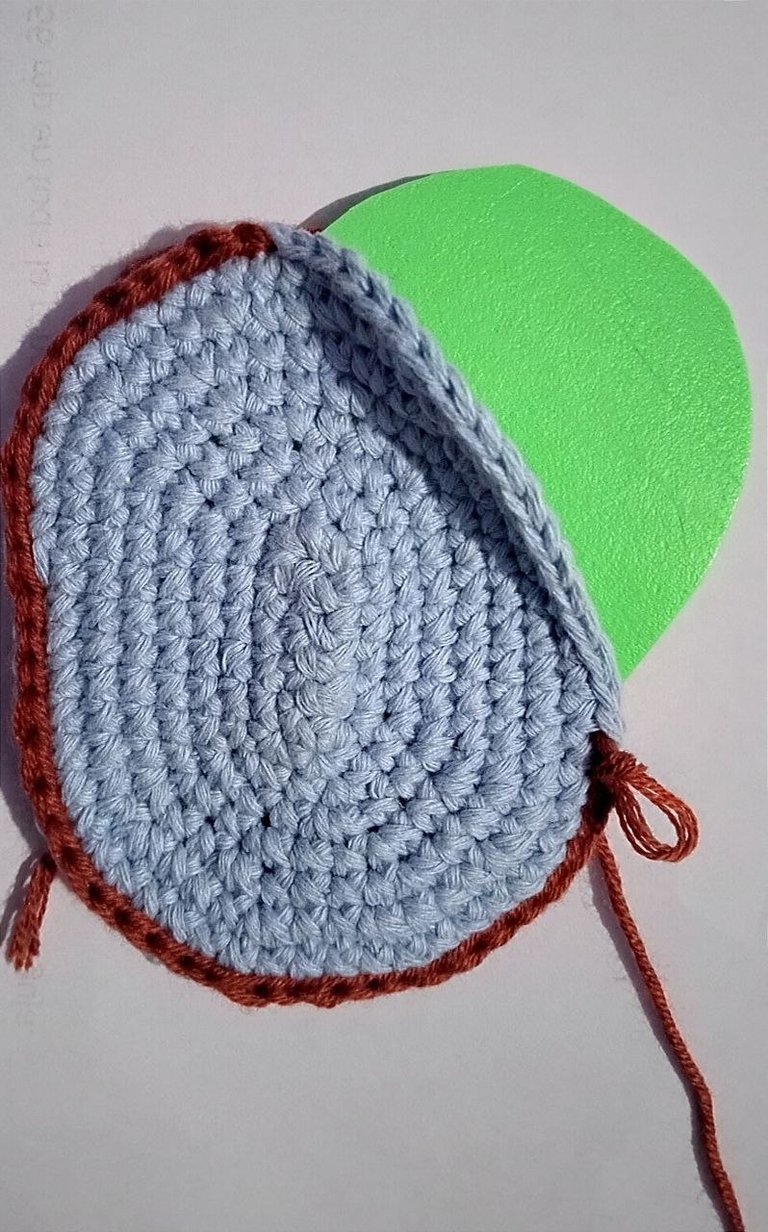
Corté el hilo y repetí el proceso para hacer otra suela en color celeste. Junté ambas suelas y las cerré con puntos deslizados. Antes de cerrarlas completamente, introduje un óvalo de plástico para dar estabilidad a la base del zapato.
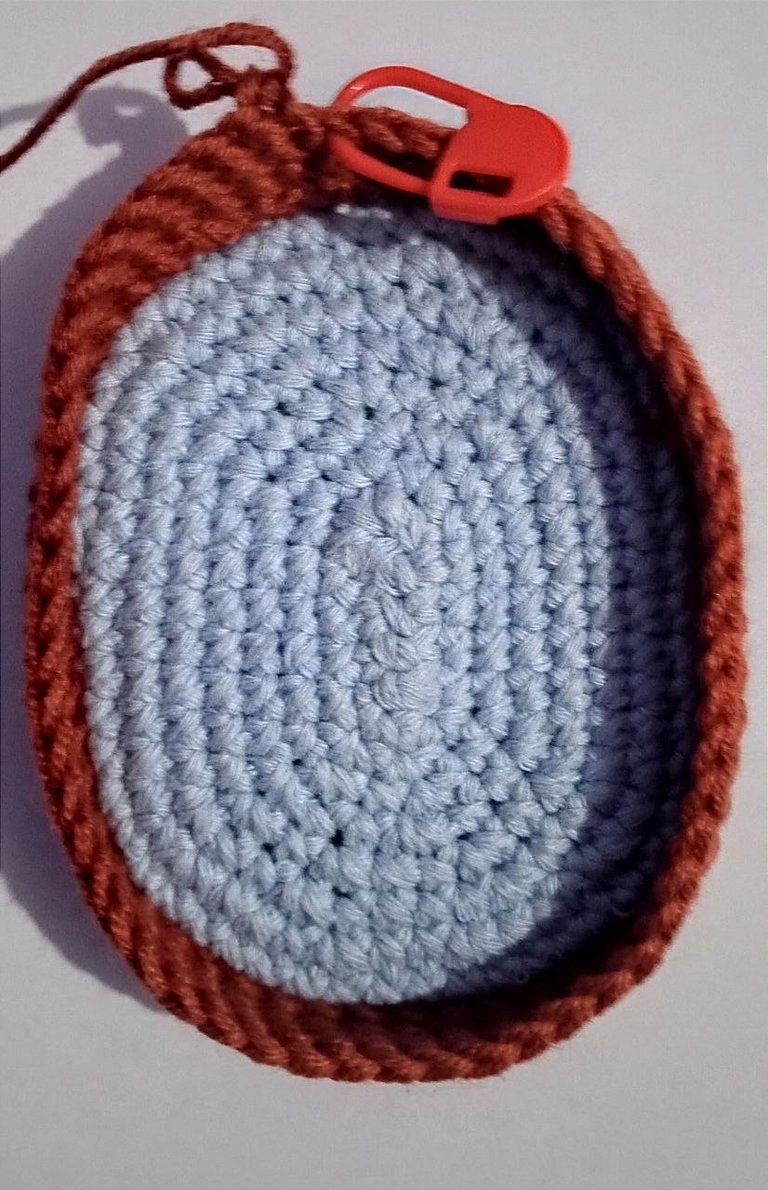
A partir de los puntos deslizados, retomé el hilo café y tejí 42 puntos bajos alrededor de la suela. Hice cuatro vueltas más de solo puntos bajos.
En la quinta vuelta, hice:
- 14 puntos bajos,
- Una secuencia de (un punto bajo, una disminución) dos veces,
- Cuatro puntos bajos,
- Otra secuencia de (un punto bajo, una disminución) dos veces,
- 14 puntos bajos.
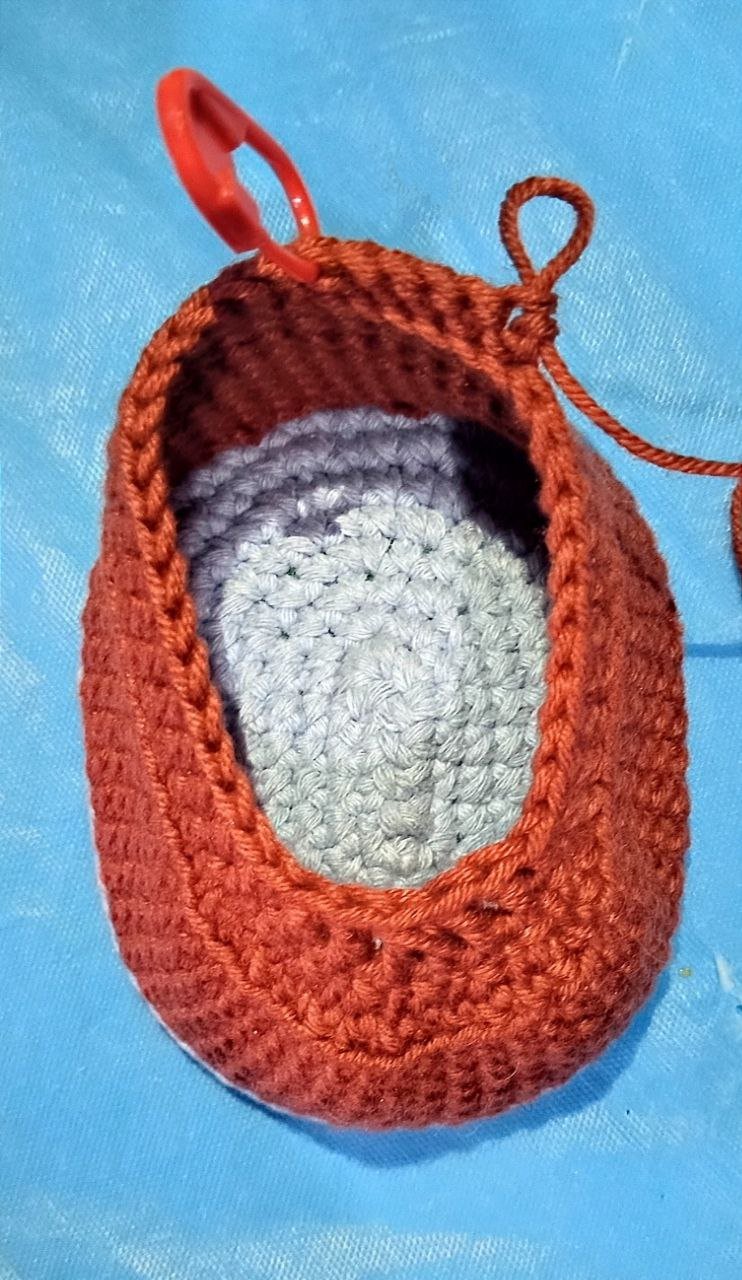
Luego, en la siguiente vuelta, tejí 10 puntos bajos, solo tomando la hebra trasera de la vuelta anterior.
Después, hice la secuencia (una disminución, un punto bajo) tres veces. Ahora al revés: (una disminución, un punto bajo) tres veces. Terminé con 10 puntos bajos.
En la siguiente vuelta, tomando ambas hebras, hice:
- 9 puntos bajos,
- 7 disminuciones,
- 9 puntos bajos.
Para la siguiente vuelta:
- 10 puntos bajos,
- 2 puntos altos,
- 1 disminución de puntos altos,
- 1 punto alto,
- 10 puntos bajos.
Después, tomando la hebra delantera, tejí solo puntos bajos.
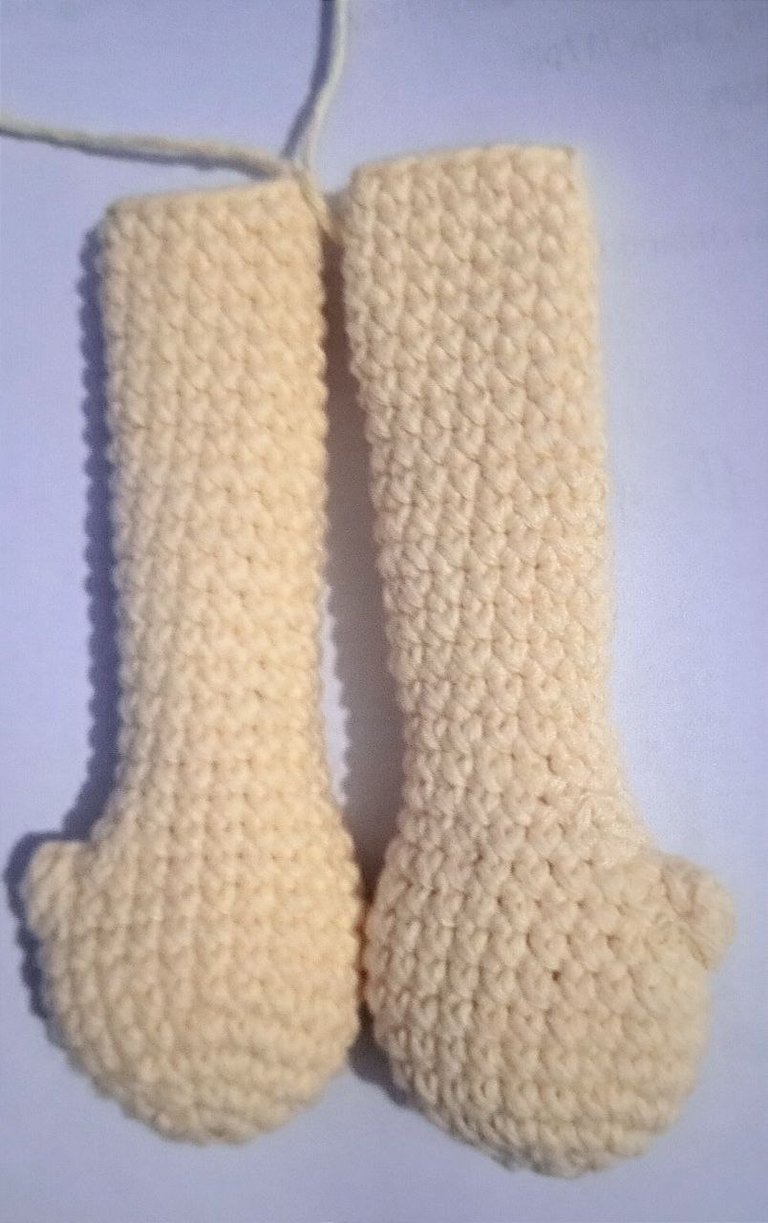
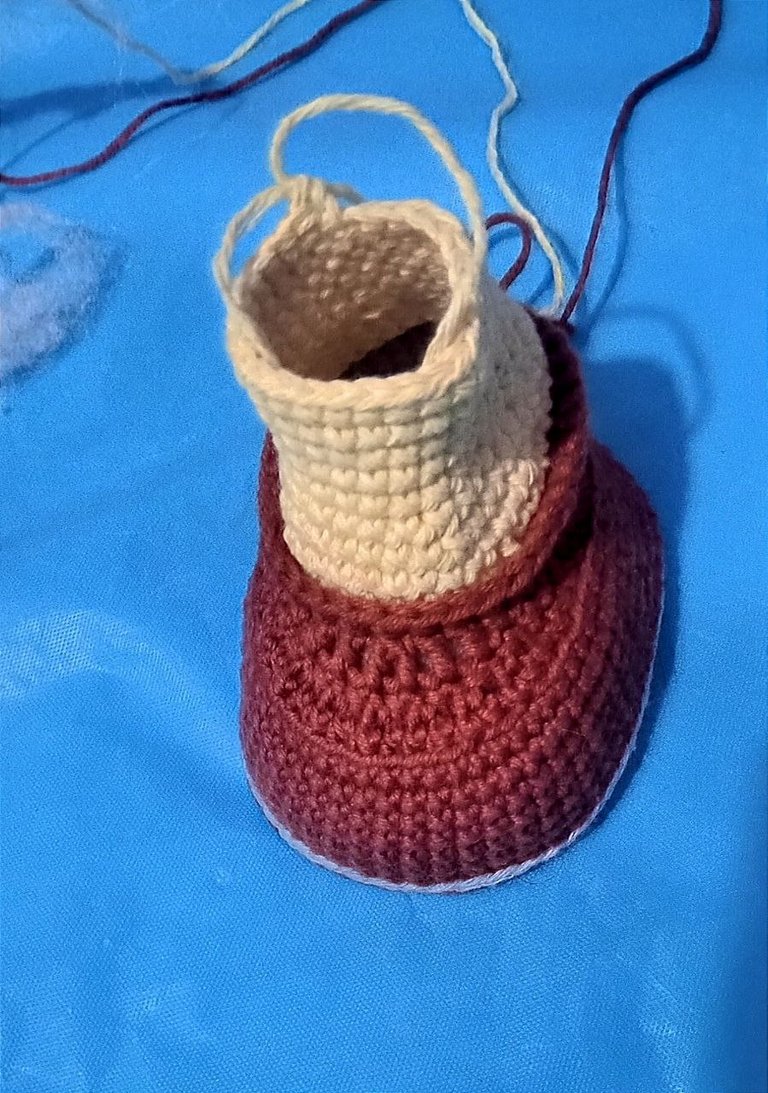
Aquí dejé el hilo café pendiente y continué con el hilo amarillo y el crochet de 2.5 mm para comenzar la pierna de la conejita. En la parte de la bota, retomé la hebra trasera que dejé en la vuelta anterior y tejí una secuencia de (cuatro puntos bajos, una disminución).
En la siguiente vuelta, tejí solo puntos bajos tomando ambas hebras. Luego, hice una secuencia de (ocho puntos bajos, una disminución).
Después, tejí varias vueltas de solo puntos bajos para darle el largo deseado a la pierna. Corté el hilo y cerré.
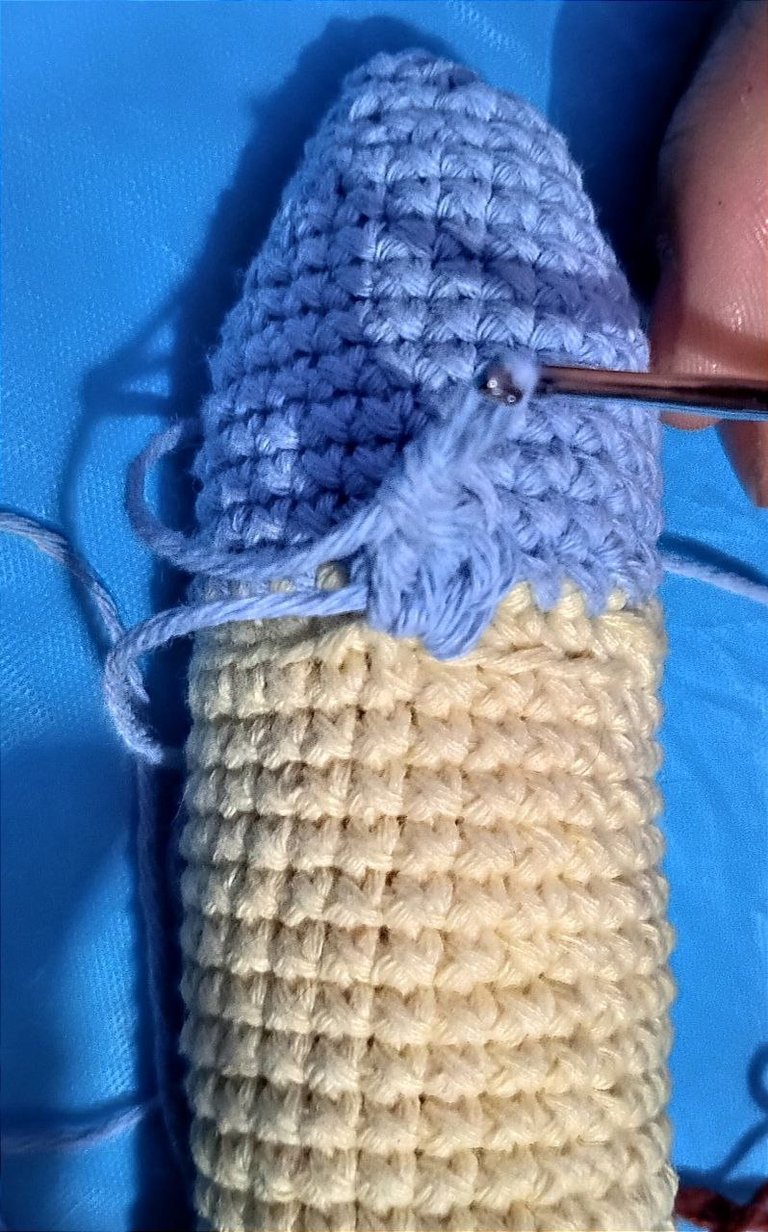
Continué con el hilo celeste y tejí solo puntos bajos, tomando la hebra trasera.
En la siguiente vuelta, hice (tres puntos bajos, una disminución).
Luego, una vuelta de (dos puntos bajos, una disminución).
Después, una vuelta de solo puntos bajos.
Comencé a rellenar.
Seguí con una vuelta de (un punto bajo, una disminución).
Por último, una vuelta de solo disminuciones, corté el hilo y cerré con aguja.
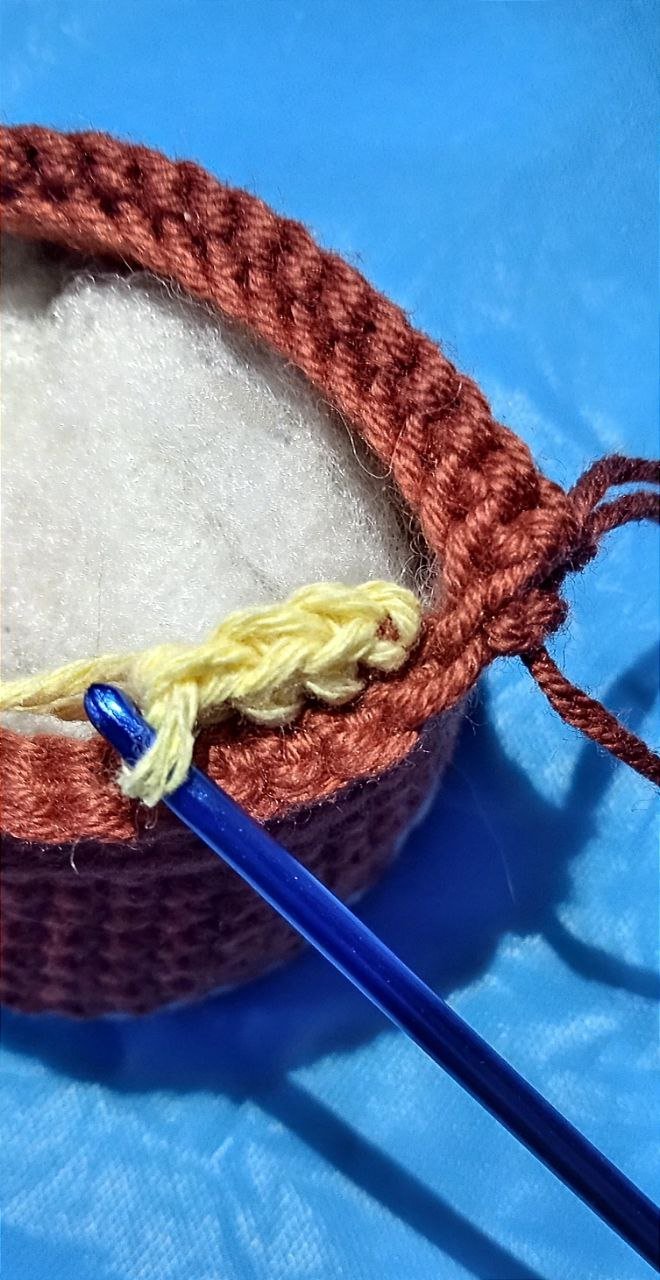
Cuando comencé a tejer con el hilo celeste, dejé algunas hebras delanteras libres. A partir de ahí, tejí unas ondas, haciendo cuatro puntos altos en el mismo punto, una cadena, y luego un punto bajo. Repetí esta secuencia por toda la vuelta para formar las ondas.
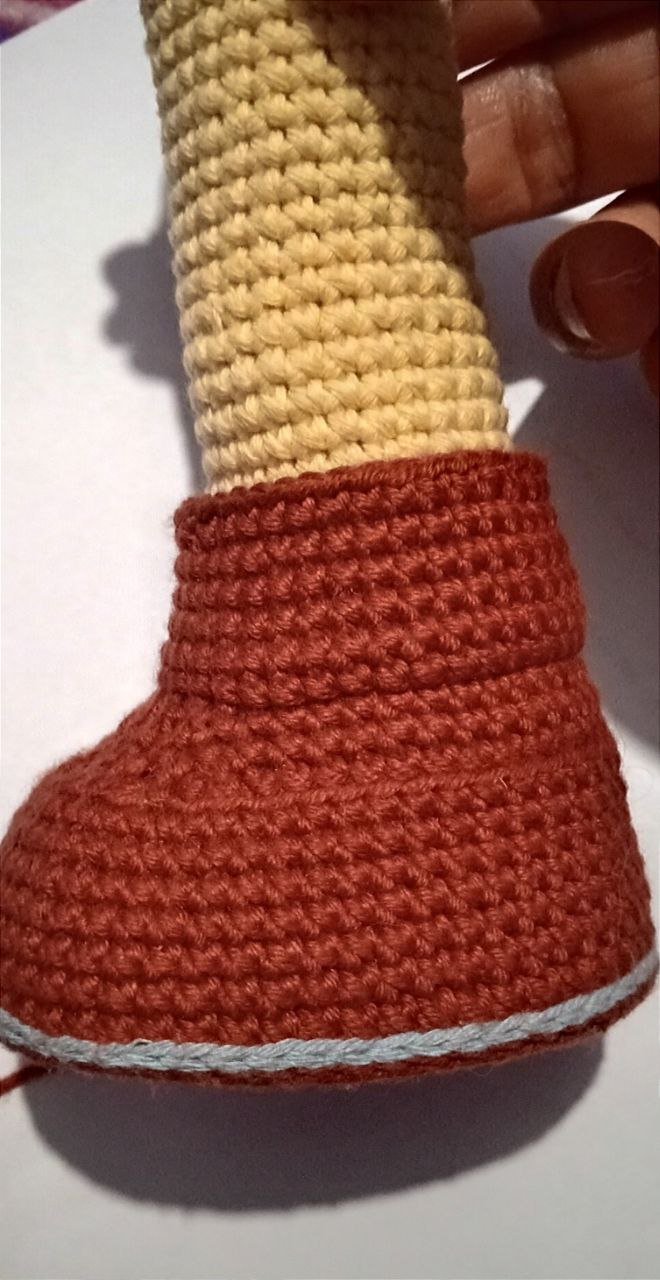
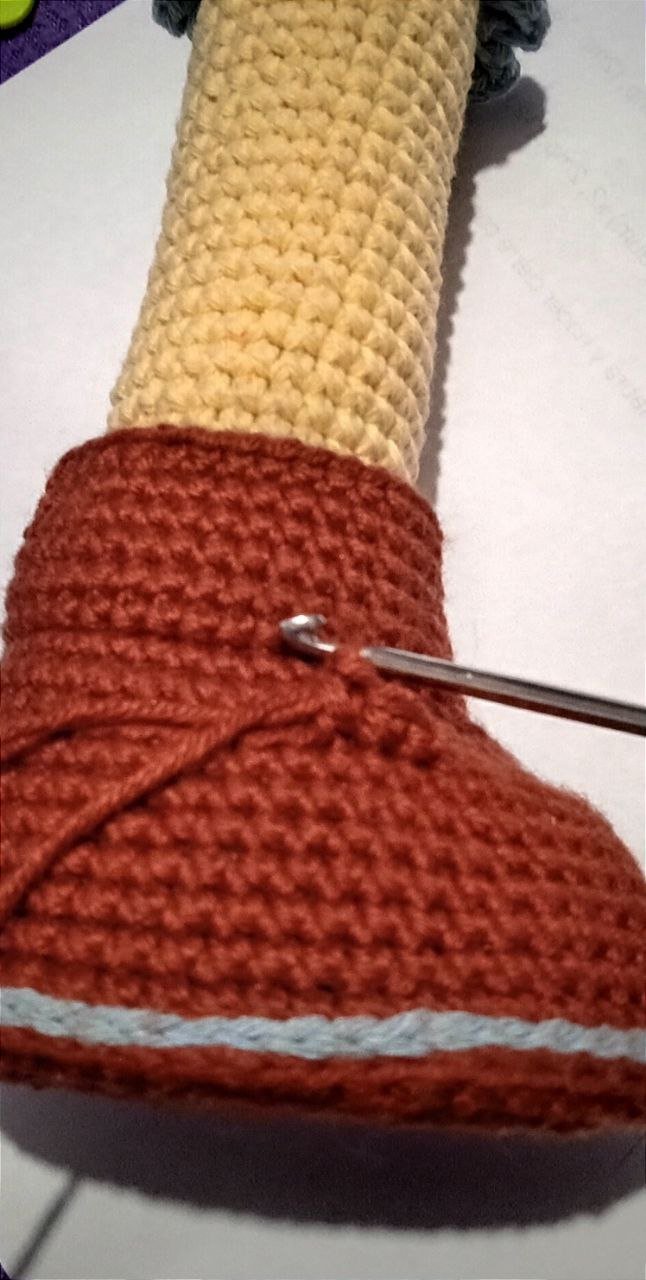
Con la pierna terminada, retomé el hilo cafe y con el crochet de 3 mm para continuar con la bota y tejí tres vueltas de solo puntos bajos.
Después, hice:
- 10 puntos bajos,
- 1 disminución,
- 10 puntos bajos,
- 1 disminución.
Seguí con una vuelta de solo puntos bajos, hice un punto deslizado y corté la hebra.
Para finalizar la bota, en la parte donde dejé hebras frontales, retomé el tejido e hice 20 puntos bajos, contando desde la parte trasera de la bota. Luego, hice una cadena, giré el tejido y volví a tejer 20 puntos bajos.
Repetí esto una vez más. Luego, hice:
- Un aumento, 18 puntos bajos, un aumento en el último punto.
- Una vuelta de solo puntos bajos.
- Una vuelta con una cadena al aire, saltando un punto y tejiendo puntos bajos en los siguientes. En los dos últimos puntos, hice otra cadena, salté un punto y terminé con un punto bajo. Repetí este paso dos veces más.
Corté la hebra y listo. Para los cordones, utilicé un hilo café más claro y lo pasé por los agujeritos que se formaron cuando salté los puntos.
To make the soles, I used brown yarn and a 3 mm crochet hook. I started by making nine chains. In the second chain from the hook, I made an increase, followed by six single crochets. In the next chain, I crocheted a triple increase (three single crochets in the same stitch). Then, I continued with six more single crochets and, at the end, another triple increase. This forms an oval shape.
I continued with the next round by making an increase, then seven single crochets, a triple increase, one single crochet, another triple increase, seven single crochets, and an increase.
Next, in the following round, I crocheted an increase, nine single crochets, a triple increase, one single crochet, another triple increase, nine single crochets, and an increase.
I continued with one single crochet, then an increase, four single crochets, an increase, three single crochets, and a sequence of (one single crochet and an increase) twice. In the next round, I repeated the sequence of (one single crochet and an increase) twice. Then, I crocheted four single crochets, an increase, three single crochets, an increase, and another sequence of (one single crochet and an increase) twice.
After that, I made a round of only single crochets.
I cut the yarn and repeated the process to make another sole in light blue. I joined both soles and closed them with slip stitches. Before closing them completely, I inserted a plastic oval to provide stability to the shoe base.
From the slip stitches, I picked up the brown yarn and crocheted 42 single crochets around the sole. I made four more rounds of only single crochets.
In the fifth round, I did:
- 14 single crochets,
- A sequence of (one single crochet, one decrease) twice,
- Four single crochets,
- Another sequence of (one single crochet, one decrease) twice,
- 14 single crochets.
Then, in the next round, I crocheted 10 single crochets, taking only the back loop of the previous round.
After that, I made the sequence (one decrease, one single crochet) three times. Now, in reverse: (one decrease, one single crochet) three times. I finished with 10 single crochets.
In the next round, taking both loops, I did:
- 9 single crochets,
- 7 decreases,
- 9 single crochets.
For the next round:
- 10 single crochets,
- 2 double crochets,
- 1 decrease of double crochets,
- 1 double crochet,
- 10 single crochets.
Then, taking only the front loop, I crocheted only single crochets.
Here, I left the brown yarn on hold and continued with the yellow yarn and a 2.5 mm crochet hook to start the bunny’s leg. In the boot area, I picked up the back loop that I left in the previous round and crocheted a sequence of (four single crochets, one decrease).
In the next round, I crocheted only single crochets, taking both loops. Then, I made a sequence of (eight single crochets, one decrease).
After that, I crocheted several rounds of only single crochets to give the leg the desired length. I cut the yarn and closed it.
I continued with the light blue yarn and crocheted only single crochets, taking the back loop.
In the next round, I did (three single crochets, one decrease).
Then, a round of (two single crochets, one decrease).
Next, a round of only single crochets.
I followed with a round of (one single crochet, one decrease).
Finally, a round of only decreases, cut the yarn, and closed with a needle.
When I started crocheting with the light blue yarn, I left some front loops free. From there, I crocheted some waves, making four double crochets in the same stitch, one chain, and then one single crochet. I repeated this sequence all around to form the waves.
With the leg finished, I picked up the brown yarn with the 3 mm crochet hook to continue with the boot and crocheted three rounds of only single crochets.
Then, I did:
- 10 single crochets,
- 1 decrease,
- 10 single crochets,
- 1 decrease.
I followed with a round of only single crochets, made a slip stitch, and cut the yarn.
To finish the boot, in the area where I left front loops, I picked up the stitches and crocheted 20 single crochets, counting from the back of the boot. Then, I made a chain, turned the work, and crocheted 20 single crochets again.
I repeated this one more time. Then, I did:
- One increase, 18 single crochets, one increase in the last stitch.
- A round of only single crochets.
- A round with a chain in the air, skipping one stitch, and crocheting single crochets in the next ones. In the last two stitches, I made another chain, skipped one stitch, and finished with a single crochet. I repeated this step two more times.
I cut the yarn, and that was it. For the laces, I used a lighter brown yarn and threaded it through the holes created when skipping stitches.
Cabeza / Head
|
|
|
|
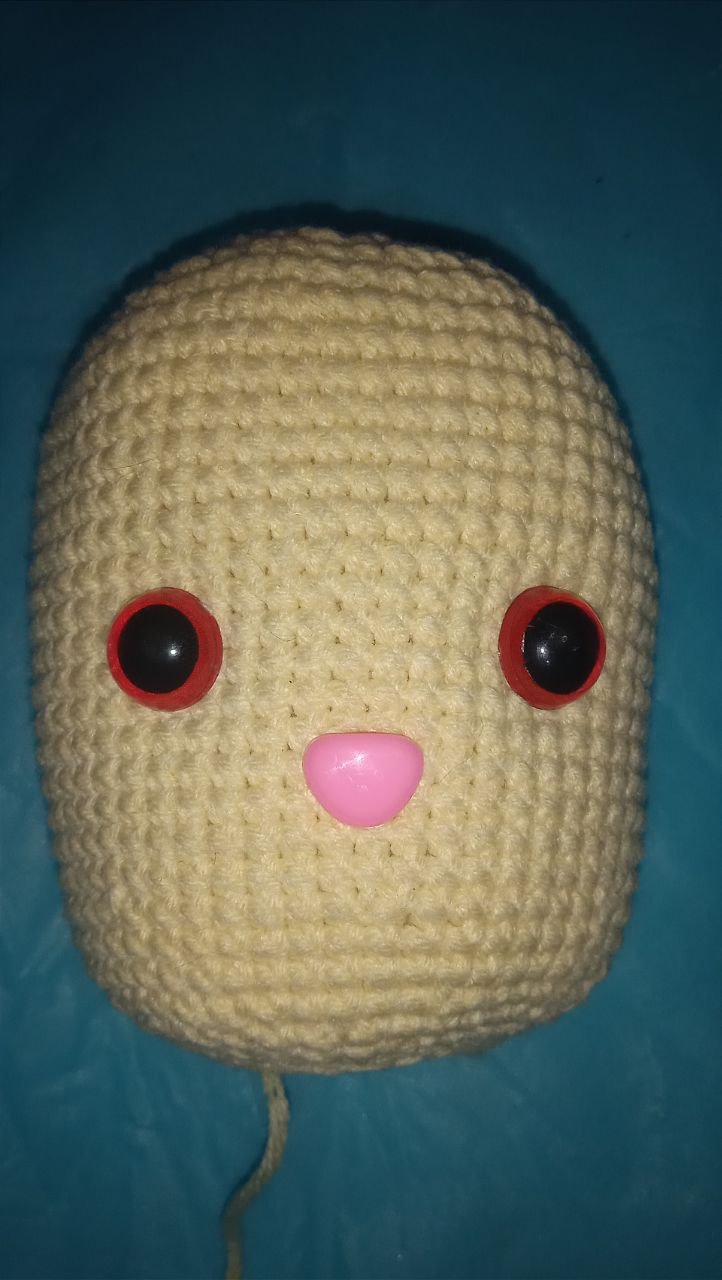
- Con el color amarillo, hice seis puntos bajos en un anillo mágico.
- En la siguiente vuelta, hice seis aumentos. Luego, continué con una secuencia de un punto bajo, un aumento seis veces.
- Después, tejí una vuelta de solo puntos bajos.
- En la siguiente vuelta, hice dos puntos bajos, un aumento, repitiendo esta secuencia seis veces.
- Otra vuelta de solo puntos bajos.
- Luego, tejí tres puntos bajos, un aumento, repitiendo la secuencia seis veces.
- Seguí con una vuelta de solo puntos bajos.
- Después, hice cuatro puntos bajos, un aumento seis veces.
- Otra vuelta de solo puntos bajos.
- Luego, tejí cinco puntos bajos, un aumento seis veces.
- Una vuelta más de solo puntos bajos.
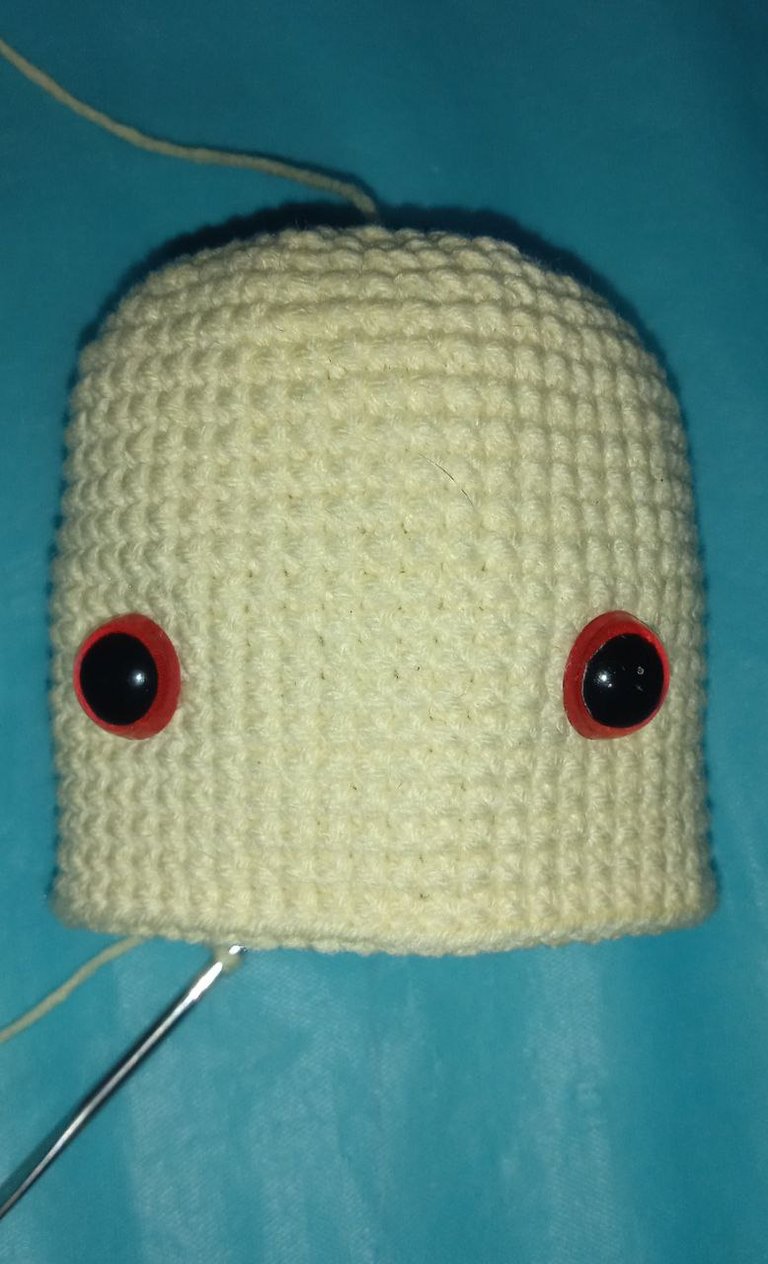
- A continuación, hice seis puntos bajos, un aumento seis veces.
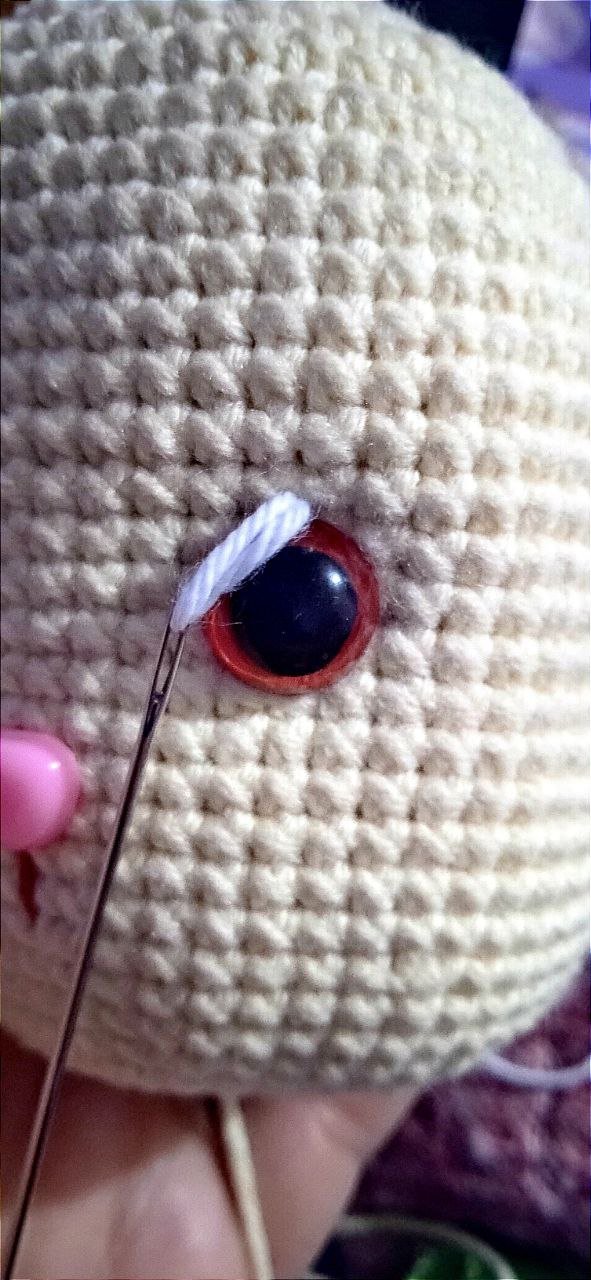
- Continué con vueltas de solo puntos bajos y, en esta parte, coloqué los ojitos y nariz de seguridad.
Luego, comencé con las disminuciones:
- Seis puntos bajos, una disminución, seis veces.
- Una vuelta de solo puntos bajos.
- Cinco puntos bajos, una disminución, seis veces.
- Una vuelta de solo puntos bajos.
- Cuatro puntos bajos, una disminución, seis veces.
- Una vuelta de solo puntos bajos.
- Tres puntos bajos, una disminución, seis veces.
- Una vuelta de solo puntos bajos.
- Dos puntos bajos, una disminución, seis veces.
- Una vuelta de solo puntos bajos.
- Un punto bajo, una disminución, seis veces.
- Una vuelta de solo puntos bajos.
Por último, tejí solo disminuciones, corté la hebra y cerré la cabeza.
- With yellow yarn, I made six single crochets in a magic ring.
- In the next round, I made six increases. Then, I continued with a sequence of one single crochet, one increase six times.
- After that, I crocheted a round of only single crochets.
- In the next round, I made two single crochets, one increase, repeating this sequence six times.
- Another round of only single crochets.
- Then, I crocheted three single crochets, one increase, repeating the sequence six times.
- I continued with a round of only single crochets.
- Next, I made four single crochets, one increase six times.
- Another round of only single crochets.
- Then, I crocheted five single crochets, one increase six times.
- One more round of only single crochets.
- After that, I made six single crochets, one increase six times.
- I continued with rounds of only single crochets and, at this point, I placed the safety eyes and nose.
Then, I started with the decreases:
- Six single crochets, one decrease six times.
- One round of only single crochets.
- Five single crochets, one decrease six times.
- One round of only single crochets.
- Four single crochets, one decrease six times.
- One round of only single crochets.
- Three single crochets, one decrease six times.
- One round of only single crochets.
- Two single crochets, one decrease six times.
- One round of only single crochets.
- One single crochet, one decrease six times.
- One round of only single crochets.
Finally, I crocheted only decreases, cut the yarn, and closed the head.
Capota / Hood
|

|
|

|
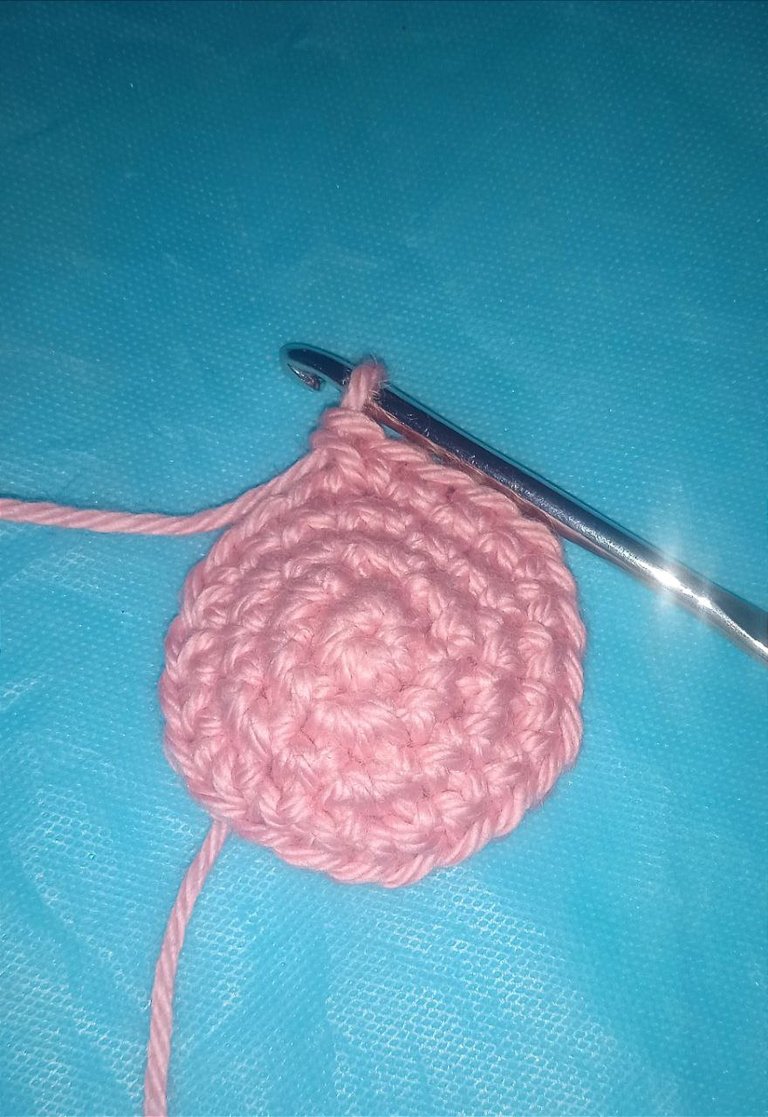
Con el color rosa, hice seis puntos bajos en un anillo mágico. Luego, en la siguiente vuelta, continué con aumentos: un punto bajo, un aumento, repitiendo esta secuencia seis veces.
Después, seguí con las siguientes secuencias:
- Dos puntos bajos, un aumento (seis veces).
- Tres puntos bajos, un aumento (seis veces).
Para continuar, tejí:
- Cuatro puntos bajos, un aumento (cinco veces). Para terminar la vuelta, hice dos puntos bajos adicionales.
- Cinco puntos bajos, un aumento (seis veces).
- Tres puntos bajos, un aumento (seis veces). Luego, un punto bajo, un aumento (cinco veces) y para finalizar, tres puntos bajos.
- Siete puntos bajos, un aumento (seis veces).
- Cuatro puntos bajos, un aumento. Luego, una secuencia de ocho puntos bajos, un aumento (cinco veces) y, para terminar, cuatro puntos bajos.
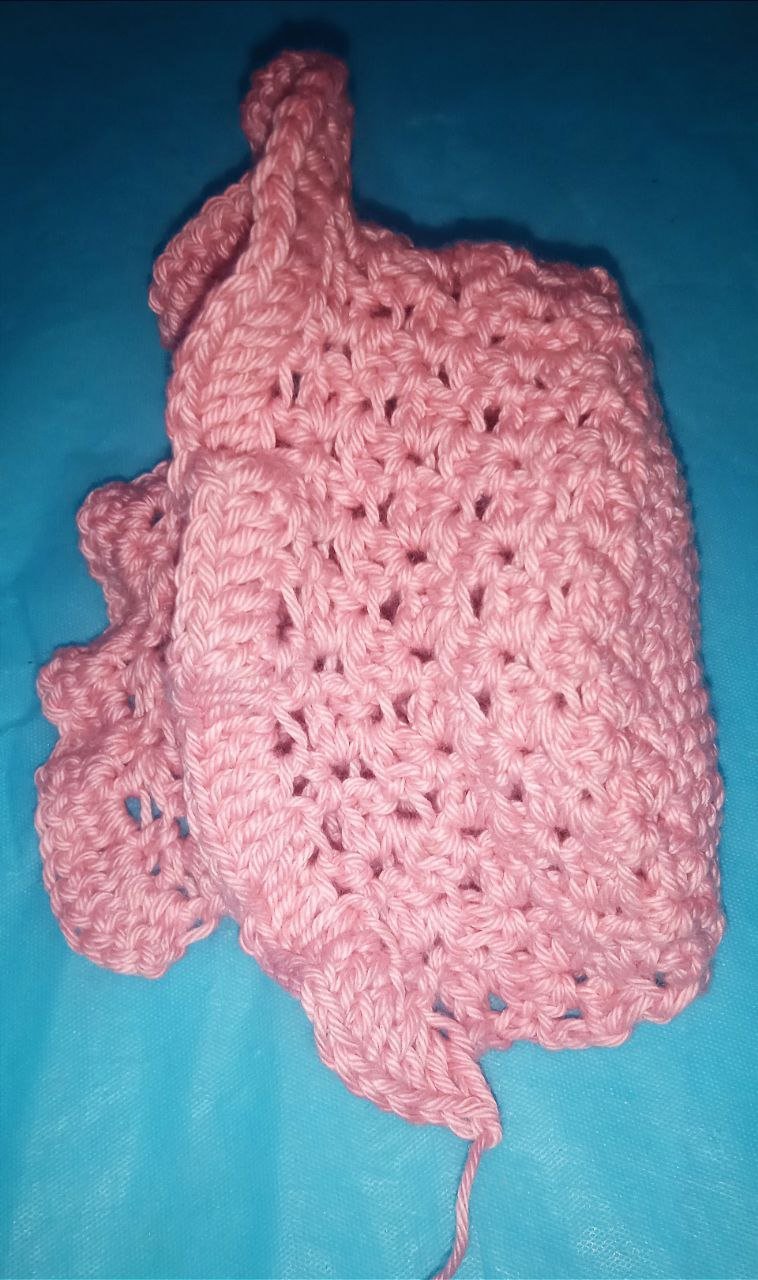
A continuación, en la siguiente vuelta, tejí cinco puntos deslizados. Desde aquí, comencé a tejer de forma lineal, es decir, girando la labor en cada vuelta.
- En la siguiente vuelta, hice dos cadenas, me salté un punto y realicé un aumento de medios puntos altos. Luego, tejí una cadena, me salté dos puntos y repetí este paso hasta terminar la vuelta.
- En la fila siguiente, hice dos cadenas y un aumento de medios puntos altos separados por una cadena, repitiendo esto durante toda la vuelta.
- En la siguiente vuelta, tejí solo puntos altos.
- Luego, trabajé la secuencia de un punto alto, dos aumentos de puntos altos.
- En la última vuelta, tejí aumentos de puntos altos para finalizar la pieza.
With pink yarn, I made six single crochet stitches in a magic ring. Then, in the next round, I continued with increases: one single crochet, one increase, repeating this sequence six times.
Next, I followed these sequences:
- Two single crochets, one increase (six times).
- Three single crochets, one increase (six times).
To continue, I crocheted:
- Four single crochets, one increase (five times). To finish the round, I made two additional single crochets.
- Five single crochets, one increase (six times).
- Three single crochets, one increase (six times). Then, one single crochet, one increase (five times), and to finish, three single crochets.
- Seven single crochets, one increase (six times).
- Four single crochets, one increase. Then, a sequence of eight single crochets, one increase (five times), and to finish, four single crochets.
Next, in the following round, I made five slip stitches. From this point, I started crocheting in a linear fashion, meaning turning the work at the end of each row.
- In the next row, I made two chains, skipped one stitch, and worked an increase of half double crochets. Then, I made one chain, skipped two stitches, and repeated this step until the end of the row.
- In the following row, I made two chains and an increase of half double crochets separated by a chain, repeating this throughout the entire row.
- In the next row, I crocheted only double crochets.
- Then, I worked the sequence of one double crochet, two increases of double crochets.
- In the last row, I crocheted only increases of double crochets to finish the piece.
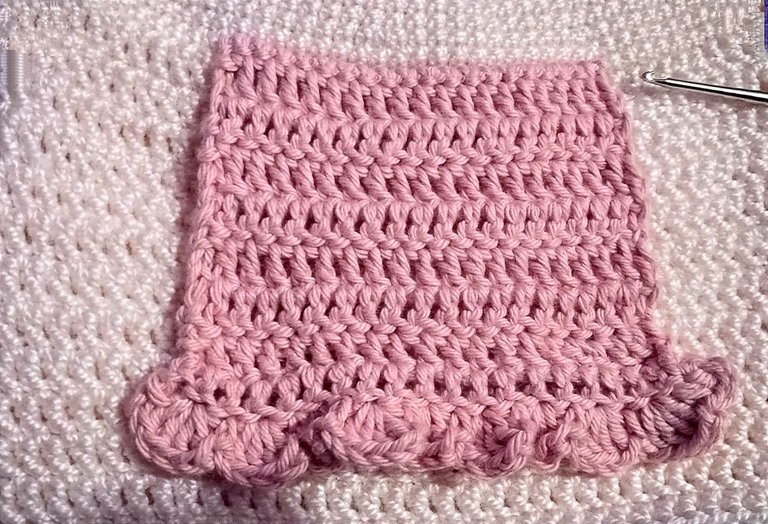
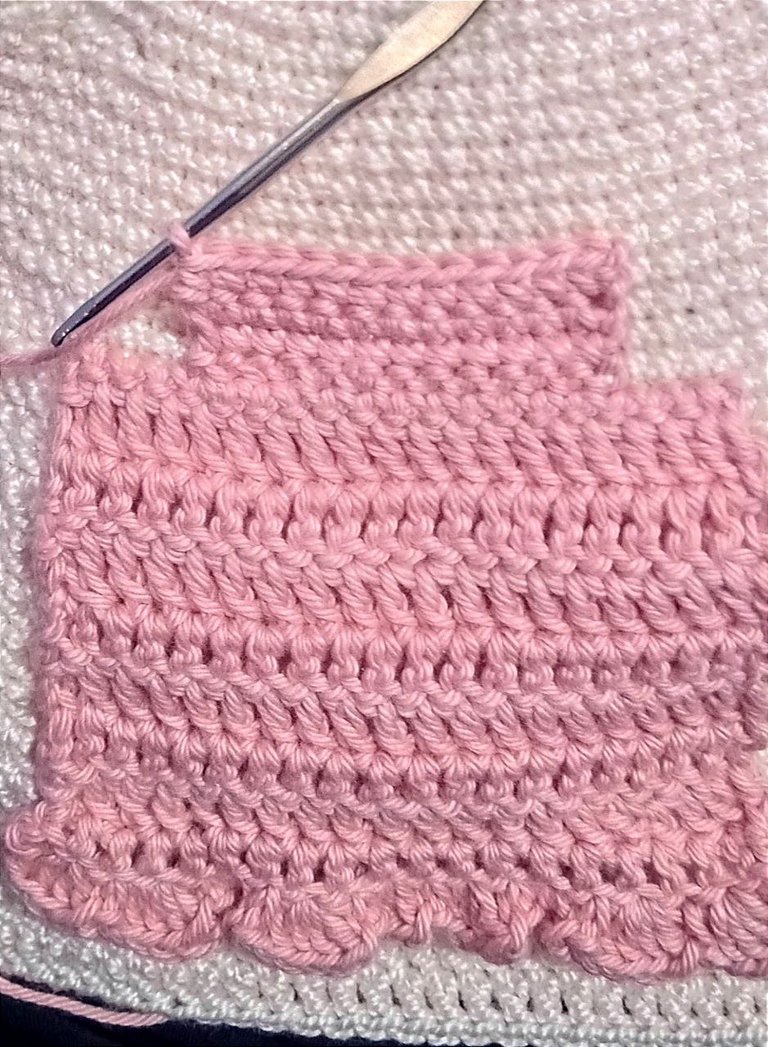
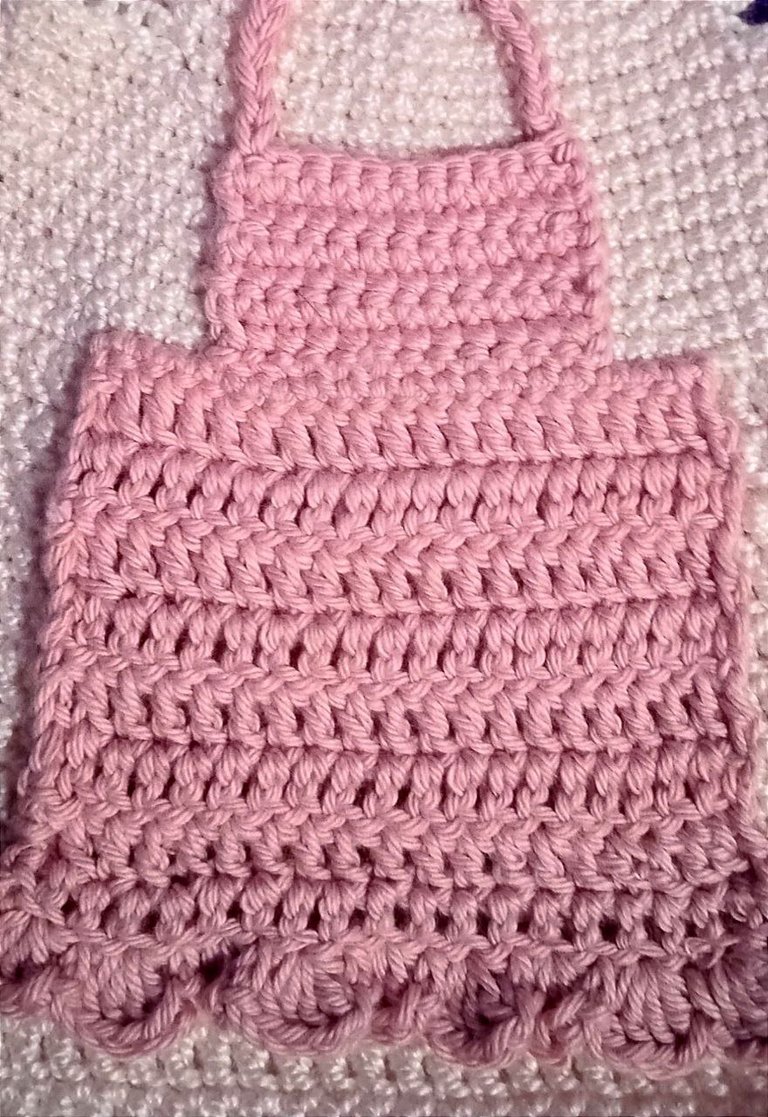
Vestido/ Dress
|
|
|
|
|
|
|
|
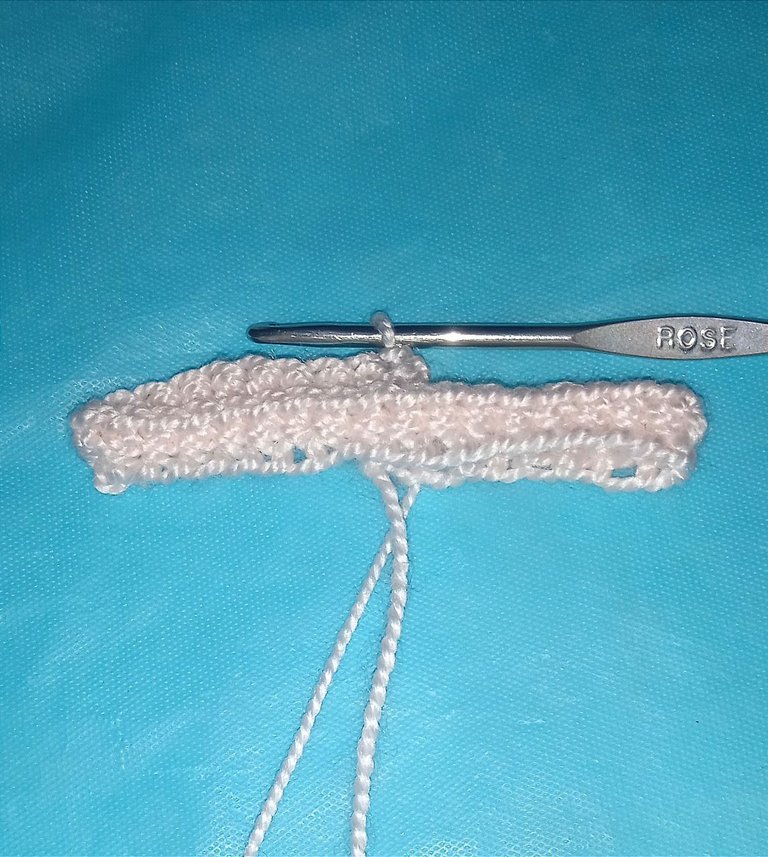
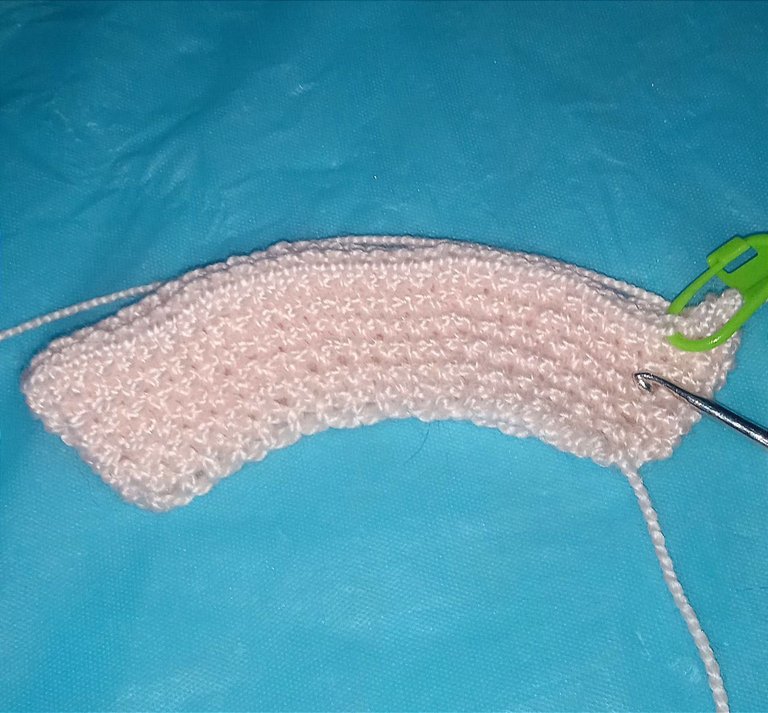
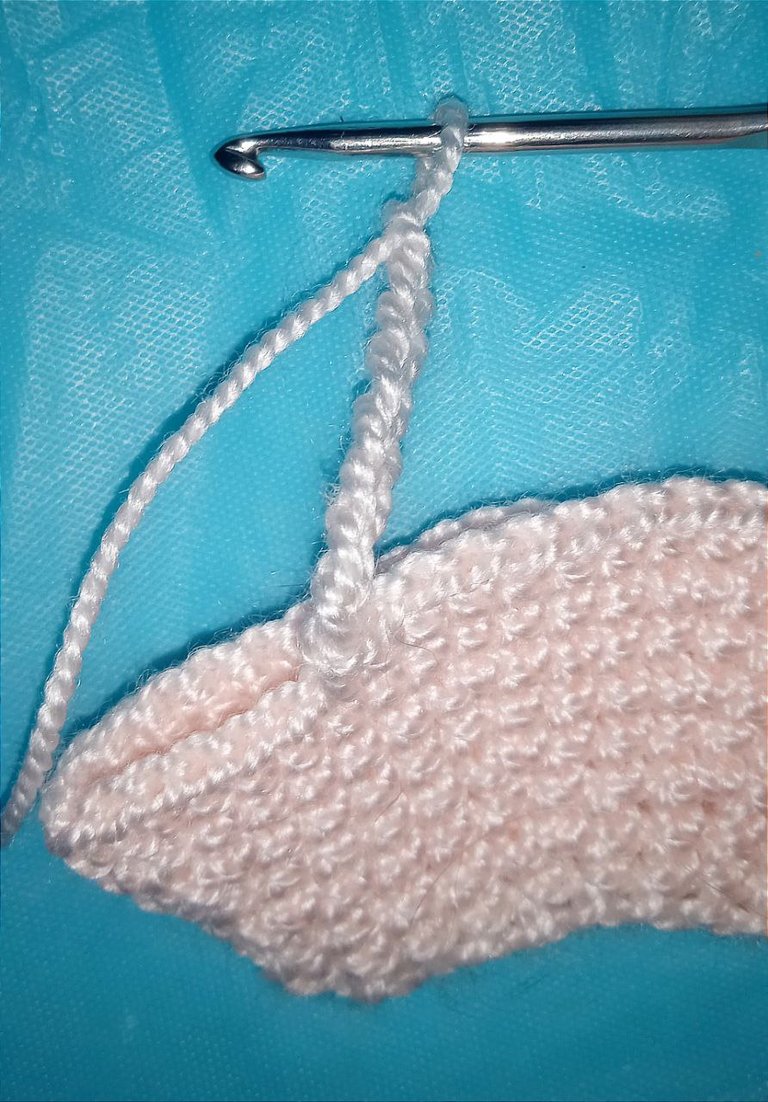
Con el color rosa, comencé tejiendo 36 cadenas y las uní para formar un círculo, que debe quedar recto, como si fuera una pulsera. Luego, empecé a tejer en espiral.
Tejí la siguiente secuencia:
- 5 puntos bajos, un aumento.
- Luego, 3 puntos bajos, un aumento.
- Después, una secuencia de 6 puntos bajos, un aumento (esto lo repetí 5 veces) y terminé con 3 puntos bajos.
Luego, hice la siguiente secuencia:
- 7 puntos bajos, un aumento (lo repetí 6 veces).
En la siguiente vuelta, hice:
- 4 puntos bajos, un aumento, y una secuencia de 8 puntos bajos, un aumento (lo repetí 5 veces) para terminar con 4 puntos bajos.
En la siguiente vuelta:
- 9 puntos bajos, un aumento (lo repetí 6 veces).
Después, hice:
- 5 puntos bajos, un aumento, y una secuencia de 10 puntos bajos, un aumento (lo repetí 5 veces) para terminar con 5 puntos bajos.
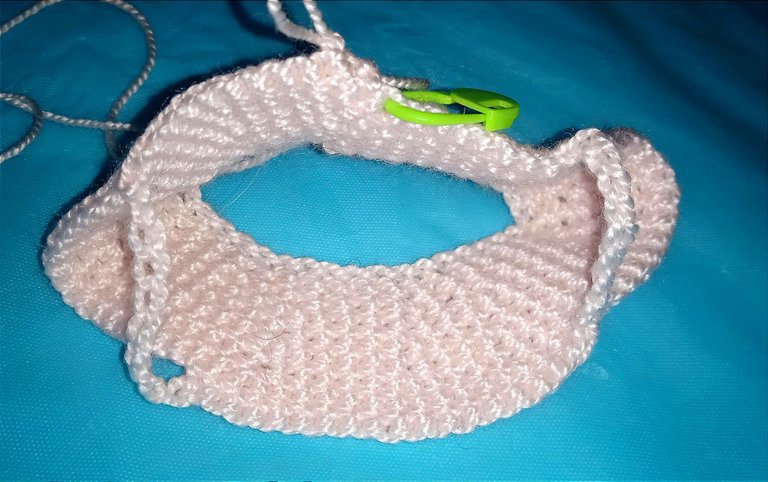
A continuación, hice 9 puntos deslizados, luego me salté 17 puntos bajos y tejí 9 cadenas. Después, hice 19 puntos deslizados, me salté 17 puntos bajos nuevamente y tejí 9 cadenas. Finalmente, hice 10 puntos deslizados.
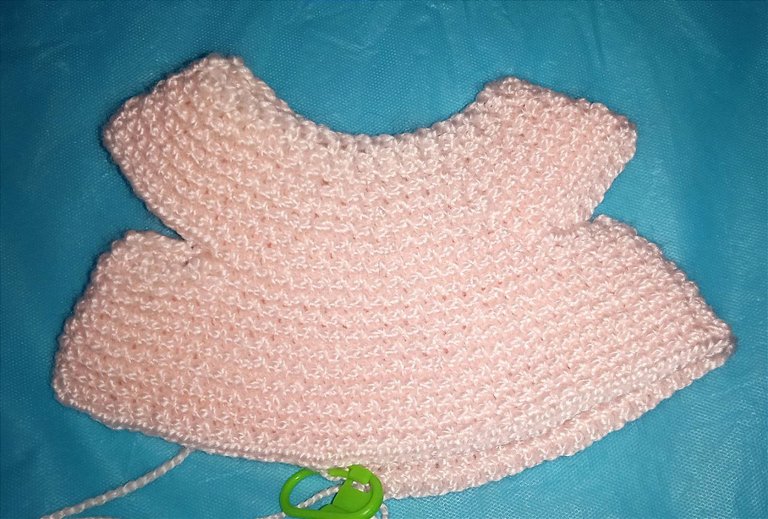
En las siguientes 4 vueltas, tejí solo puntos bajos, formando así el canesú del vestido.
Continué con la secuencia de 7 puntos bajos, un aumento, repitiéndola 6 veces. Luego, hice dos vueltas de solo puntos bajos.
En la siguiente vuelta, tejí solo puntos bajos, pero tomando la hebra trasera. Desde aquí en adelante, toda la vuelta fue de puntos altos hasta alcanzar el largo deseado para el vestido. Corté la hebra y cerré.
Ahora, tomé el color rosa y, en la parte del vestido donde comencé a tejer los puntos altos, dejé las hebras delanteras. Ahí empecé a tejer puntos altos para crear el delantal. Hice varias vueltas de puntos altos, girando la labor. En la parte final, hice dos aumentos de puntos altos, una cadena, y repetí los aumentos de puntos altos en toda la vuelta, creando una especie de onda. Corté la hebra y cerré.
Para la parte de arriba, tomé nuevamente el hilo rosa, me salté 4 puntos y comencé a tejer puntos medios altos, pero no llegué hasta el final porque dejé también 4 puntos. Continué con varias vueltas hasta que consideré que tenía el largo deseado. Corté la hebra.
Por último, tomé el hilo rosa y en las esquinas, hice 10 cadenas en cada esquina, para simular los cordones que se atan en los delantales.
Y listo.
With the pink color, I started by making 36 chains and joining them to form a circle, which should remain straight, like a bracelet. Then, I began crocheting in a spiral.
I crocheted the following sequence:
- 5 single crochet stitches, one increase.
- Then, 3 single crochet stitches, one increase.
- Next, a sequence of 6 single crochet stitches, one increase (I repeated this 5 times) and finished with 3 single crochet stitches.
Then, I made the following sequence:
- 7 single crochet stitches, one increase (I repeated this 6 times).
On the next round, I made:
- 4 single crochet stitches, one increase, and a sequence of 8 single crochet stitches, one increase (I repeated this 5 times) and finished with 4 single crochet stitches.
On the next round:
- 9 single crochet stitches, one increase (I repeated this 6 times).
Then, I made:
- 5 single crochet stitches, one increase, and a sequence of 10 single crochet stitches, one increase (I repeated this 5 times) and finished with 5 single crochet stitches.
Next, I made 9 slip stitches, then skipped 17 single crochet stitches and made 9 chains. After that, I made 19 slip stitches, skipped 17 single crochet stitches again, and made 9 chains. Finally, I made 10 slip stitches.
In the next 4 rounds, I crocheted only single crochet stitches, thus forming the bodice of the dress.
I continued with the sequence of 7 single crochet stitches, one increase, repeating it 6 times. Then, I made two rounds of only single crochet stitches.
On the next round, I crocheted only single crochet stitches, but using the back loop only. From then on, the entire round was crocheted with double crochet stitches until I reached the desired length for the dress. I cut the yarn and closed.
Now, I took the pink color and, on the part of the dress where I began crocheting the double crochets, I left the front loops. There I began crocheting double crochets to create the apron. I made several rows of double crochets, turning the work. On the final section, I made two double crochet increases, a chain, and repeated the double crochet increases around the entire row, creating a sort of wave. I cut the yarn and cast off.
For the top part, I took the pink yarn again, skipped 4 stitches, and began crocheting half double crochet stitches, but I did not go all the way to the end because I left 4 stitches. I continued for several rounds until I considered I had reached the desired length. I cut the yarn.
Finally, I took the pink yarn and in the corners, I made 10 chains in each corner to simulate the ties of the apron.
And that’s it.
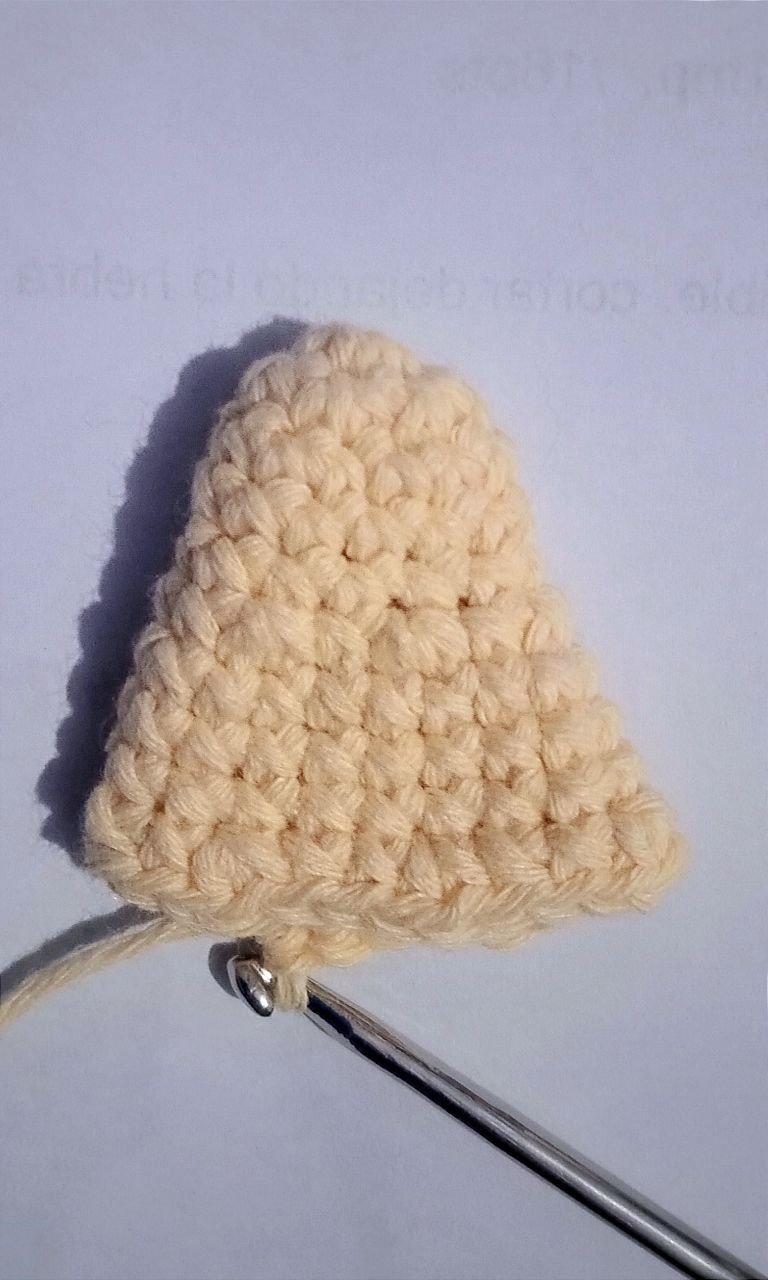
Orejas/ Ears
|
|
- Comencé con el color amarillo e hice un anillo mágico con seis puntos.
- Luego, tejí solo puntos bajos.
- En la siguiente vuelta, hice una secuencia de un punto bajo y un aumento.
- Tejí solo puntos bajos nuevamente.
- Hice una secuencia de dos puntos bajos y un aumento.
- En la siguiente vuelta, hice una secuencia de tres puntos bajos y un aumento.
- Tejí solo puntos bajos.
- Luego, hice una secuencia de cuatro puntos bajos y un aumento.
- Continué tejiendo solo puntos bajos hasta obtener el largo deseado para las orejas.
- Comencé con las disminuciones, haciendo una secuencia de cuatro puntos bajos y una disminución.
- Luego, tejí solo puntos bajos nuevamente.
- Hice una secuencia de tres puntos bajos y una disminución.
- Tejí solo puntos bajos.
- Hice una secuencia de dos puntos bajos y una disminución.
- En la siguiente vuelta, hice solo puntos bajos.
- Luego, hice una secuencia de un punto bajo y una disminución.
- Tejí solo puntos bajos.
- Para terminar, hice solo disminuciones.
- En la última vuelta, tejí solo puntos bajos.
- I started with yellow yarn and made a magic ring with six stitches.
- Then, I crocheted only single crochets.
- On the next round, I did a sequence of one single crochet and one increase.
- I crocheted only single crochets again.
- I made a sequence of two single crochets and one increase.
- On the next round, I made a sequence of three single crochets and one increase.
- I crocheted only single crochets.
- Then, I made a sequence of four single crochets and one increase.
- I continued crocheting only single crochets until I reached the desired length for the ears.
- I started with the decreases, making a sequence of four single crochets and one decrease.
- Then, I crocheted only single crochets again.
- I made a sequence of three single crochets and one decrease.
- I crocheted only single crochets.
- I made a sequence of two single crochets and one decrease.
- On the next round, I crocheted only single crochets.
- Then, I made a sequence of one single crochet and one decrease.
- I crocheted only single crochets.
- To finish, I made only decreases.
- On the last round, I crocheted only single crochets.
coser y bordar/ sew and embroider
|
|
|
|
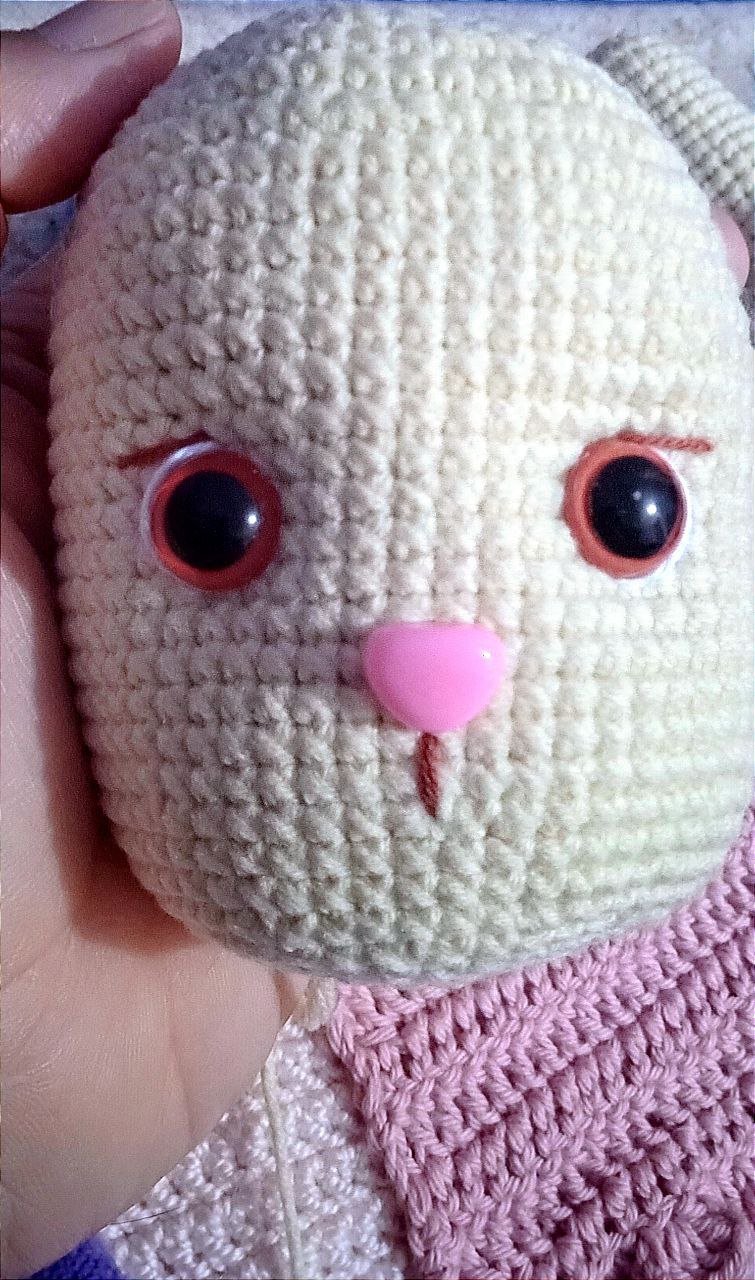
Ahora solo me queda coser todas las partes y agregar algunos detalles. Por ejemplo, en el bordado, hice algunas sombras con color blanco en los ojitos, y añadí una pequeña línea de color café justo arriba de cada ojo. También, en la nariz, hice una pequeña línea.
A mí no me gusta poner bocas a los amigurumis porque, según la historia detrás de ellos, no deberían tenerlas. La idea es que cuando uno adquiere un amigurumi, le cuenta sus secretos, pero como no tienen boca, no pueden revelar nada. Por eso, no les hago bocas.
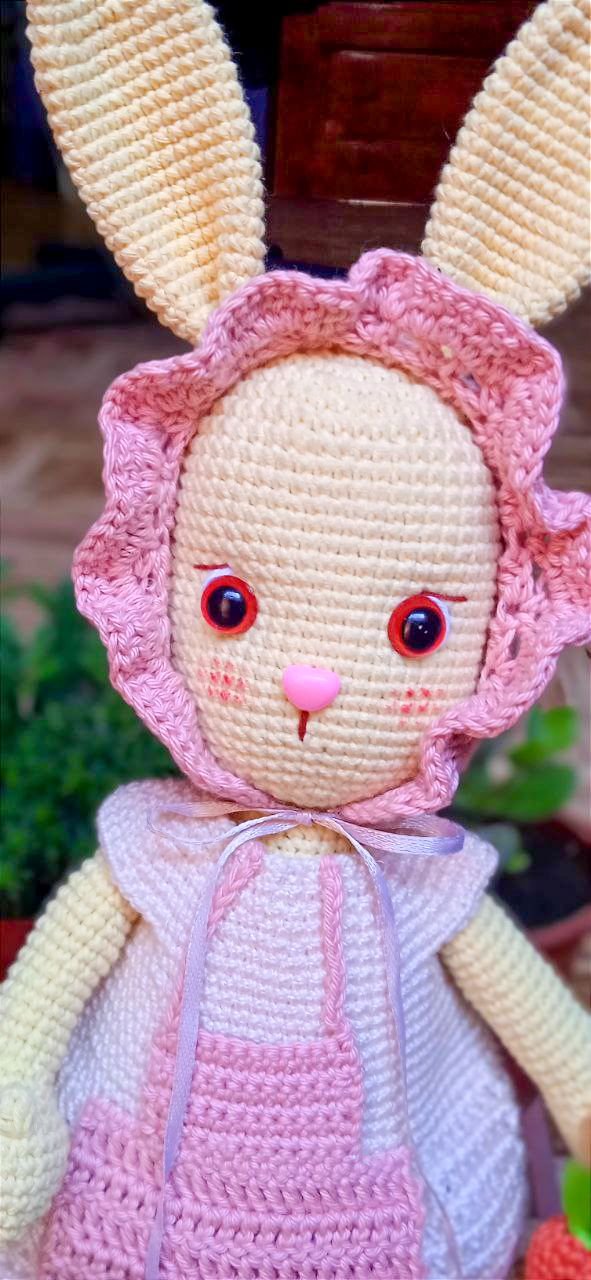
Lo que sí hice fue agregar rubor en las mejillas, y además, tenía un canastito con algunas verduras que había hecho en un proyecto anterior. Como sé que a los conejos les encantan las zanahorias y la lechuga, decidí ponerle ese canastito a la conejita. Tal vez más adelante les muestre un tutorial de cómo hice ese canastito con la zanahoria y la lechuga.
Now I just need to sew all the parts together and add some details. For example, in the embroidery, I made some shadows with white thread on the eyes and added a small brown line just above each eye. I also made a small line on the nose.
I don't like to add mouths to amigurumis because, according to the story behind them, they shouldn't have them. The idea is that when you get an amigurumi, you tell it your secrets, but since it doesn't have a mouth, it can't reveal anything. That's why I don't make mouths on them.
What I did add was blush on the cheeks, and I also had a little basket with some vegetables that I had made in a previous project. Since I know rabbits love carrots and lettuce, I decided to give the bunny that basket. Maybe I'll show you a tutorial later on how I made that basket with the carrot and lettuce.
Resultado/ Result
|
|

|
|
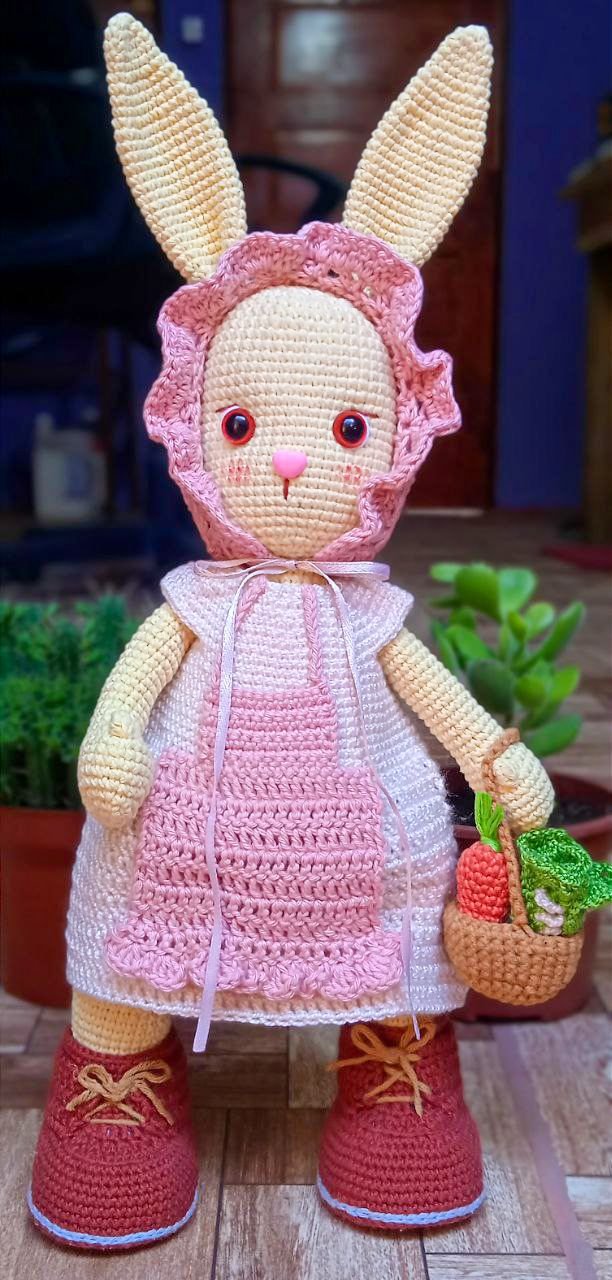
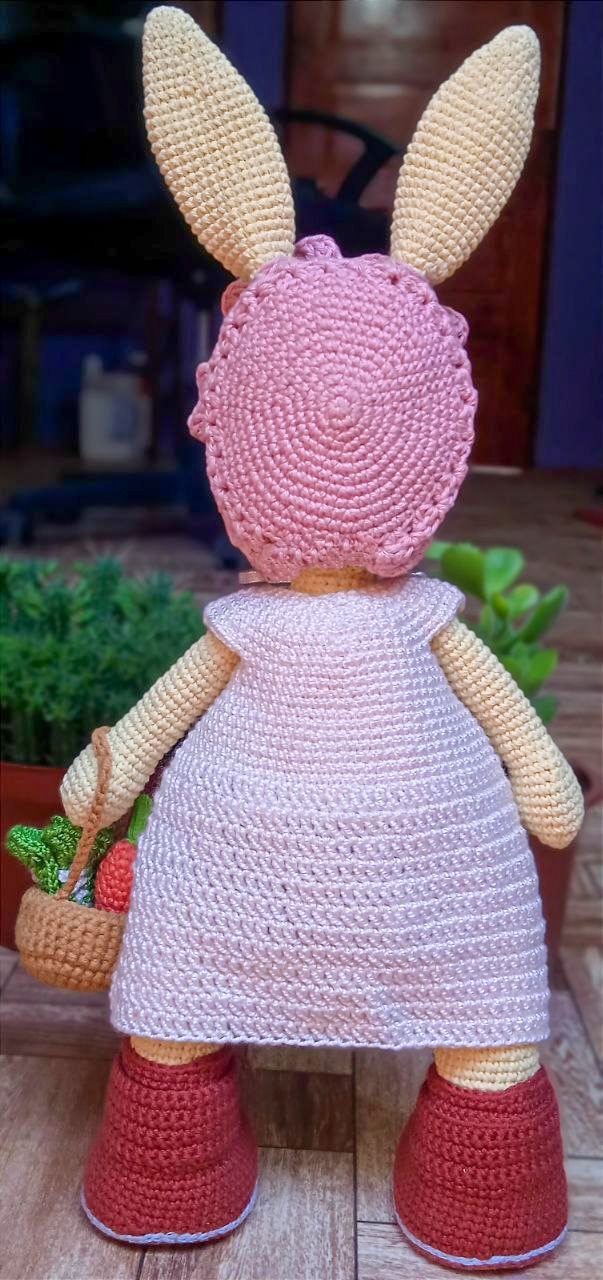
Sé que este tutorial es un poco extenso, pero el proyecto en sí fue bastante detallado y complejo en comparación con otros amigurumis que he creado. Por eso, el tutorial tiene una explicación más extensa. Pero bueno, así es como lo hice. Me encantó tejer está conejita, me divertí mucho durante el proceso. Aunque debo admitir que escribir el tutorial me ha cansado 🥱😅. ¡Quedó preciosa la conejita! Nunca había hecho un amigurumi con tanto detalle, y ahora estoy más motivada que nunca a seguir aprendiendo. Estoy tomando un curso y quiero mejorar mis habilidades para crear aún más proyectos hermosos 🥰.
Espero que mi gatito siga mejorando y así podré tener más tiempo para crear proyectos, porque la verdad es que cuando el está enfermo yo pierdo las ganas de todo.
Gracias a los que visitaron este post...
I know this tutorial is a bit long, but the project itself was quite detailed and complex compared to other amigurumis I've created. That's why the tutorial has a longer explanation. But anyway, this is how I did it. I loved knitting this bunny; I had so much fun during the process. Although I must admit that writing the tutorial was tiring 🥱😅. The bunny turned out beautiful! I've never made an amigurumi with such detail, and now I'm more motivated than ever to keep learning. I'm taking a course and want to improve my skills to create even more beautiful projects 🥰. I hope my kitten continues to improve so I can have more time to create projects, because the truth is that when he's sick, I lose my desire to do anything. Thanks to those who visited this post.

WOW, te quedó preciosa la adoré, el nivel de detalle es impresionante y el proceso largo pero bien explicado. Además, que tiene un buen tamaño, yo estoy viendo tutoriales para aprender porque me encantan como quedan los amigurumis, tan bellos.
Yo comencé haciendo amigurumis básicos, y después poco a poco fui haciendo otros más complicados. De esa manera se aprende a dar las formas de los cuerpos de los amigurumis.
Suerte con tu aprendizaje y muchas gracias por visitarme 🤗
Que bonito trabajo, se ve que te gusta las manualidades porque explicaste detalladamente el proceso de tu creación, te felicito, saludos.
Something I have always admired is the people who work with Crochet, you can make a lot of things and very beautiful if you practice a lot. You can tell it has been a special project because you have poured all your love into it.
I send you my best wishes for your pet, I understand what it is to be worried about a furry companion.
¡Felicidades! Esta publicación obtuvo upvote y fue compartido por @la-colmena, un proyecto de Curación Manual para la comunidad hispana de Hive que cuenta con el respaldo de @curie.
Si te gusta el trabajo que hacemos, te invitamos a darle tu voto a este comentario y a votar como testigo por La Colmena.
Si quieres saber más sobre nuestro proyecto, te invitamos a acompañarnos en nuestro servidor de Discord.
¡Enhorabuena!
✅ Has hecho un buen trabajo, por lo cual tu publicación ha sido valorada y ha recibido el apoyo de parte de CHESS BROTHERS ♔ 💪
♟ Te invitamos a usar nuestra etiqueta #chessbrothers y a que aprendas más sobre nosotros.
♟♟ También puedes contactarnos en nuestro servidor de Discord y promocionar allí tus publicaciones.
♟♟♟ Considera unirte a nuestro trail de curación para que trabajemos en equipo y recibas recompensas automáticamente.
♞♟ Echa un vistazo a nuestra cuenta @chessbrotherspro para que te informes sobre el proceso de curación llevado a diario por nuestro equipo.
🏅 Si quieres obtener ganancias con tu delegacion de HP y apoyar a nuestro proyecto, te invitamos a unirte al plan Master Investor. Aquí puedes aprender cómo hacerlo.
Cordialmente
El equipo de CHESS BROTHERS
Too beautiful
Amiga te felicito por este grandioso trabajo es bellísimo , quisiera aprender a tejer estas figuras . Muy bien explicado; por ejemplo para mi que tengo un nivel básico agradezco lo detallado del tutorial . Que bien que te sigas capacitando haciendo cursos tienes mucho talento 👏👏
Muchas gracias 😊