Tutorial to diagnose power supply failure in a computer / Tutorial diagnosticar falla en ordenador por fuente de alimentación
fuentes del contenido
Traducción deepl
regalo:
Logo facebook
logo instagram
Logotipo colmena
Logotipo zona de la semana
English
Hello friends of geek zone how are you I'm Daniel, my username is josuerr29 I come to you to share a repair content that came to my workshop recently.
In my workshop I am dedicated to the repair of phones and computers and this time I want to share the repair of a computer that arrived.
This computer has a fault, the customer brings the CPU because when you give the button to turn it on simply makes it will turn on hard, seconds sounding the fanCooler, half turns on the screen and instantly turns off. Sometimes it simply does not turn on the screen, but simply turns on without turning on the screen, starts to sound the fanCooler and then turns off.
Then the steps to check the computer, I did them very fast because this computer seemed to me already at last that the fault was the power supply.
So it provides the following things.
- First through the multimeter the short forest in the RAM memory.
- I also looked for shorts on the board.
- In addition to this, I checked the hard disk in another PC to make sure it was good.
- As there was no failure in these places, I had to simply disassemble the whole computer, clean it, service it and put it back together because maybe it could have excess static energy.
- But nothing continued with the same failure, so finally I gave myself the task of investigating and with more patience to analyze the power supply.
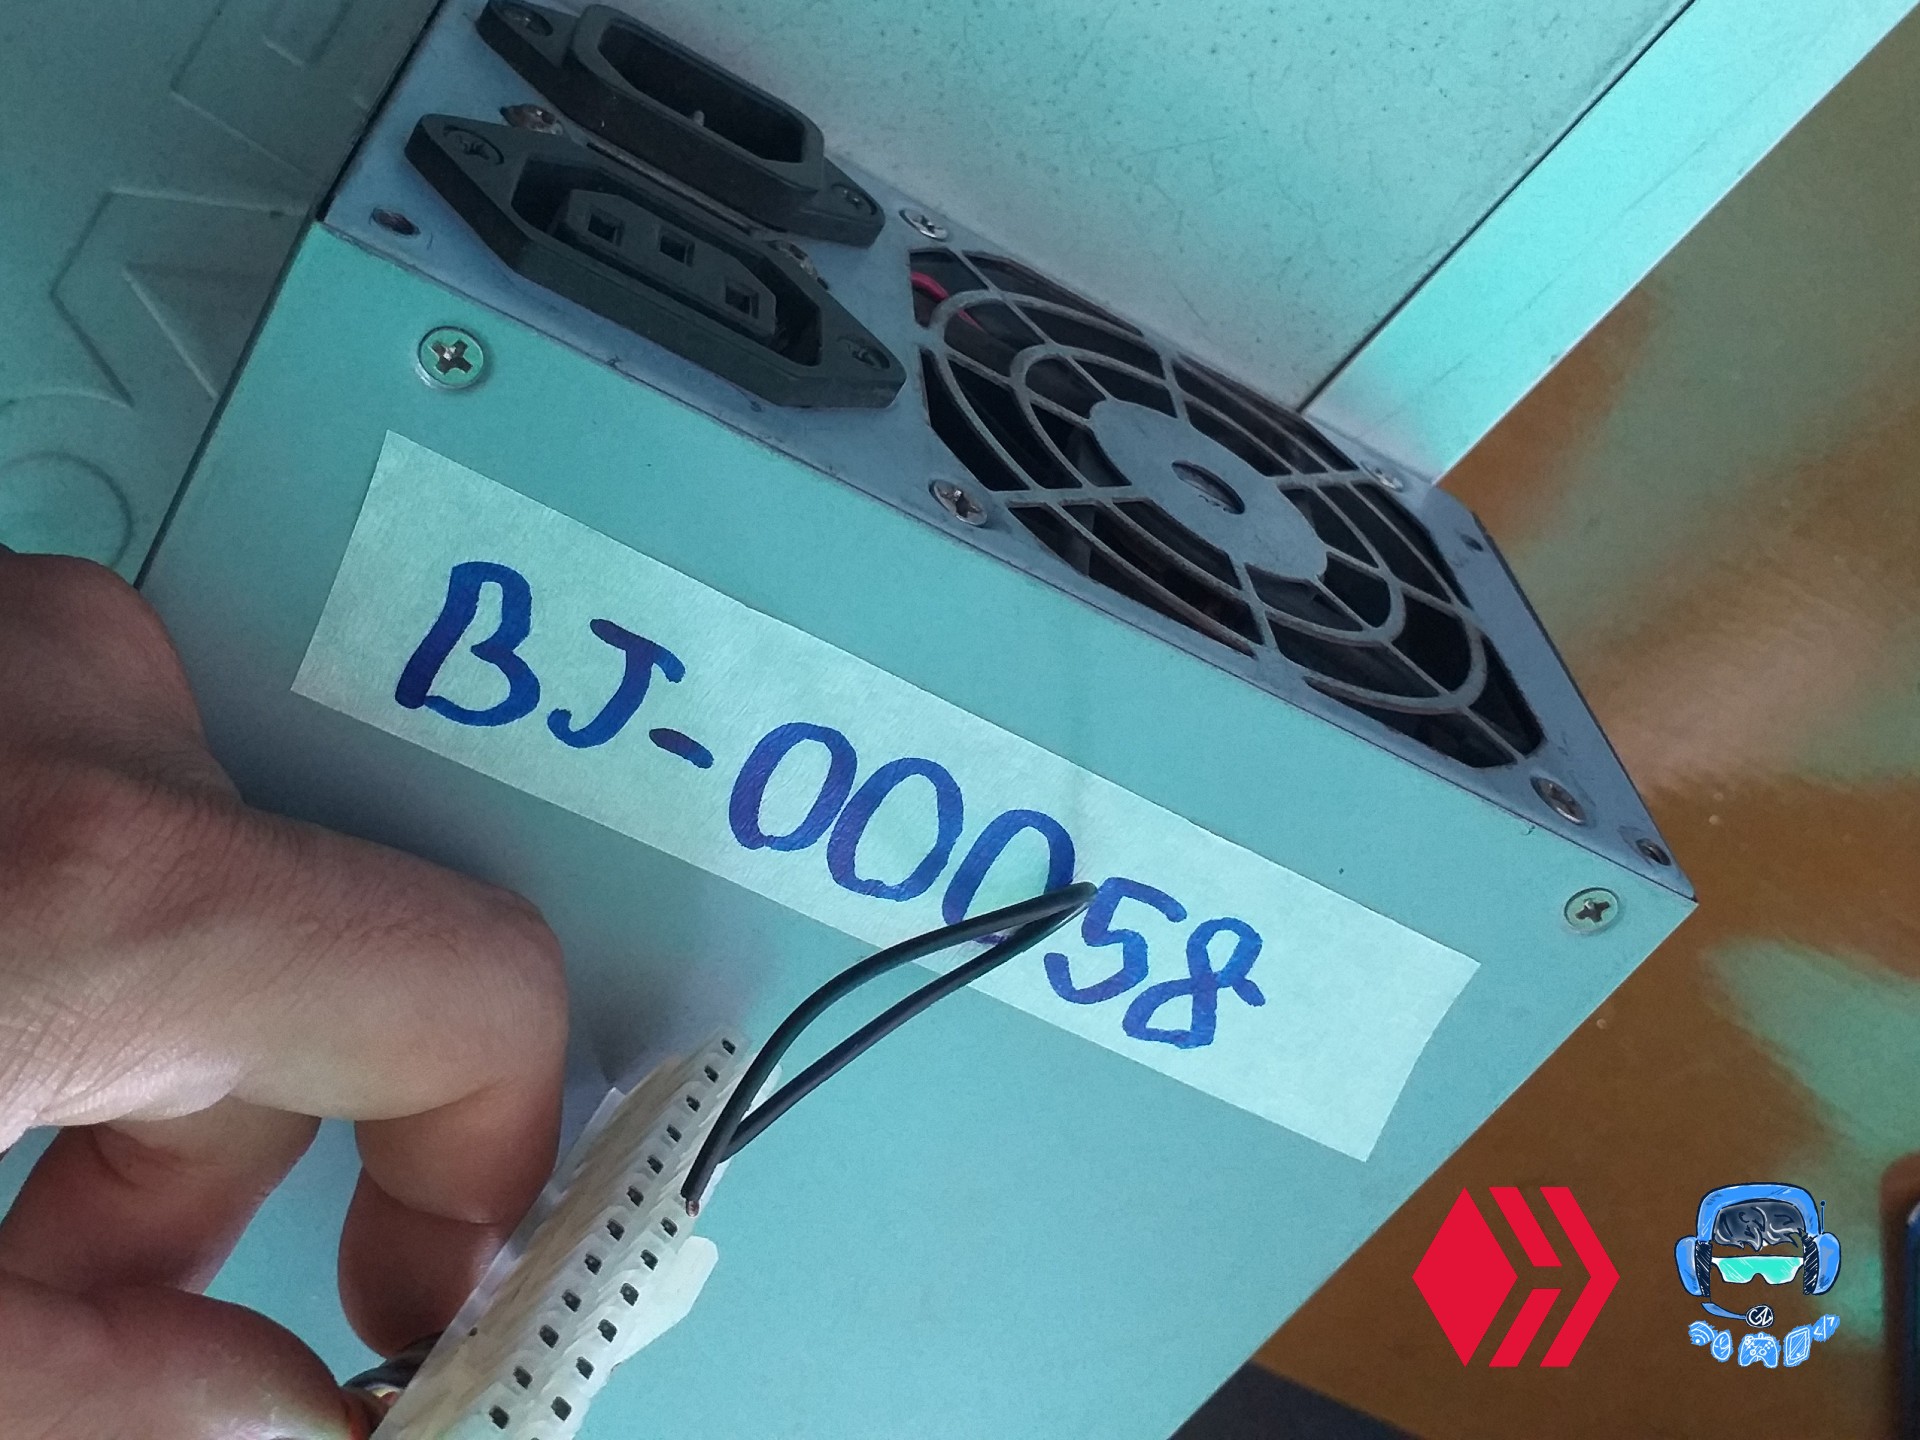
The model of this part was bj-00058 utech.
To diagnose the power supply is very easy, I will show you how to do it:
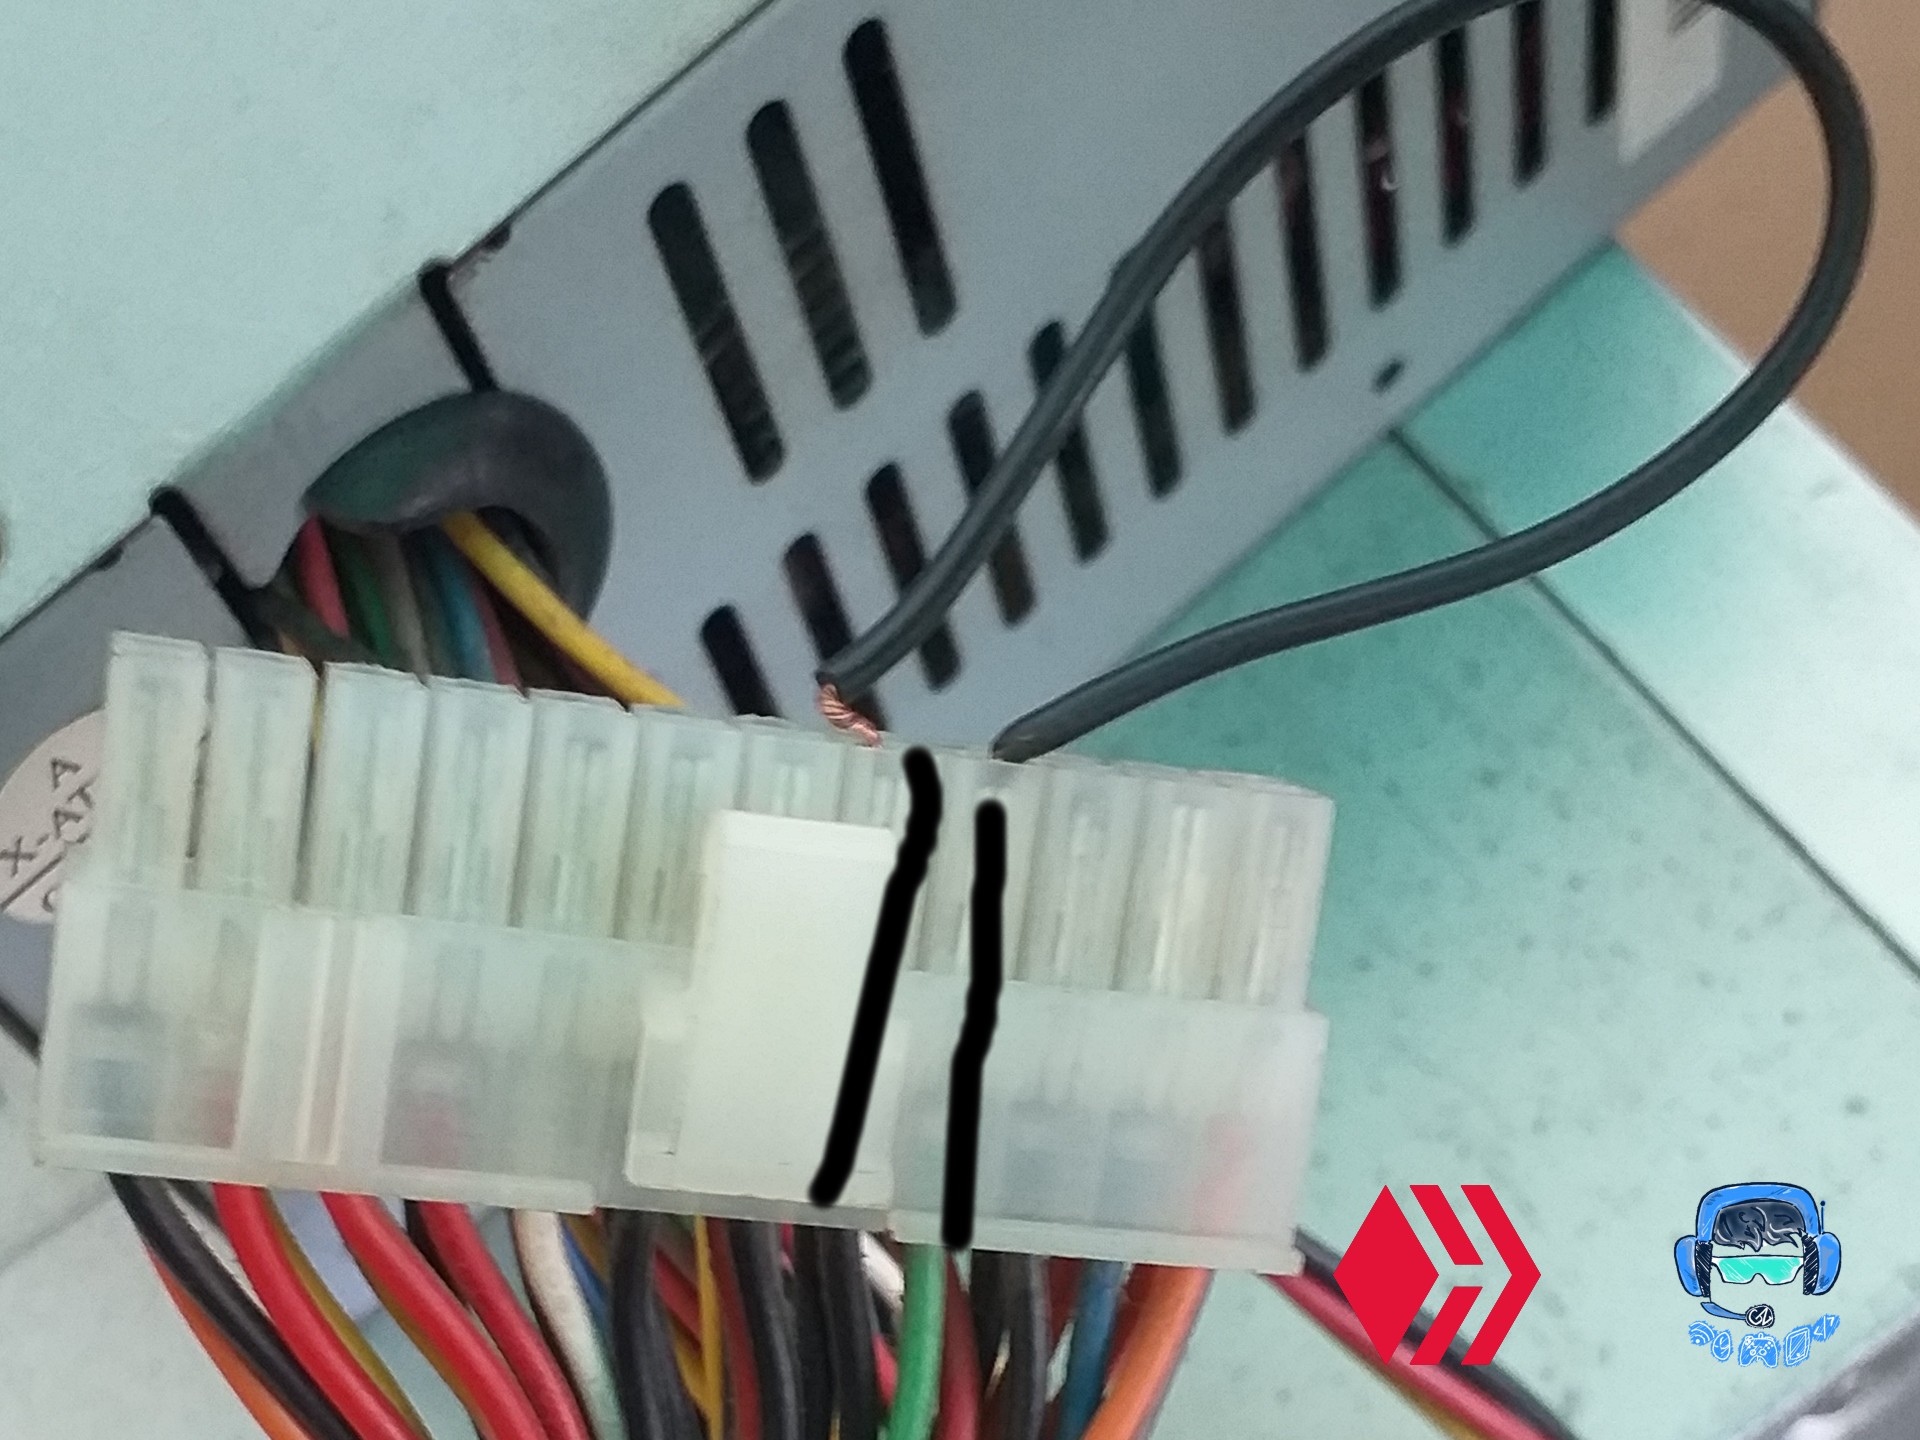
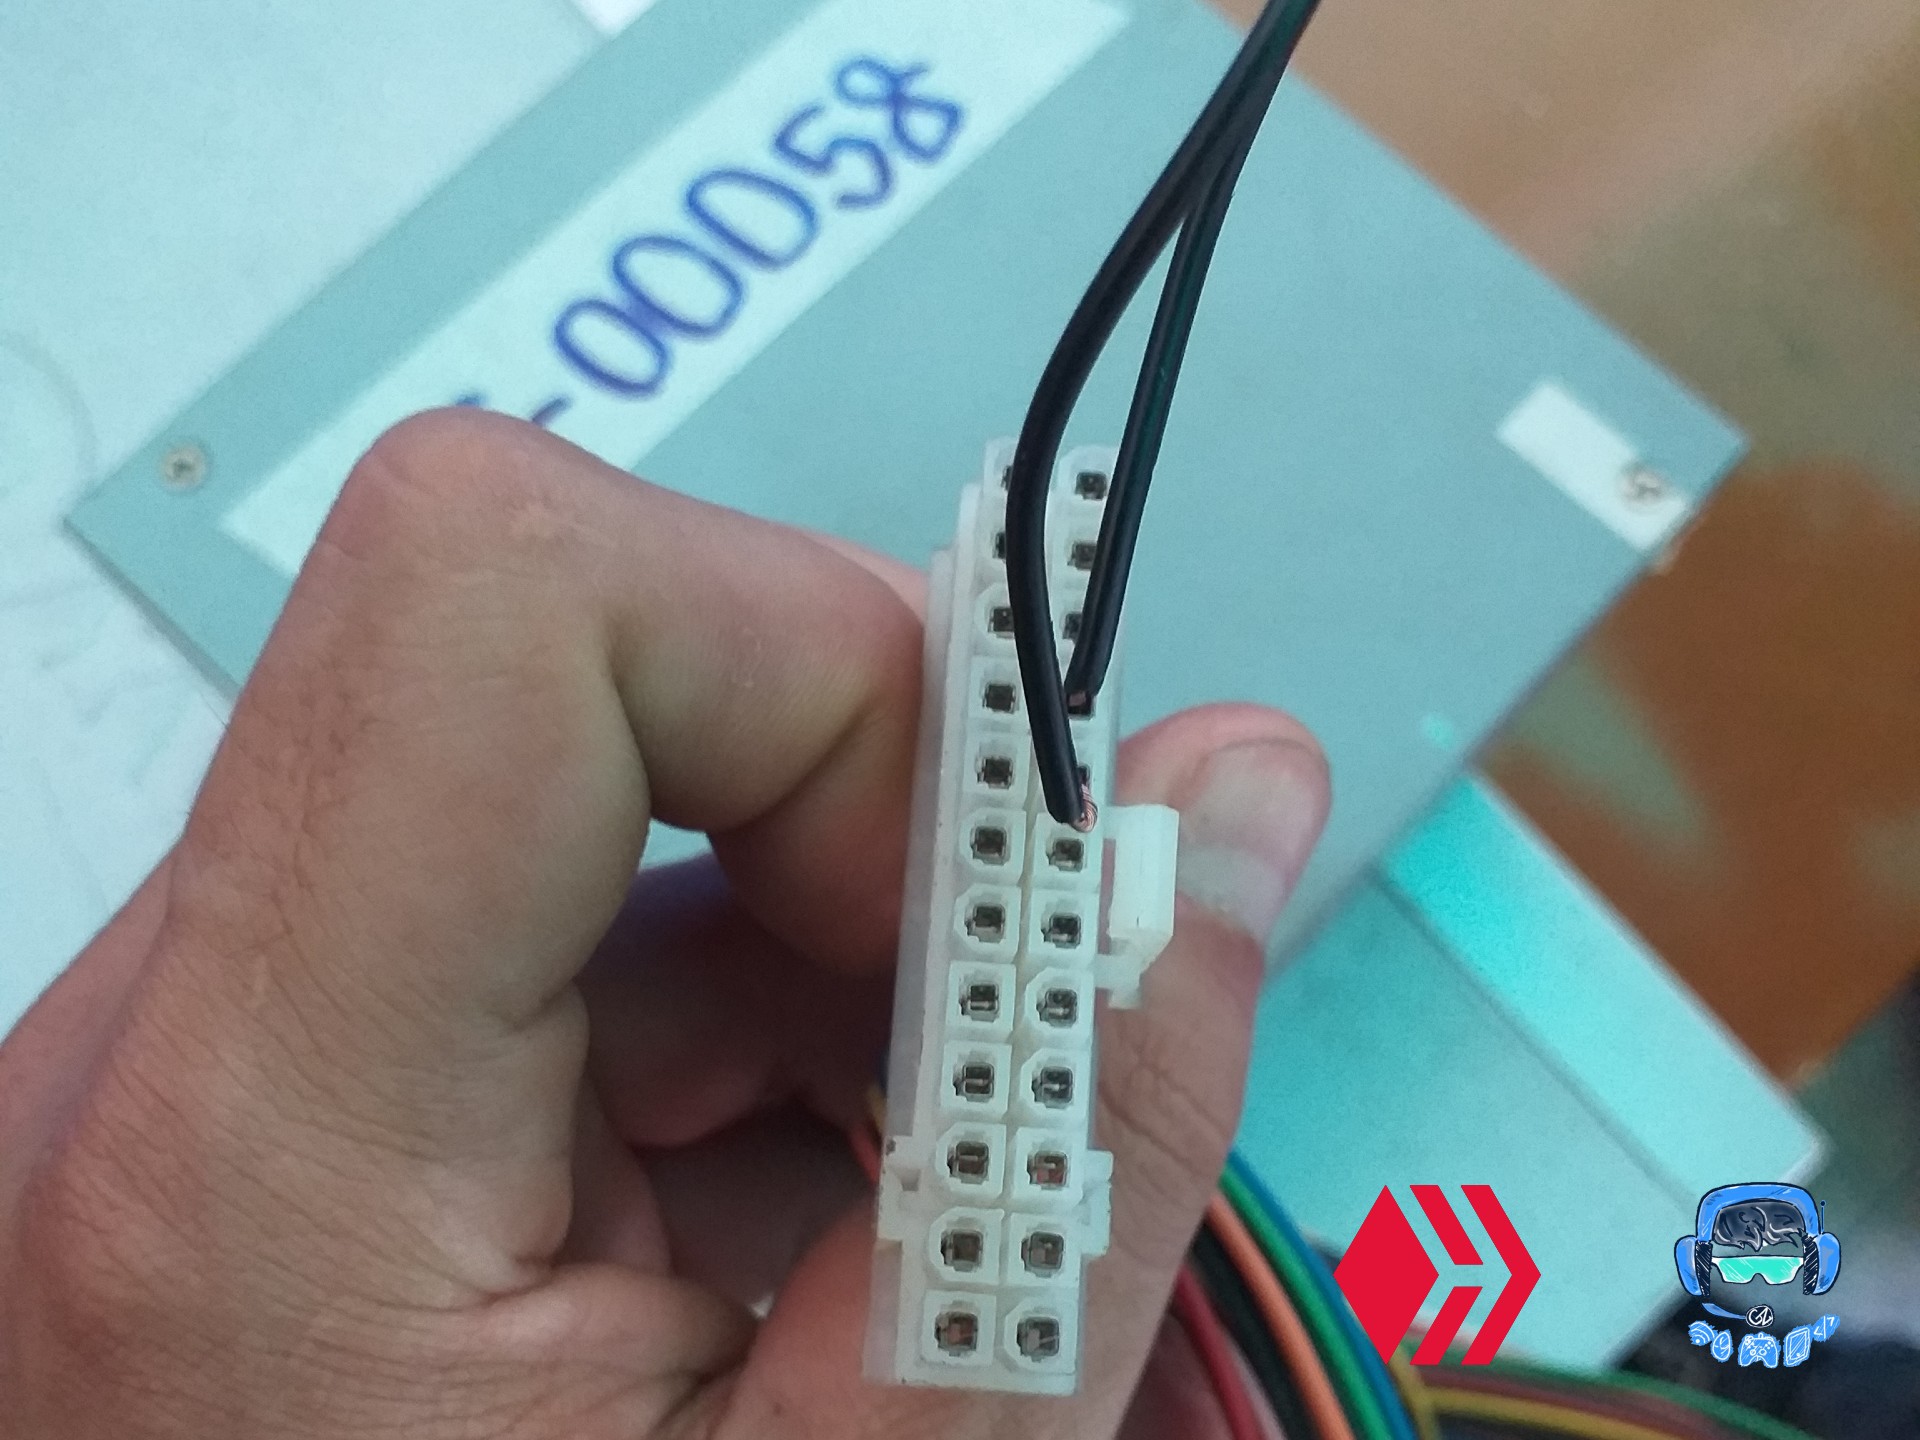
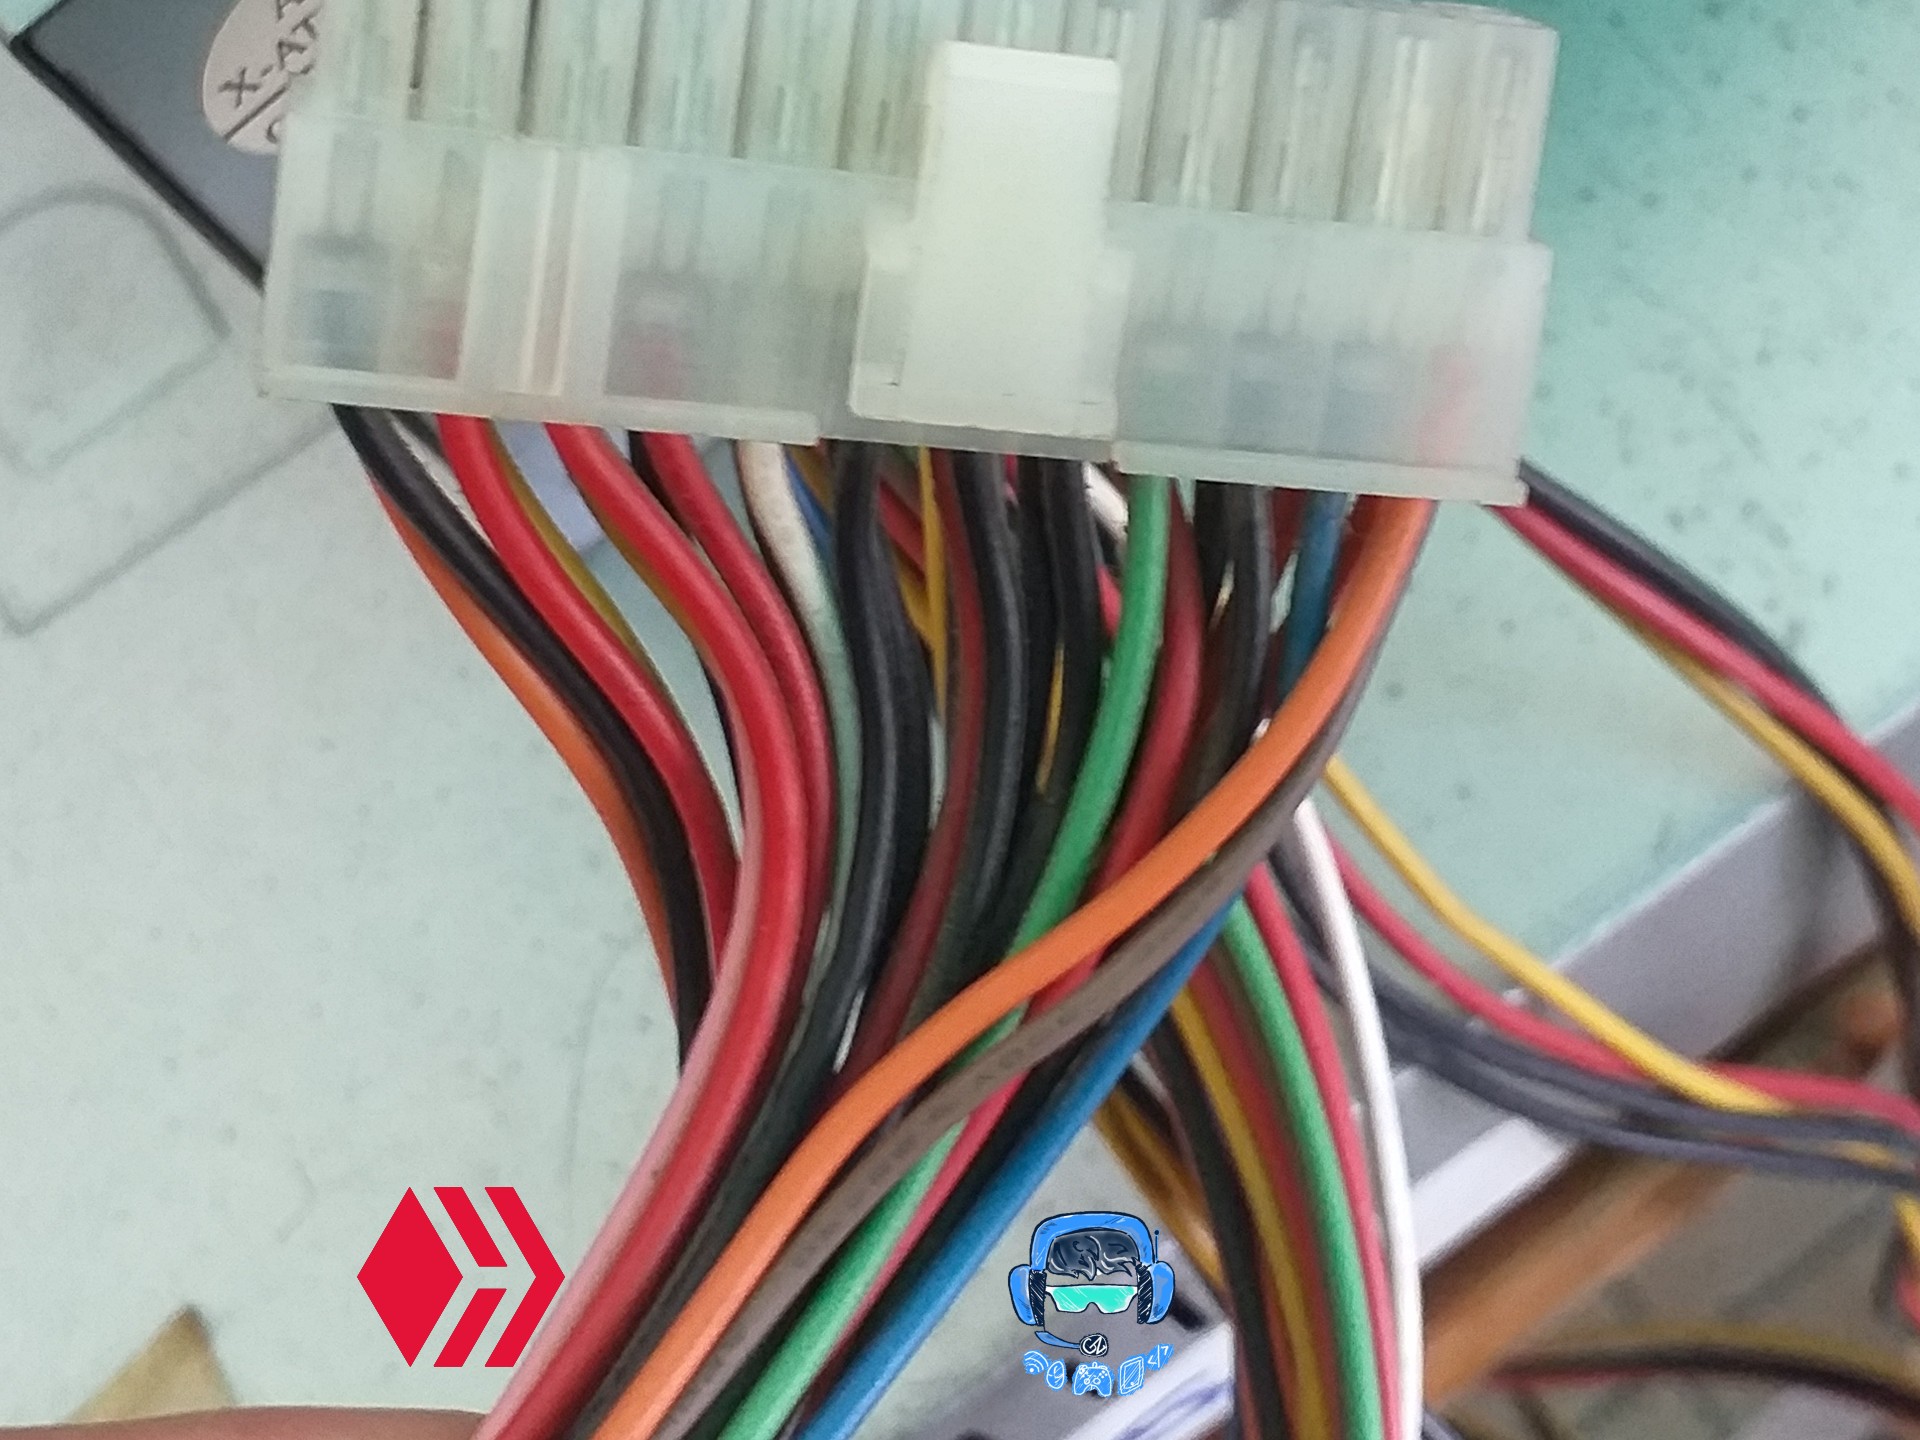
To start you must take the power supply and remove it from the computer, all when you remove its connector you will have to find the green wire of all its connectors and make a bridge between that wire and the black one, after this you will connect the power supply to a normal home power source this will make the power supply turn on. You will notice that if you remove the jumper you placed on its wires it will turn off, this is like a power switch.
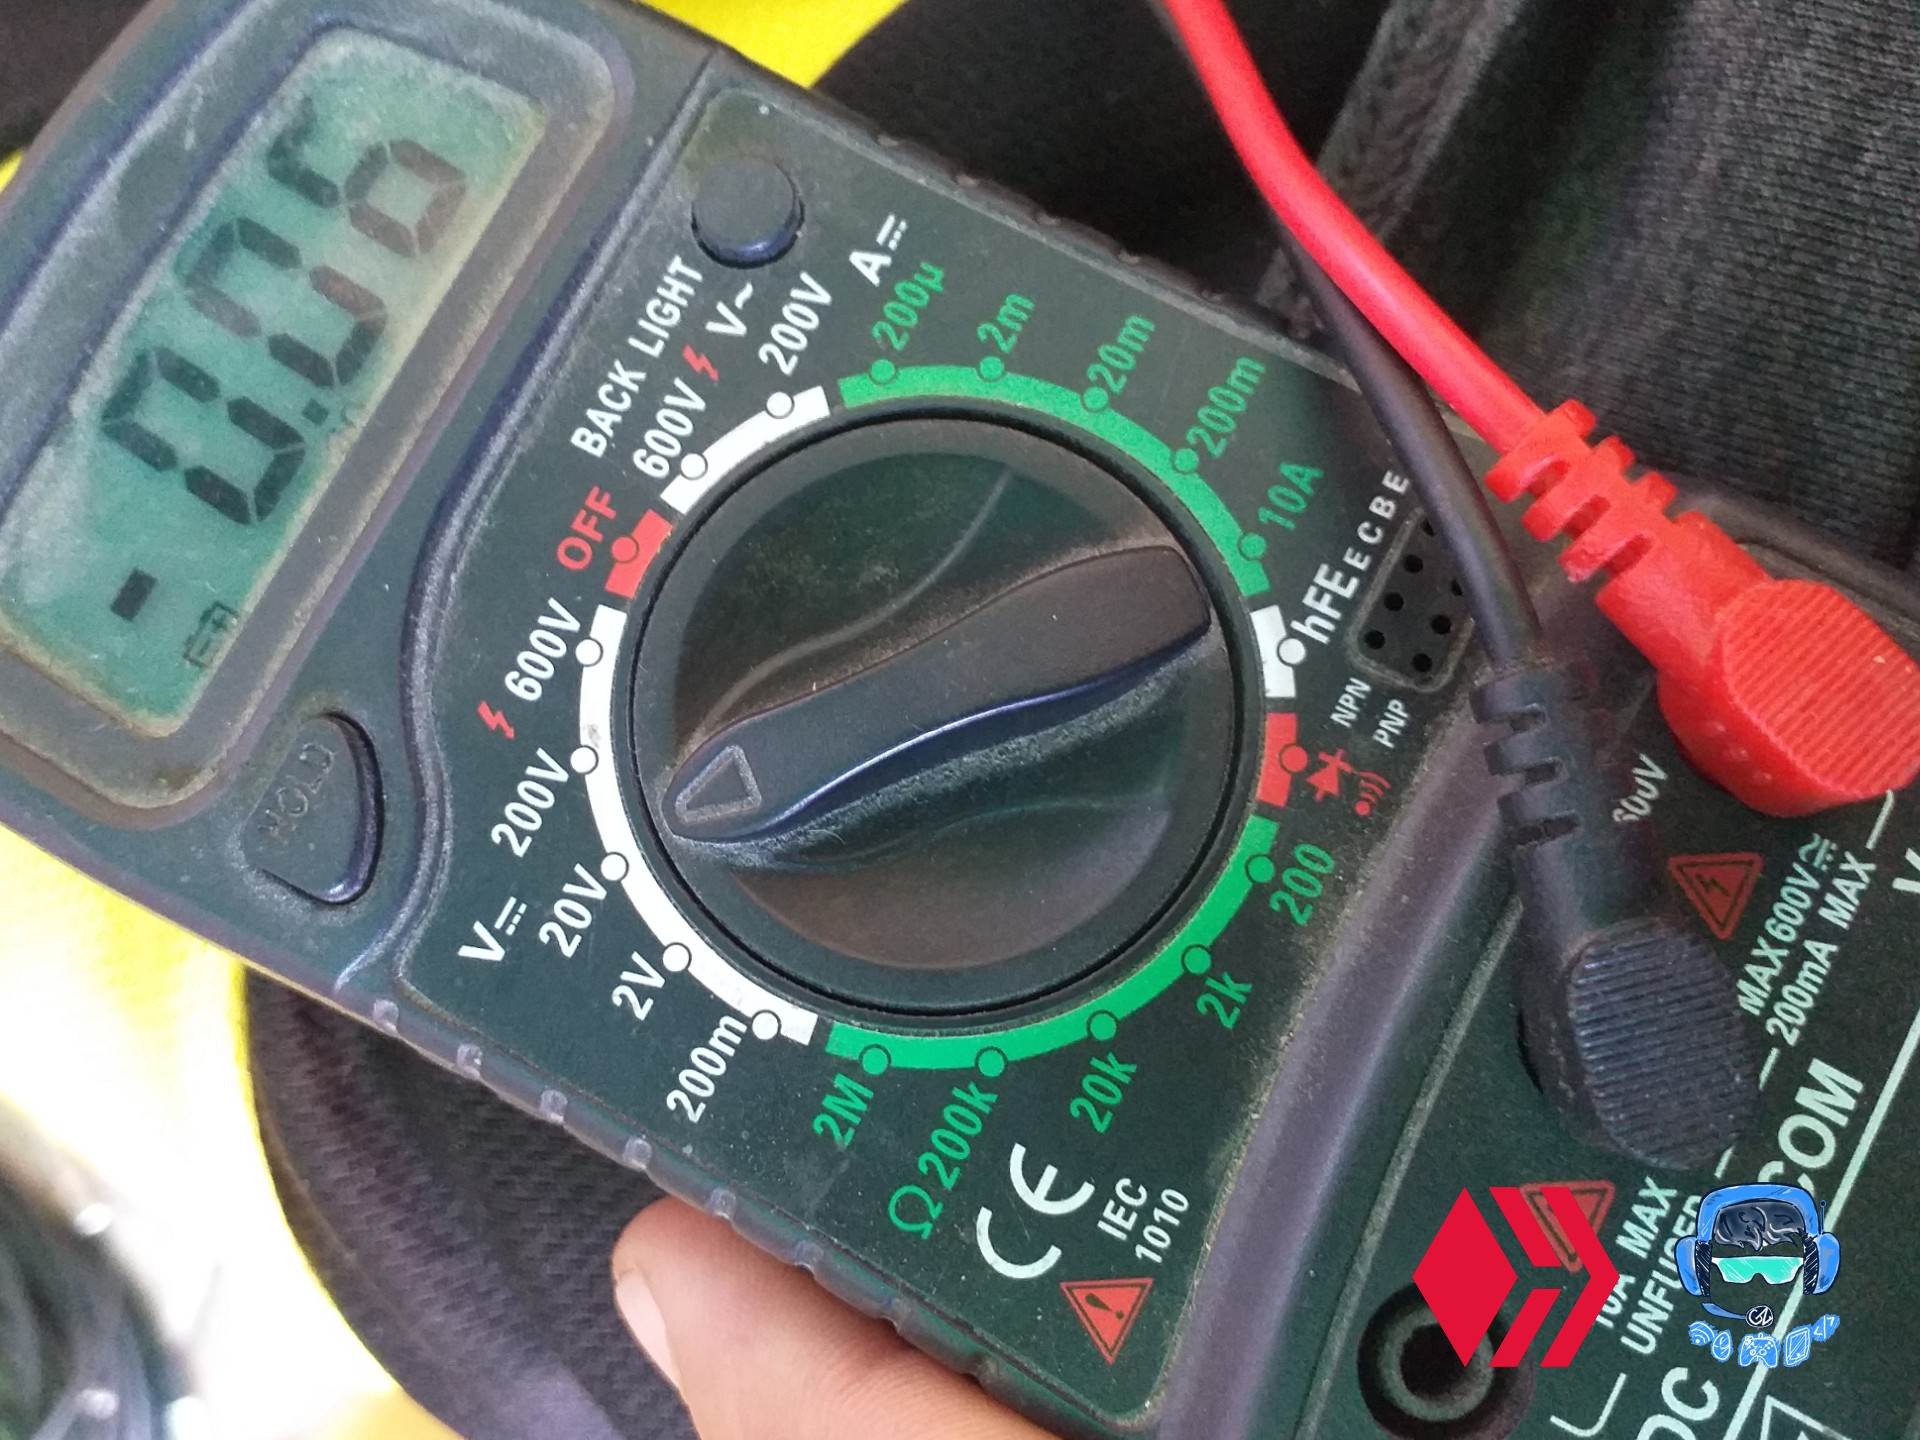
Now we are ready to make the correct analysis, we will take our multimeter and place it on the voltage scale having a maximum voltage of 20 volts, then we will place the negative side of our tester on a black wire of our power supply wires and with the positive wire we will start testing the voltages of each pin of this branch.
Next I will show you through an image the correct voltage of all these for its correct repair.
- Red 5 v
- Orange 3.3 v
- White none
- Blue 17 v
- Yellow 12 v
With the tester it should be these voltages that should be displayed. To my surprise the orange one was sending 6 volts almost double its original voltage, so here was the fault, the only thing left to do was to change it.

Español
Hola amigos de geek zone cómo están Soy Daniel, mi nombre de usuario es josuerr29 vengo a ustedes para compartir un contenido de la reparación que llegó a mi taller hace poco.
En mi taller Yo me dedico a la reparación de teléfonos y computadoras y en esta ocasión les Quiero compartir la reparación de una computadora que llegó.
Esta computadora tiene una falla, el cliente trae el CPU porque cuando le da al botón para encenderlo simplemente hace que va a encender dura, segundos sonando el fanCooler, medio enciende la pantalla y al instante se apaga. En ocasiones Simplemente no enciende la pantalla, sino que simplemente hace a encender sin encender la pantalla, comienza a sonar el fanCooler y luego se apaga.
Entonces los pasos para la revisión de la computadora, yo los hice muy rápido porque esta computadora me parecía ya por último que la falla era la fuente de poder.
Así que provee las siguientes cosas.
- Primero a través del multímetro el bosque corto en la memoria RAM.
- También busqué cortos en la placa.
- Además de esto, revisé el disco duro en otra PC para cerciorarme de que estuviera bueno.
- Cómo no hubo falla en estos lugares, tuve que simplemente desarmar toda la computadora, limpiarla, hacerle mantenimiento y volverla armar porque tal vez podría llegar a tener exceso de energía estática.
- Pero nada seguía con la misma falla, así que por último me di a la tarea de investigar y con más paciencia analizar la fuente de poder.
El modelo esta pieza era bj-00058 utech
Para diagnosticar la fuente de poder es algo muy fácil, te mostraré a continuación Cómo se debe hacer:
Para comenzar debes tomar la fuente de poder y sacarla del equipo, toda cuando saques su conector tendrás que encontrar el cable verde de todos sus conectores y hacer un puente entre ese cable y el negro, después de esto conectarás la fuente de alimentación a una fuente de energía normal de casa esto hará qué la Fuente encienda. Te darás cuenta de que si le quitas el puente que le colocaste a sus cables Se apagará este es como un switch de encendido.
Ya estaremos listo para hacer el correcto análisis, tomaremos nuestro multimetro y lo colocaremos en la escala de voltaje teniendo como máximo voltaje de 20 voltios, luego colocaremos el lado negativo de nuestros tester en un cable negro de nuestros cables de la Fuente de alimentación y con el cable positivo comenzaremos a testear los voltajes de cada pin de este ramal.
A continuación te mostraré a través de una imagen el voltaje correcto de todos estos para su correcta reparación
- Rojo 5 v
- Anaranjado 3.3 v
- Blanco nada
- Azul 17 v
- Amarillo 12 v
Con el tester deberían ser estos voltajes que se deben mostrar. Para mi sorpresa el anaranjado mandaba 6 volteos casi el doble de su voltaje original, así que aquí estaba la falla, solo esto quedaba cambiarlo.
fuentes del contenido
Traducción deepl
gift:
Logo facebook
logo instagram
Logo hive
Logo week zone
Ganar algunios pequeños tokens por buscar en google. Registrare aqui
presearch
 Instagram
.png)

Oye esto no lo tenia muy claro, pero gracias por mencionarlo :D
Hace tiempo tambien llego al negocio donde trabajo una pc que no encendia y la fuente de poder sonaba mucho, resulta que era que tenia un nido de cucarachas en la fuente de poder y luego de limpiarla quedo como nueva.
Hermano parace que la fuente de poder tambien es la fuente de todos los males de una conputadora jajajajajajajaj de pana tambie he encontrado cucarachas dentro de ellas jejeje
¡Enhorabuena!
✅ Has hecho un trabajo de calidad, por lo cual tu publicación ha sido valorada y ha recibido el apoyo de parte de CHESS BROTHERS ♔ 💪
♟ Te invitamos a usar nuestra etiqueta #chessbrothers y a que aprendas más sobre nosotros.
♟♟ También puedes contactarnos en nuestro servidor de Discord y promocionar allí tus publicaciones.
♟♟♟ Considera unirte a nuestro trail de curación para que trabajemos en equipo y recibas recompensas automáticamente.
♞♟ Echa un vistazo a nuestra cuenta @chessbrotherspro para que te informes sobre el proceso de curación llevado a diario por nuestro equipo.
Cordialmente
El equipo de CHESS BROTHERS
Congratulations @josuerr29! You have completed the following achievement on the Hive blockchain and have been rewarded with new badge(s):
Your next target is to reach 1000 replies.
You can view your badges on your board and compare yourself to others in the Ranking
If you no longer want to receive notifications, reply to this comment with the word
STOPCheck out the last post from @hivebuzz:
Support the HiveBuzz project. Vote for our proposal!
I read this before I went to bed and just now I am able to leave a comment. I think we need more tutorial like this. I am not a hardware person but I love tinkering with it and learning something new. Since you mention you repair phone too, did you ever have customer who got water damaged and their screen flickering? if so, how do you repair those?
Hello, such a friend. First of all, thank you for leaving your comment I appreciate Micho that and encourages me to segrude from bringing interesting content to the community. Well when a team arrives with wet screen the steps I do are the following: I disarm it and proceed to clean it with the ultra sound machine. But I have it, I do it with Senpillo Old Delta and isopropyl alcohol. And then I analyze with the multimeter and tester components that are bad on the plate. And I proceed to change bad asonents. If there is not the failure, I would then go to the screen. There depends on where the damage is. I first reviewed each FLEX that is in good performance and in ocacation the screens have computers of micro electronics, these are the ones that I analyze with the multimeter, it depends on it is of poor quality the bak lai can be changed but if the water entered among all their layers there already opened that change
Ooooo que interesante, esto me sucedió en varias ocasiones y fue casualmente cuando ocurrió el gran apagon. La fuente tenia problemas y la pantalla del monitor quedaba en negro. Muy interesante como poder solventar ante ello.