Homemade 3D printer: It's already moving! (At the end are the GIF's)
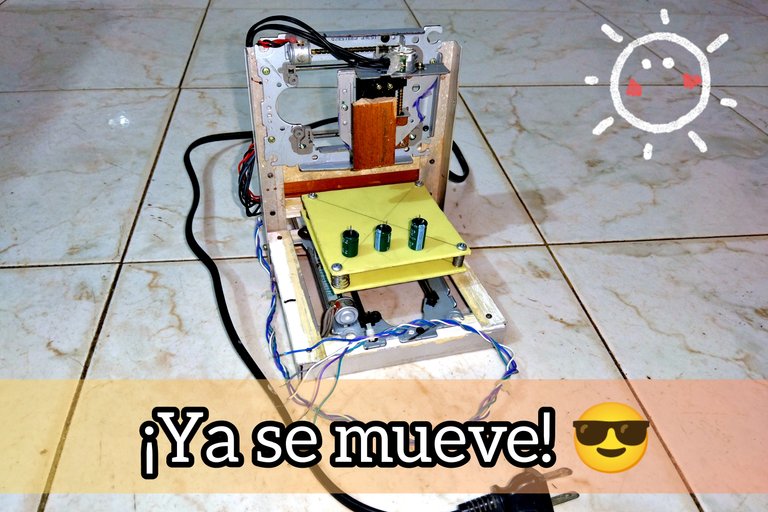
Hello, today I come to show you the new updates of the 3D printer that I am building, I have been very busy lately and I feel that I have not made much progress, although my mom tells me "don't look how much you lack, but how much you have" and I really have a lot .
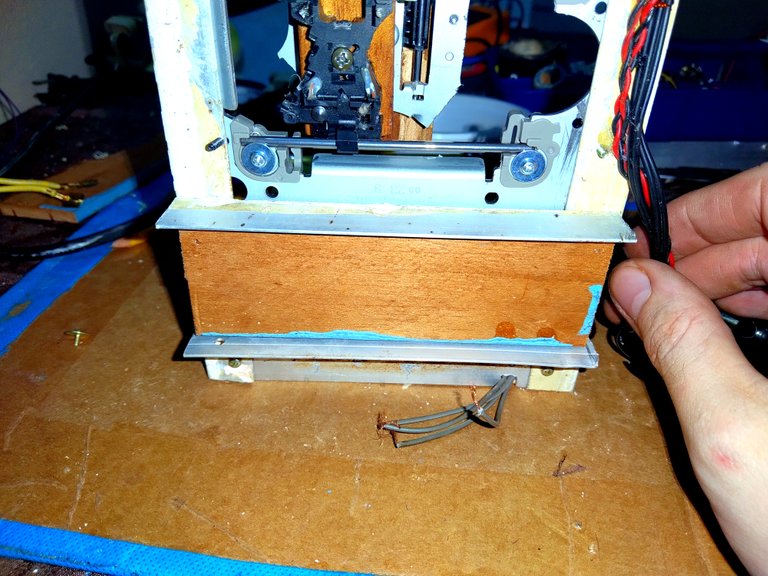
I already got movement in all axes and built a more solid and resistant base based on aluminum.
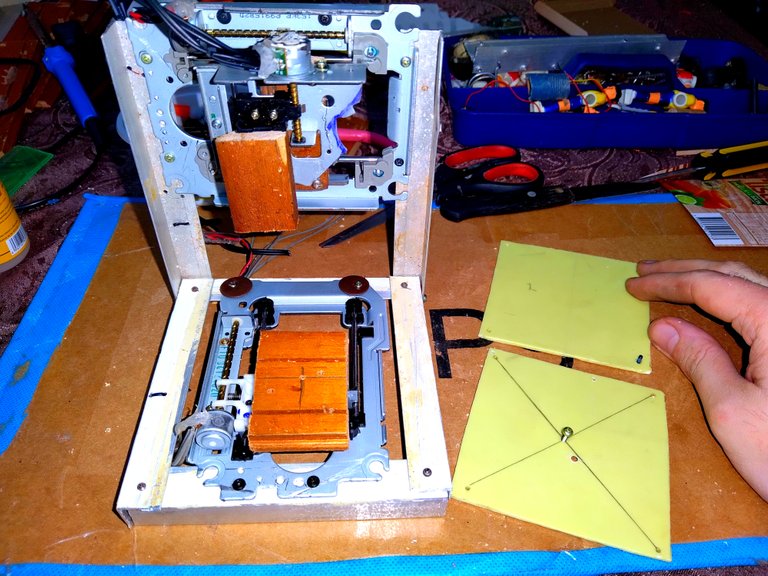
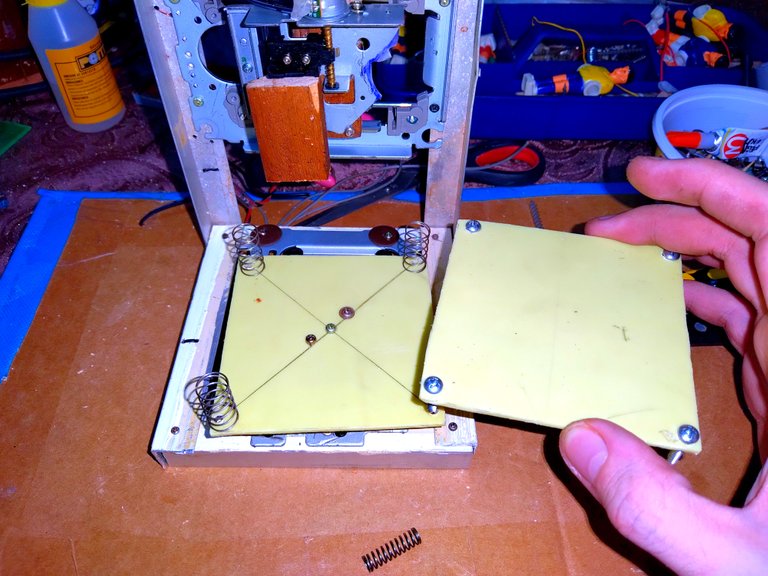
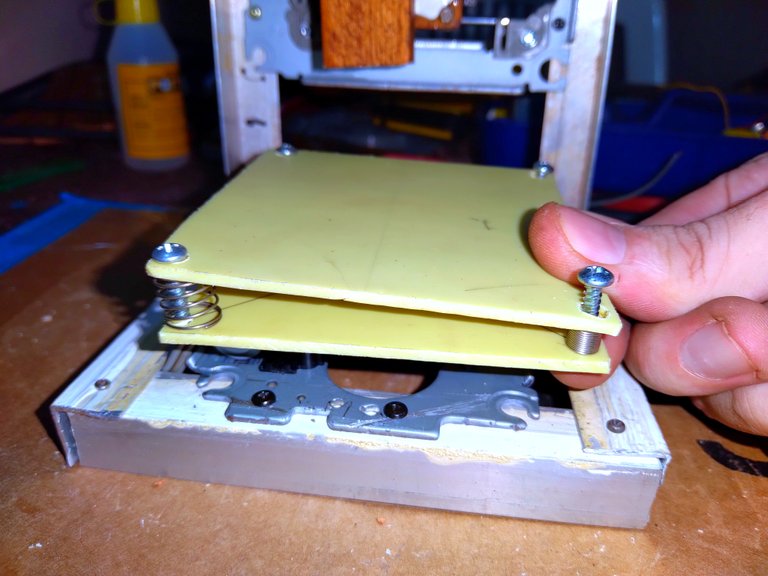
Another thing I did was make the leveling table, this is much easier than it seems, you just have to make two identical pieces and drill holes in both of them in the 4 corners to later join them with screws and springs in the middle.
The idea is that by slowly adjusting each screw we can get a perfectly level surface and so that what we print is properly printed and not with some kind of inclination. My base is 9x9 cm, which may not seem like much and it is not, although it will come in handy for making key rings and miniature figures.

Another thing I did is take measurements to know how to design the plastic ejector, for this I simply placed the horizontal axis and the depth axis in the center of their rails and started to take measurements, I'll show you how I did it.
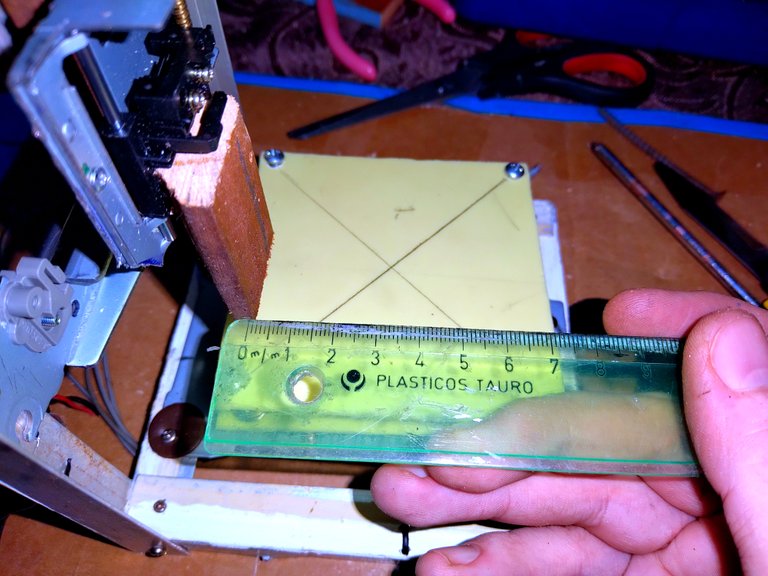
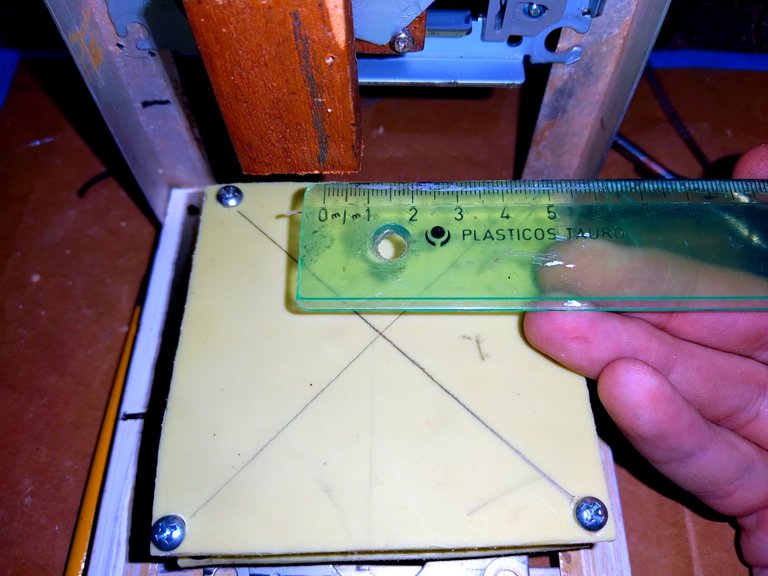
By making simple measurements with a ruler, I can tell that the tip of the ejector needs to be 1.2 cm offset to the right and 3.4 cm forward to achieve perfect centering on the level surface.
Having these measurements I can start designing it on the computer using 3D design programs, I personally like SketchUp a lot and it is the one that I will possibly use to design this piece to build it later. In fact, I was originally planning to have it ready for this post, but the structure change changed the measurements and now I have to design everything from scratch 😂
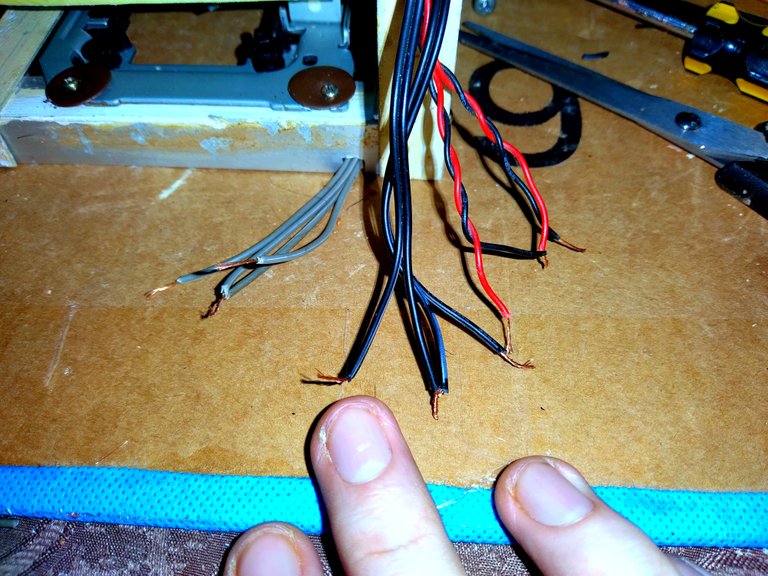
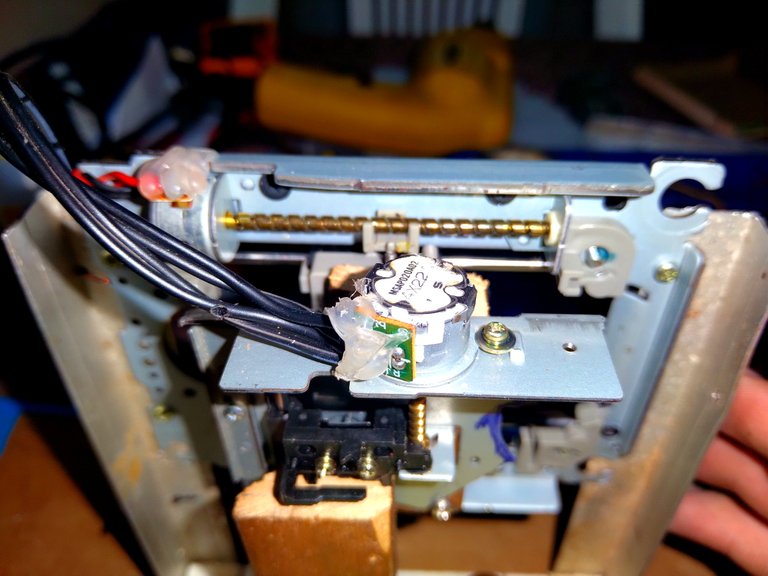
Something was bothering me and what I decided to dedicate some time to was ordering the cables. Testing the tangled cables was extremely exhausting, not to mention that they were located at the rear of the structure and that made it difficult to visualize the test results.
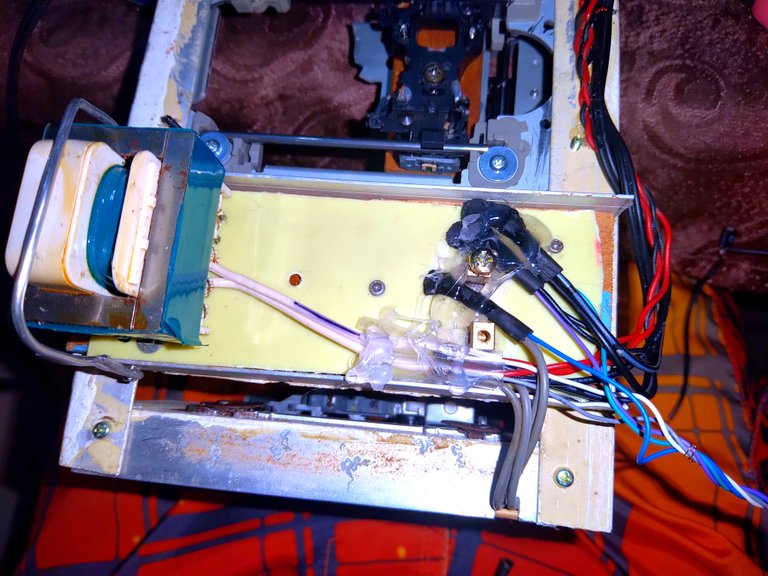
In order not to be struggling, I put everything in order. I made a small junction box with a piece of wood and anchored the transformer and all the connections to it, obviously everything already soldered with tin. Although it wouldn't be the first time that I glue everything with hot silicone and then I have to take everything off due to a badly connected cable 😂
Also this time I made an effort to check that everything was together and that there was continuity in all the connections before sealing everything with hot silicone.
In the end I got something like this, just 5 cables that are going to make my life easier. Two of them correspond to food and the 3 most colorful each correspond to an axis. The connections are fairly simple, although without a controller it becomes extremely tedious to perfect.
Let me explain, to make them work I must connect one of the connectors of a capacitor to one of the cables of some axis, then by connecting the other output of the capacitor to one or the other power cable I can vary the direction of rotation of the motors, that is to say , make it go up or down, go from right to left and forward and backward.

Tests in the depth axis. (X)

Tests on the horizontal axis. (Y)

Tests on the vertical axis. (Z).
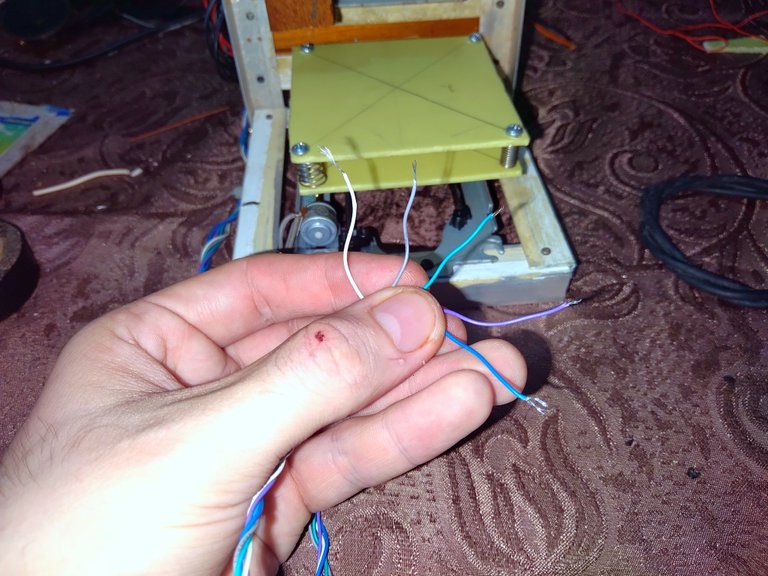
Although everything seems to be going perfectly, unfortunately it is not. The capacitors need to be large enough to absorb the electrical pulses emitted by the motors when they are run and I can't get the right capacitance right now. In the GIFs it is not noticeable, although lying seems very unethical to me.
Not having the correct capacitors produces a small vibration in the motors, it's nothing special, I just have to keep testing capacitors until I get the right one for each motor. The vertical axis is the one that gave me the least problems and I managed to calm its vibrations, I'm still testing capacitors on the other 2 remaining axes.
Thank you for sharing this post on HIVE!
Your content got selected by our fellow curator ashikstd & you just received a little thank you upvote from us for your great work! Your post will be featured in one of our recurring compilations which are aiming to offer you a stage to widen your audience within the DIY scene of Hive. Next time make sure to post / cross-post your creation within the DIYHub community on HIVE and you will receive a higher upvote ;) Stay creative & HIVE ON!
Please vote for our hive witness <3
Hermano este trabajo es de ingeniería es bastante asombroso increíble que lo puedas hacer y en una de las publicaciones recientes que te vi Todavía estabas Aprendiendo a soldar en esta ya eres todo un maestro hermano Te felicito cuando uno quiere algo lo alcanza no importa el tiempo puede llegar más lejos y lo sé
No te creas, aun me trabo y cometo errores tontos jaja, aunque ahi voy, aprendiendo poco a poco, creo que uno aprende mas rapido cuando el proyecto le interesa y bueno, yo quiero mi maquinita 😂
Saludos hermano, un abrazo y gracias por comentar!
Realmente te admiro y me encanta poder ver que hay más amantes de las impresoras 3D. No se si conoces la comunidad de impresión 3D de Hive pero estas más que invitado 3D Printing a veces no esta tan activo pero la idea es sumas gente a la comunidad. La verdad cumpliste uno de mis sueños, armar una impresora totalmente de cero, seguro te llevo mucho tiempo de investigación, pruebas y el hecho de conseguir los materiales. VAMOS QUE FALTA MENOS YA TENES UNA GRAN PARTE DEL RECORRIDO
Oh, no sabia que existía esa comunidad, ya voy a entrar y a ver y prometo que mi primera impresión será ahí, aunque tendrás que disculparme, porque seguramente será una embarrada de plástico derretido 😂
Y con respecto a..
Honestamente si y no, la cosa es que consumo mucho contenido variado, entonces un día veo a un tipo construyendo una rueda de hamster y al otro dia veo a otro explicando como reparar un televisor viejo.. no lo se, veo de todo!
El asunto es que no solo lo veo, sino que realmente aprendo mucho viendo y me fijo en los detalles, por ejemplo el de la rueda de hamster tuvo que hacer un marco para sostener todo aquello y usó perfiles parecidos a estos y ahí aprendí a como cortarlos y unirlos, no me sale perfecto, aunque me las arreglo.
Luego del otro, aprendí que el problema del televisor era una conexión a tierra fallando y un capacitador inflado, entonces presto atención y aprendo a medir continuidad para buscar fallos de tierra y de paso tambien aprendo a medir capacitadores. Y de nuevo, no me sale perfecto y se me olvida que puntos medí y cuales no y ahí me tienes, midiendo lo mismo 3 y 4 veces 😂
Es un todo, pero realmente ponerme a investigar sobre la construcción de impresoras 3D, un par de horas para ver la idea general, el resto pues simplemente he ido sumando tonterías a mi cabeza durante años. Creo que todos lo hacemos, solo que consumimos mas noticias y farandula y los conocimientos útiles se van perdiendo. No es por nada, pero si pasas 2 horas al dia viendo el canal Discovery aprendes mucho mas que viendo el noticiero 10 horas al dia y de paso te estresas menos 😂
JAJAJAJA en resumen, conocimientos de otras areas las adaptas para lo que queres hacer. Me parece genial. Hablando de eso te recomiendo seguir a @soltecno hace cada reparación y cada recuperación de componentes que seguro vos mas que nadie va a saber aprovechar
https://twitter.com/1422413915275812864/status/1599213309688893440
The rewards earned on this comment will go directly to the people( @mariajcastro28 ) sharing the post on Twitter as long as they are registered with @poshtoken. Sign up at https://hiveposh.com.
Congratulations!
✅ Good job. Your post has been appreciated and has received support from CHESS BROTHERS ♔ 💪
♟ We invite you to use our hashtag #chessbrothers and learn more about us.
♟♟ You can also reach us on our Discord server and promote your posts there.
♟♟♟ Consider joining our curation trail so we work as a team and you get rewards automatically.
♞♟ Check out our @chessbrotherspro account to learn about the curation process carried out daily by our team.
Kindly
The CHESS BROTHERS team
Yay! 🤗
Your content has been boosted with Ecency Points, by @oscargonzalez123.
Use Ecency daily to boost your growth on platform!
Support Ecency
Vote for new Proposal
Delegate HP and earn more
Congratulations @oscargonzalez123! You received a personal badge!
You can view your badges on your board and compare yourself to others in the Ranking
Check out the last post from @hivebuzz:
Support the HiveBuzz project. Vote for our proposal!
Dear @oscargonzalez123,
May I ask you to review and support the new HiveSQL Proposal so we can keep it free to use for the community?
You can do it on Peakd, ecency, Hive.blog or using HiveSigner
Thank you!