Haciendo una pulsera Miyuki sencilla pero muy linda.//making a simple but very cute Miyuki bracelet.(Esp-Eng)
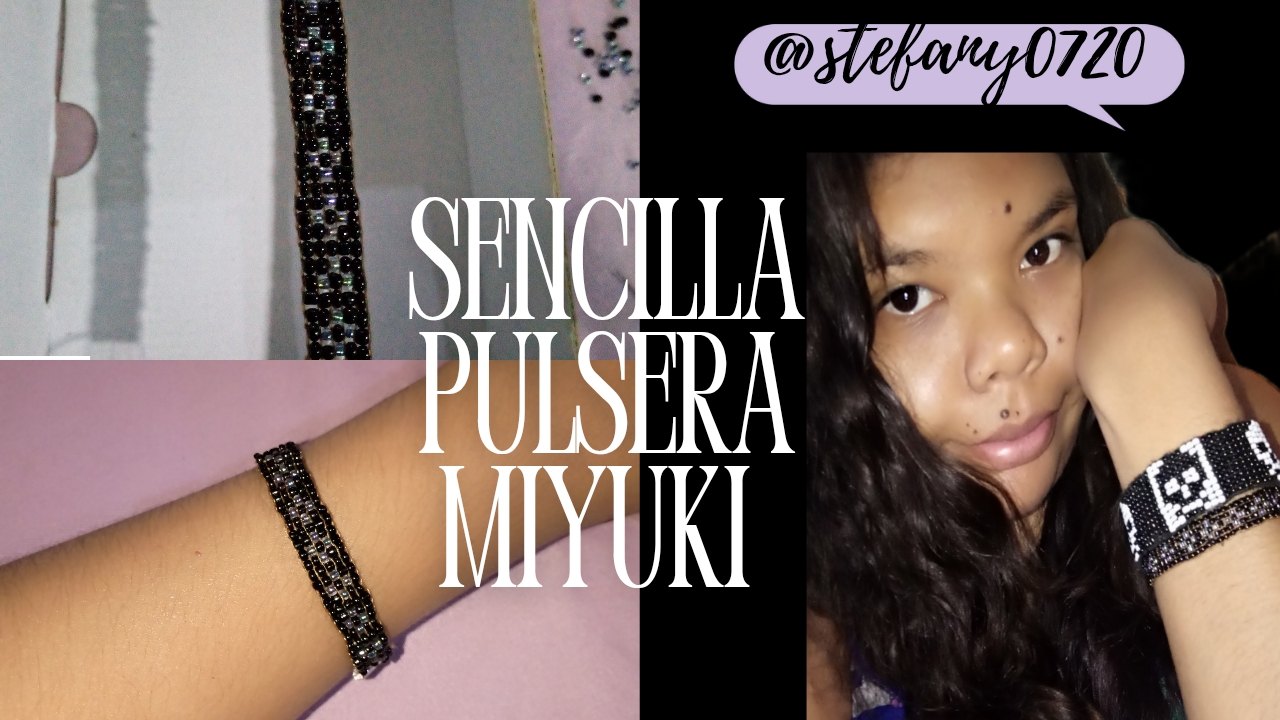
Hello, hello to all of you friends, how are you in this wonderful community full of creativity? I am very happy to be here again and share with you a new adventure in the world of arts and crafts. On this occasion, I want to show you how to make a Miyuki bracelet. Although it is a simple bracelet, the result is truly charming and perfect for any occasion. As you know, Miyuki weaving is a fascinating technique that allows us to create unique and vibrant designs, full of colors and shapes. The versatility of this technique is incredible, and thanks to our creativity, we can experiment with different patterns and combinations that reflect our personality.Today, I'm going to focus on making a simple bracelet with a small cross print. The reason I chose this design is because I want to create a set of bracelets that can be combined with each other. I recently made a skull bracelet, and seeing how both bracelets would complement each other, I jumped at the chance. I love the idea of having a set of bracelets that can be worn together, as it's always fun to play with accessories and create a more dynamic look. I've also been thinking about the possibility of making more bracelets. It never hurts to have an additional accessory that can enhance our style. Fashion is all about experimenting and having fun, and I believe every bracelet we make tells a story. That's why I'm excited to share the process of creating this bracelet with you.

(Materiales a usar:)(Materials to use:)
- Hilo nilon
- Tijeras
- Mostacillas de color negro
- Mostacillas de color tornazul
- Pinzas
- Dos argollas,tapa nudos y un poco de loro
- Aguja de mostacillas
- Nylon thread
- Scissors
- Black seed beads
- Teal seed beads
- Tweezers
- Two jump rings, knot stoppers, and a bit of thread cutter
- Bead needle
(Procedimiento:)(Procedure:)
💜
💜
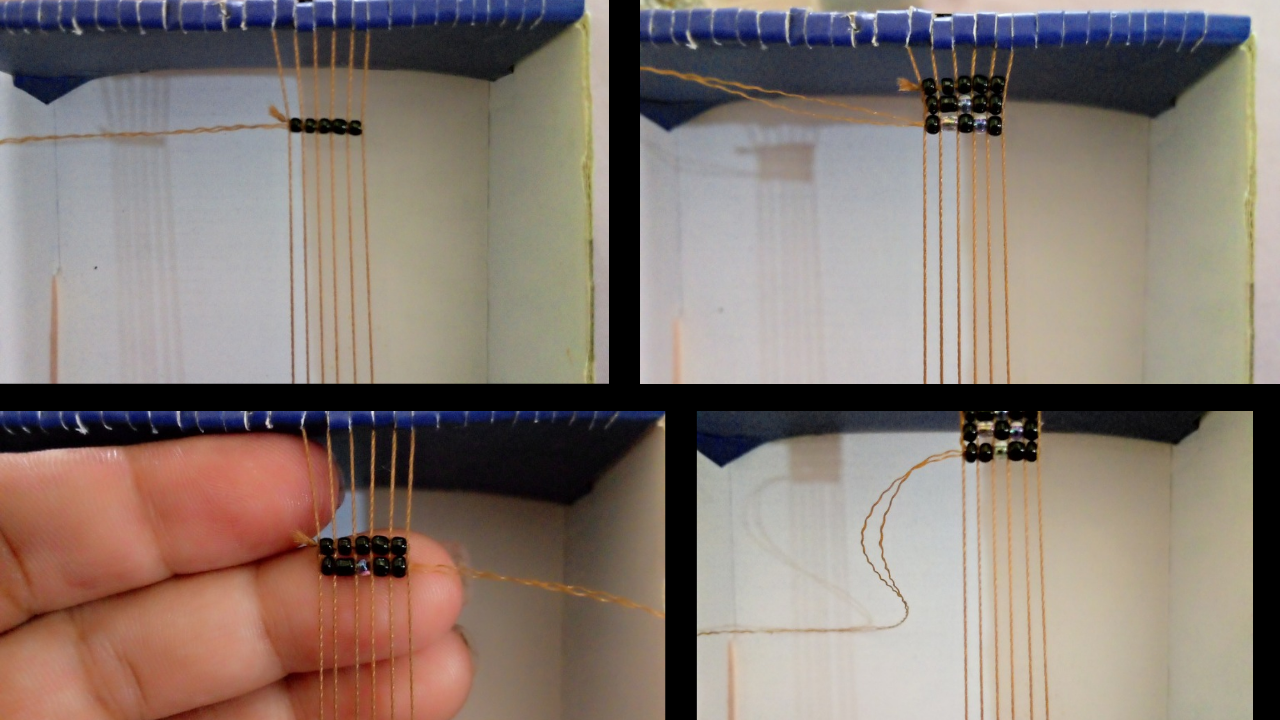
To start, I always prepare the loom, which is my faithful little box, and I place five rows of nylon thread on it, which, by the way, I am using for the first time 🫰, and I also prepare the needle, which is a bead needle, with enough nylon thread so that it doesn't run out, and I join it to one of the ends where I am going to start the bracelet ☺️.
💜
💜
Now I'm going to start by first placing five black beads under the loom and arranging each bead on each row of threads, and then I pass the thread upwards and pass the needle through the middle of the beads. I'm going to continue doing this step consecutively. At first it may be somewhat complicated since sometimes the sequence is lost, but believe me, this in turn is relaxing🙂↕️.
💜
💜
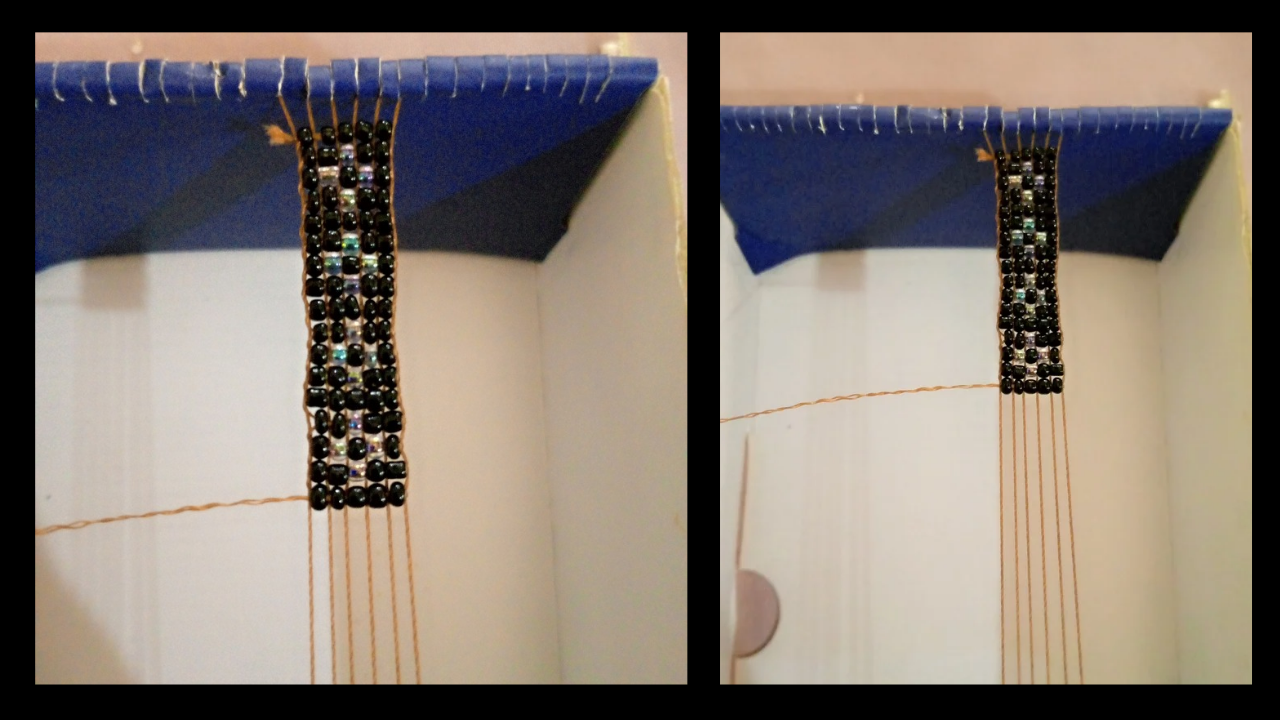
At this point I realized that I had made good progress, even though the cross isn't as visible as it seemed and I thought it would have been better in another color, but I'd been weaving for a while and I didn't want to damage it and start over, so I kept going, but what can I say? I imagine it's not easy to undo something so beautiful. You know, if I had a loom, the weaving would be much better, of course, the box is a good option, but it turns out that you have to be constantly adjusting the thread and holding it with adhesive tape, which is somewhat annoying, but in reality, it has been a good option for me 🙂.

💜
💜
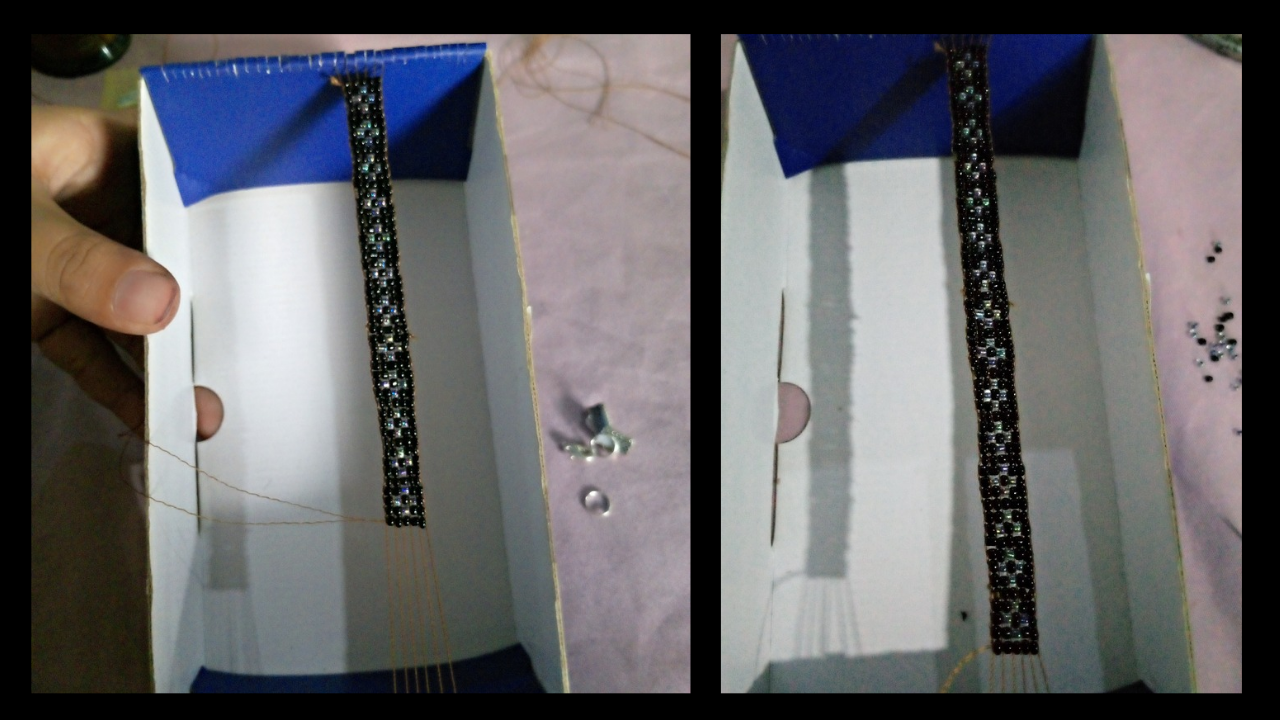
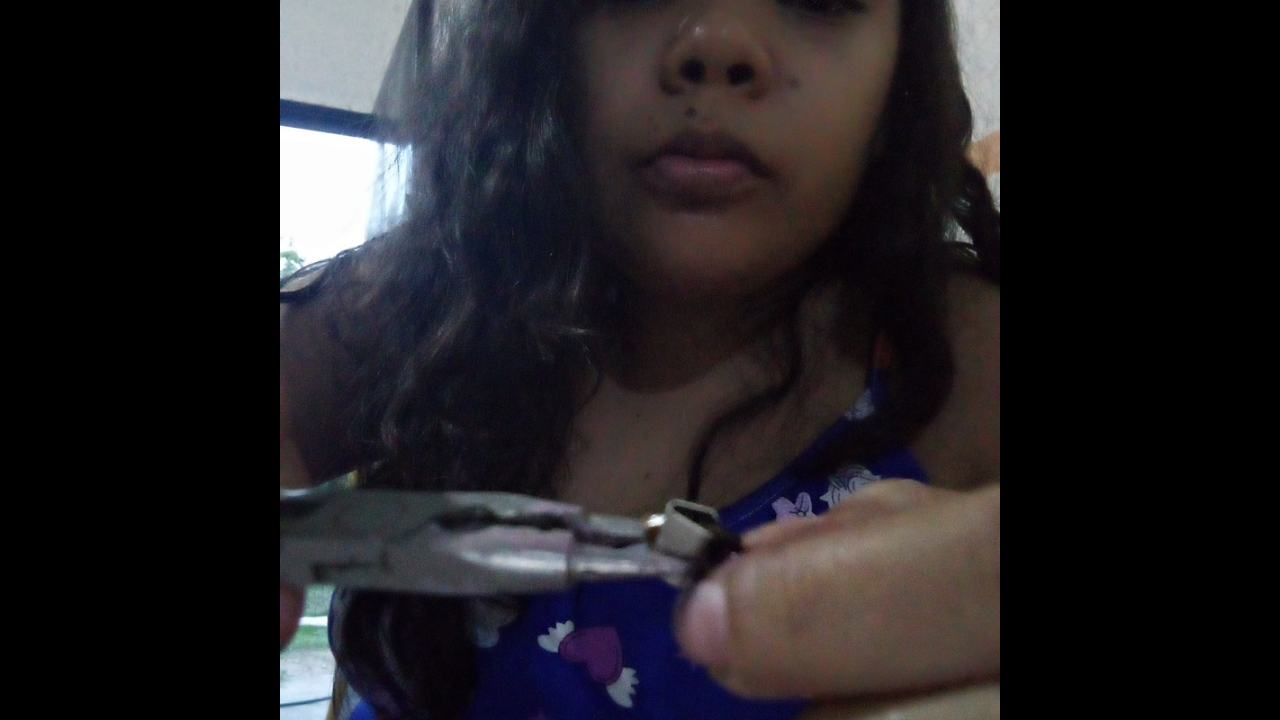
Once I finished, all that was left was to place the knot stoppers, the rings, and the parrot beak, with the help of jewelry pliers. I also want to mention that you can put a little liquid silicone on the tips so that the knot stopper would adhere well and the bracelet would last a little longer 😎.
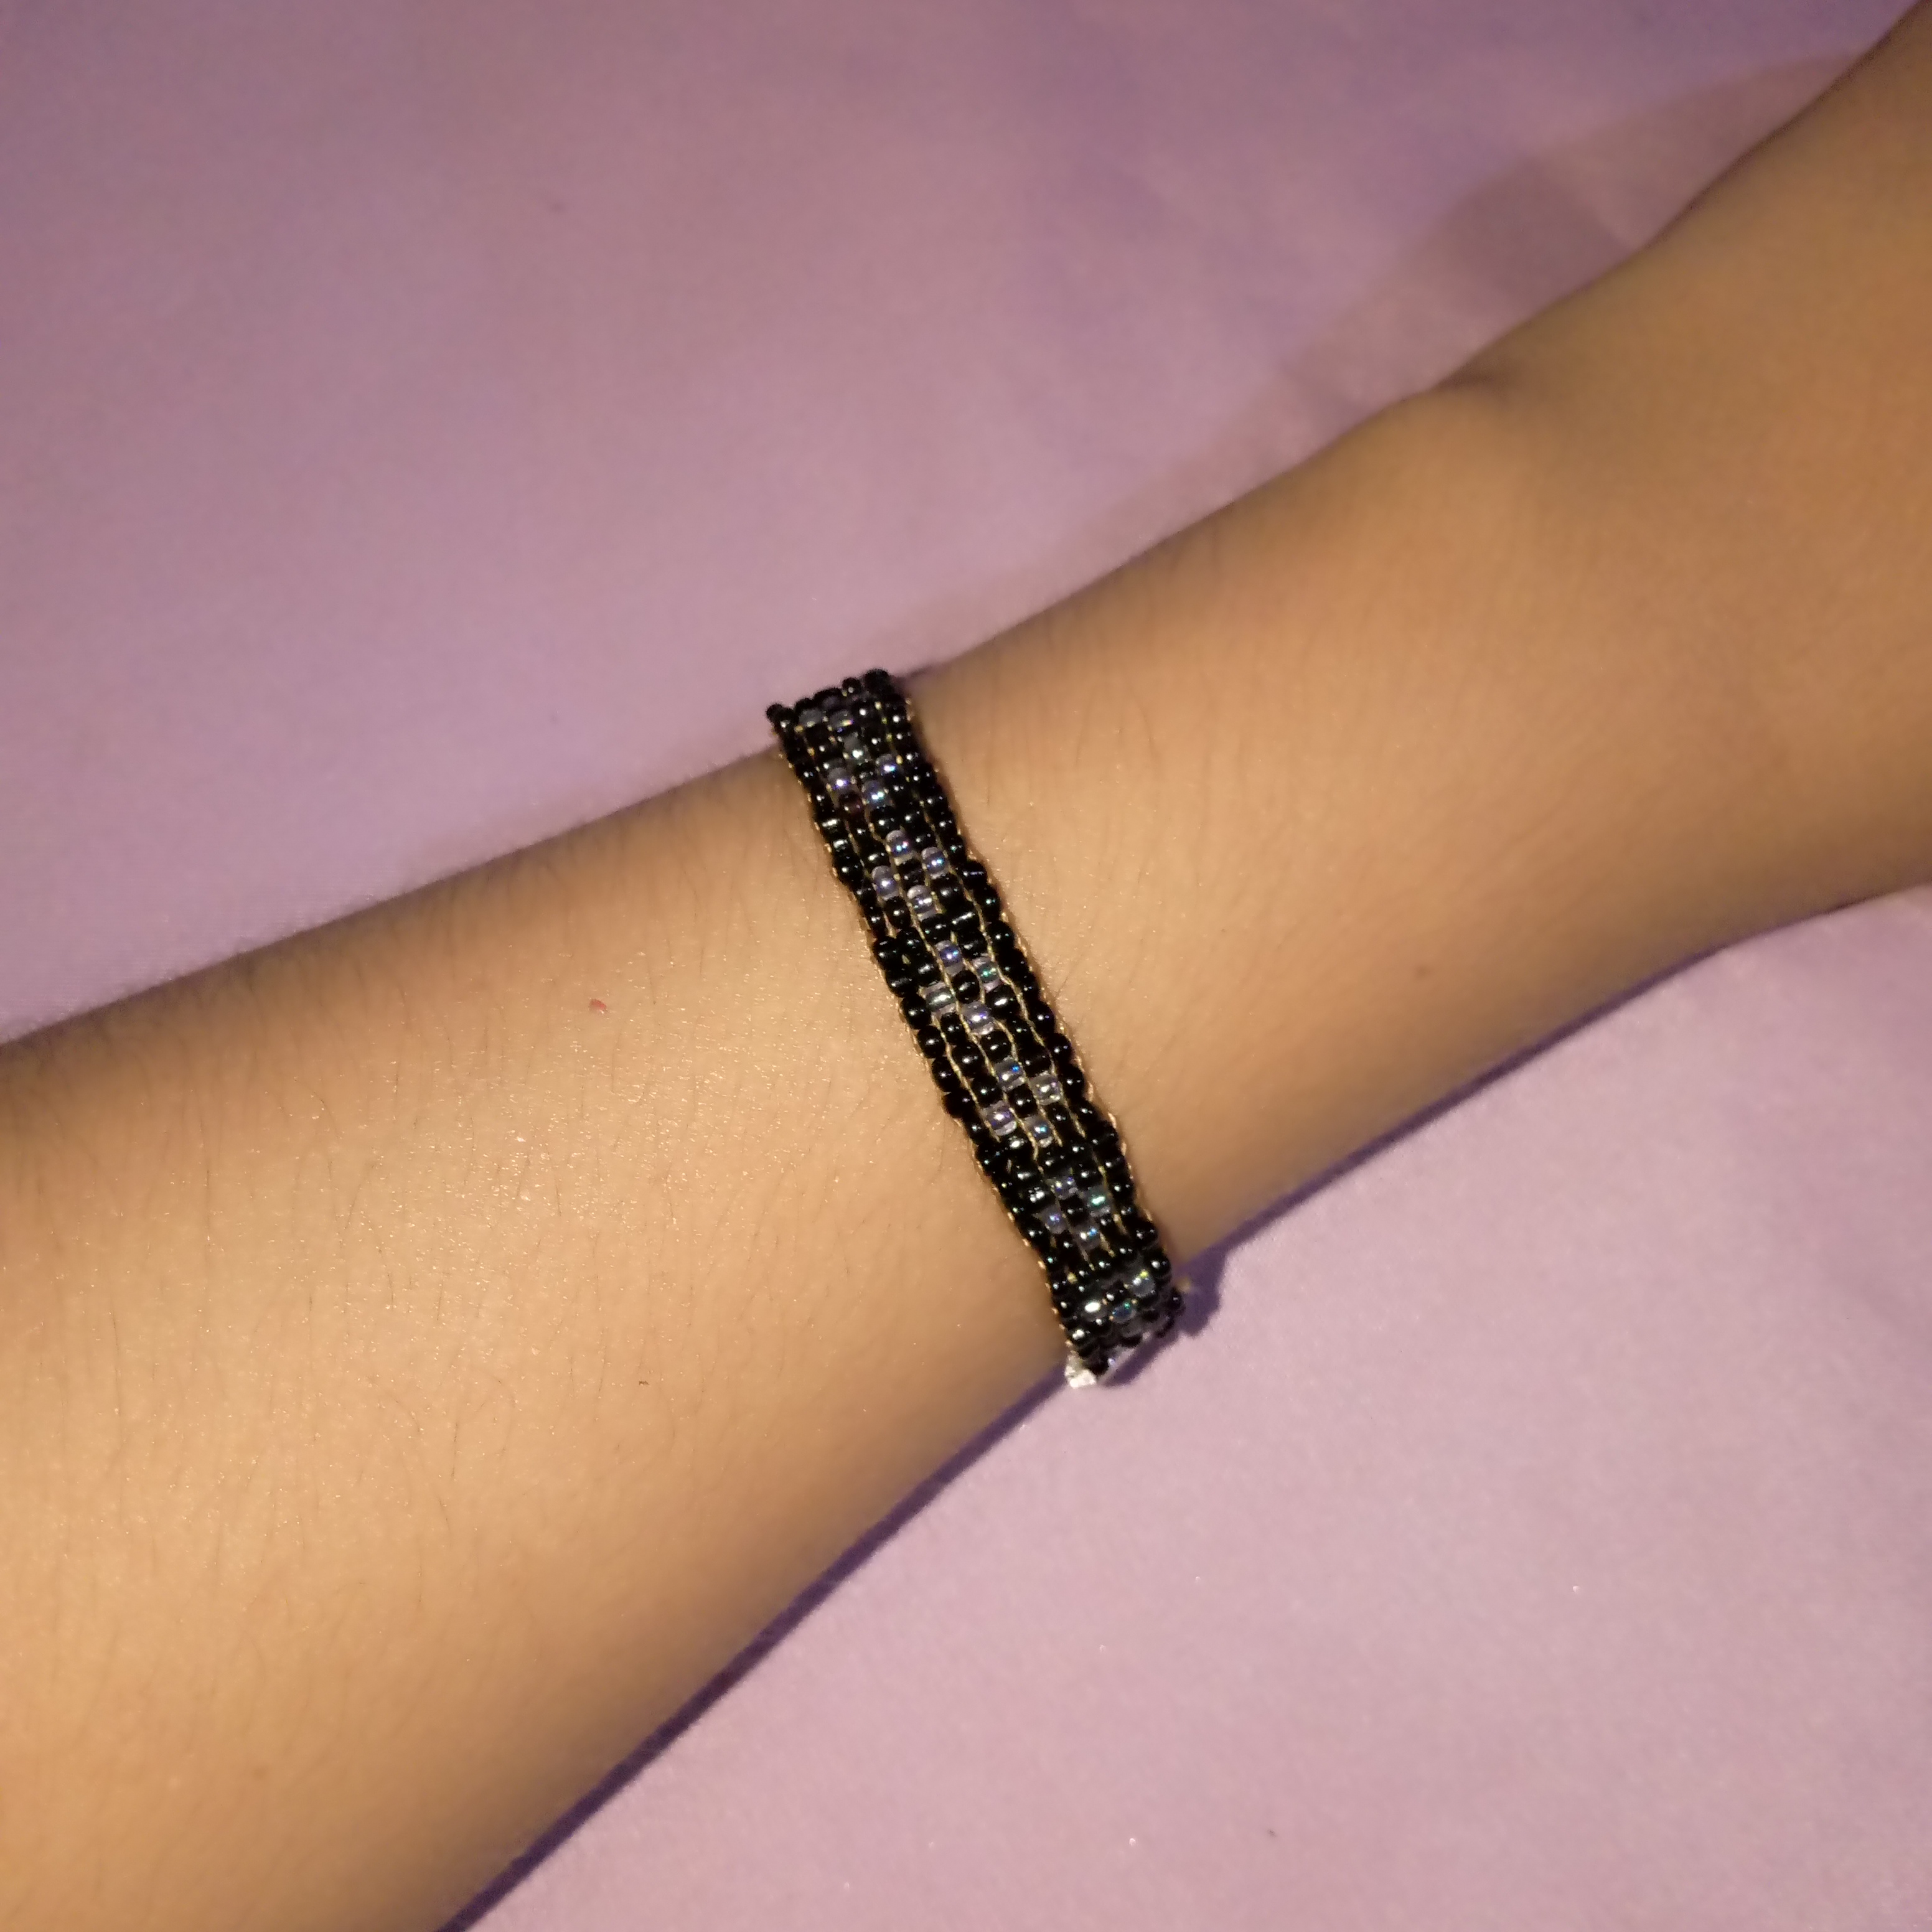
(Resultado final:)(Bottom line:)
Ok now that my bracelet is ready here are the photos where I tried it on with my other bracelet, I really loved it and I already want to make another one 🤭, and this is the final result of how I made this bracelet I hope you like it and I will eagerly await your comments and if you know of any tricks please tell me I will always treasure your recommendations, and finally I send you a big greeting and say goodbye until next time 👋😘.


Las fotos de este blog son de mi propiedad|Las imágenes son editadas en canva|Fotografías tomadas en mi celular infinix Smart 7|El contenido está traducido en el traductor de Firefox.
Thanks for showing us how to make a Miyuki bracelet, it looks so lovely and your tutorial was enlightening. Well done and thanks for sharing.
selected by @ibbtammy
Hello, thank you for your comment. I am always grateful to have shared this bracelet with you.
Sencilla pero muy linda, esta combinación me encanta pues se puede usar con todo, lindo trabajo.
Gracias ☺️
¡Enhorabuena!
✅ Has hecho un buen trabajo, por lo cual tu publicación ha sido valorada y ha recibido el apoyo de parte de CHESS BROTHERS ♔ 💪
♟ Te invitamos a usar nuestra etiqueta #chessbrothers y a que aprendas más sobre nosotros.
♟♟ También puedes contactarnos en nuestro servidor de Discord y promocionar allí tus publicaciones.
♟♟♟ Considera unirte a nuestro trail de curación para que trabajemos en equipo y recibas recompensas automáticamente.
♞♟ Echa un vistazo a nuestra cuenta @chessbrotherspro para que te informes sobre el proceso de curación llevado a diario por nuestro equipo.
🏅 Si quieres obtener ganancias con tu delegacion de HP y apoyar a nuestro proyecto, te invitamos a unirte al plan Master Investor. Aquí puedes aprender cómo hacerlo.
Cordialmente
El equipo de CHESS BROTHERS