DIY bike rear rack orange paint job
Hello!
Some of you may know that I am a proud owner of a Radrover (2019) which I use every day as my daily commute.
I originally bought it in june of last year and received it in middle of june. Since I've had it, I've been using it essentially every day and I am clocking 3909km (2428 miles) on the odometer.
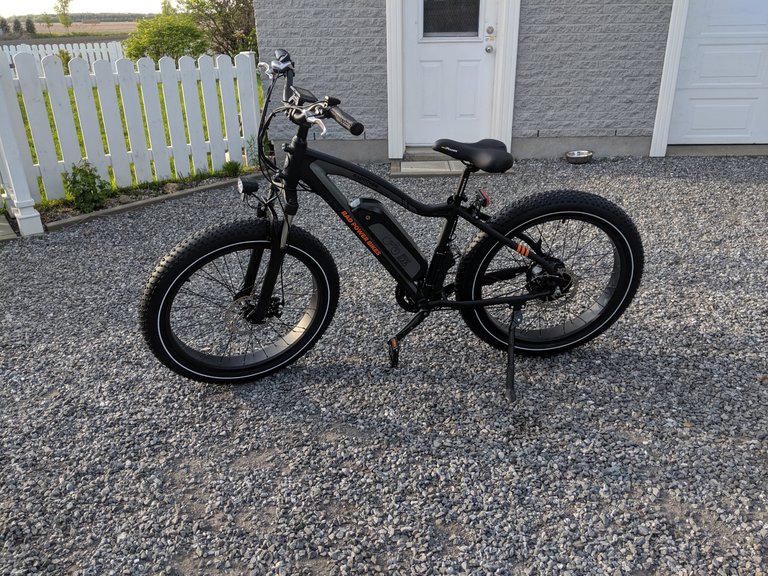
after assembling it in june.
Since buying it, I've done a few upgrades and what I would call sidegrades. Like transferring my rear rack from my old bike which proved to be a mistake because the rack looked really flimsy on a fat bike so I ended up giving it to my mother's since her bike didn't have one.
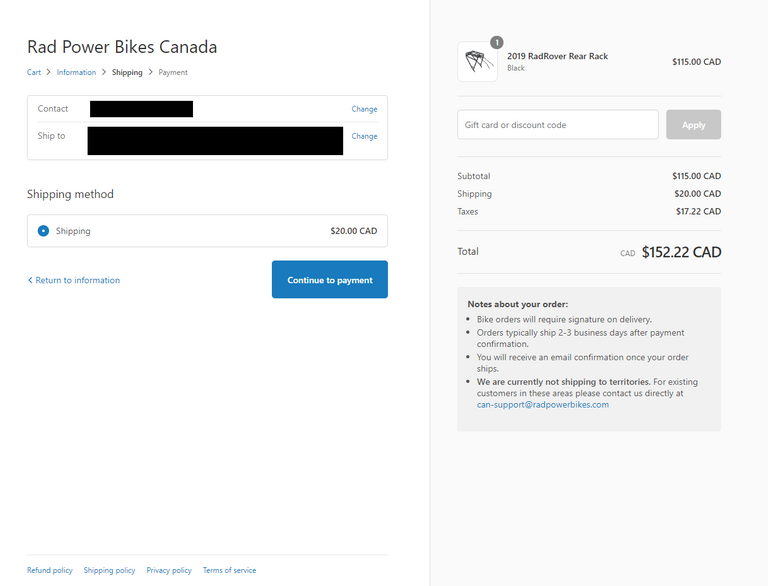
I was originally intending to buy the original racks from Rad Power Bikes but their accessories are prohibitively expensive for what they are. I am not one to scuff at a company making profit margins but this is more price gauging when you charge this much for a fairly basic rack.
The problem was that I really but I mean really liked the orange colored rack. I like th combination of black and orange so I decided to do it myself.
First thing I had to do was find a decent rack that would fit a fat bike's larger frame.
In my case, the Ibera PakRak Touring Plus rear rack at $44.79 CAD was perfect. Not only was it less than half the price that radpowerbikes is selling theirs but it came with free shipping, and next day delivery instead of about a week.
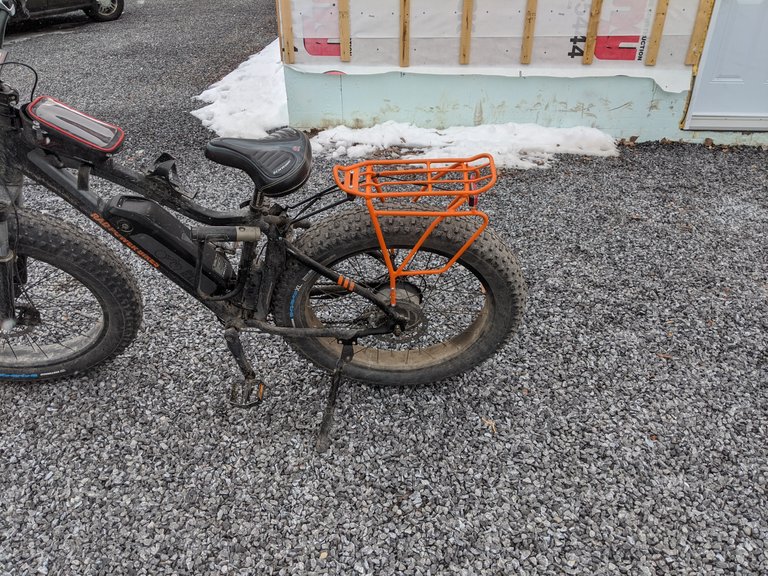
I have to say it looks pretty decent and as you can see, before I started working on this project, I was using the rack so I had to clean it up. But first thing first, I went to the store to buy a bottle of orange paint in spray. I hesitated between the gloss natural orange and the fluorescent orange but ended up settling for the gloss orange from Rust-oleum for $7.99 CAD at the local hardware store.
Cleaning
First thing I did was clean the rack, it's winter here so any time I go outside, there's usually slushie (mix of snow and water) which absolutely stains anything it touches. I disassembled the rack except for the two long rods in the front which I'm going to leave black.
I removed the little stickers on each side because I hate those things. It's nice that it's an option even without repainting and cleaned the thing using friction alcool where the stickers were to remove any remnants of paint.
Painting
To paint with a spray can, there are a few things to keep an eye on.
- Make sure wind doesnt get in the way of you painting properly.
- Prevent paint from going everywhere and permanently staining something you dont want to paint.
- Ensure proper aeration. You dont want to breath the fumes.
- Reduce contact points on the thing you are going to paint.
- Make sure your cats cant fuck with it.
What I ended up doing is using my small greenhouse that I use to start my tomatoes/peppers in the spring. I only took one section as I didnt need that much space.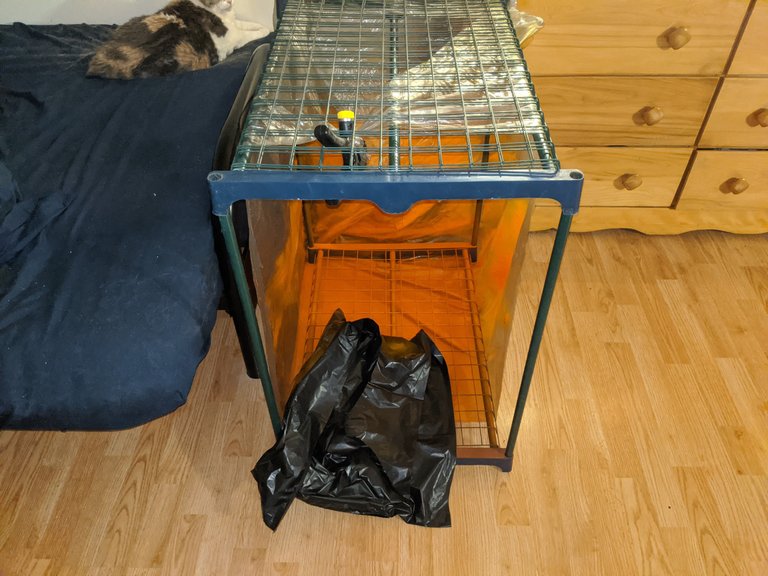
I removed the plastic sheet that comes with it as I wanted to keep it for next spring and instead went with two large plastic bags that I had. I cut one side of the transparent bag to make it easier to wrap around the improvised painting tent. The black one was used to prevent me spraying on myself.
Once that was done, I hanged the two feets of the rack using old speaker wires. I moved the whole thing outside and spray painted the feets first, to see what it would look like first. 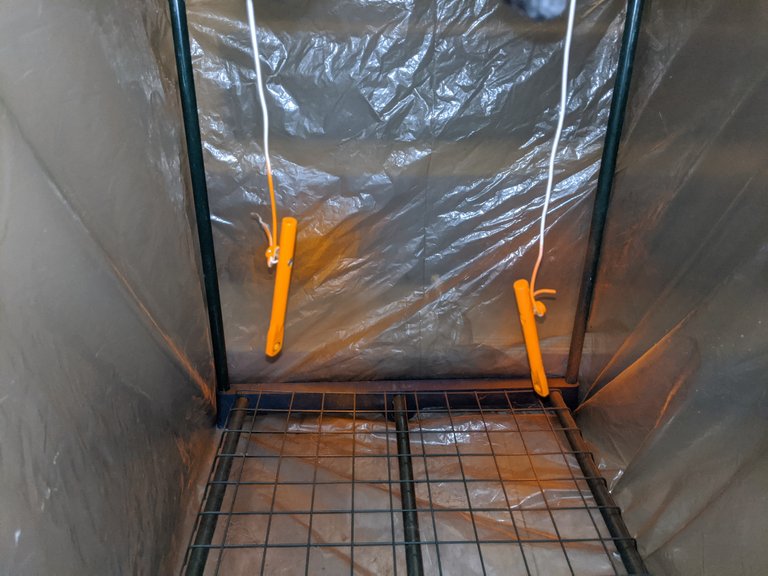
Satisfied with the first layer of paint, I hanged the rack as well. and started painting it. I ended up putting 2 layers on the feet which were much easier to paint than the rack.
On the rack, I ended up putting 3 layers. Bringing the painting tent inside after each spray, because of the winter temperatures.
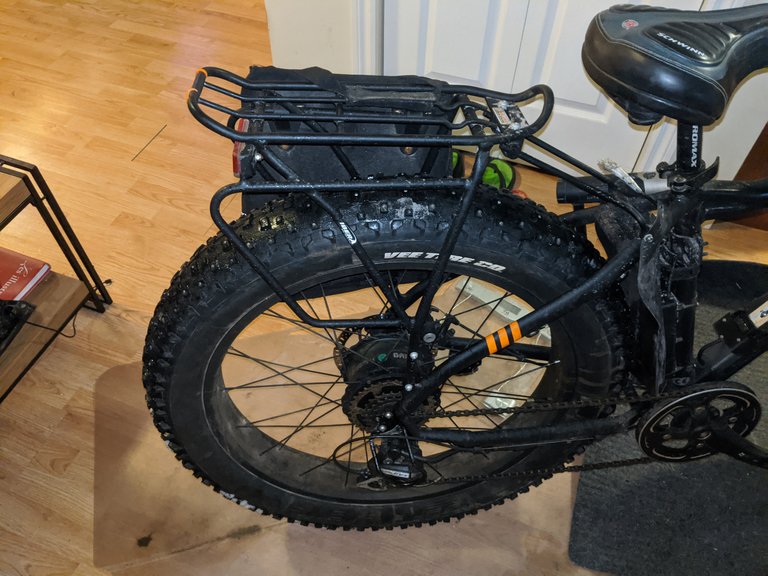
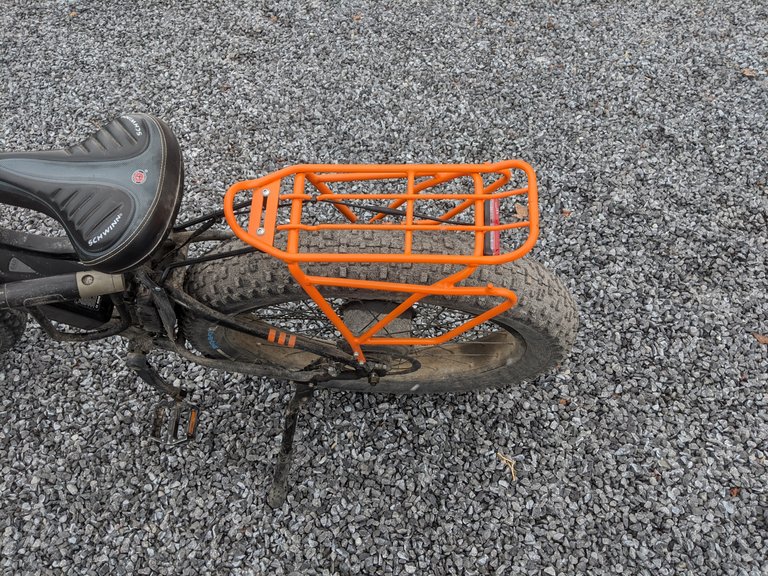
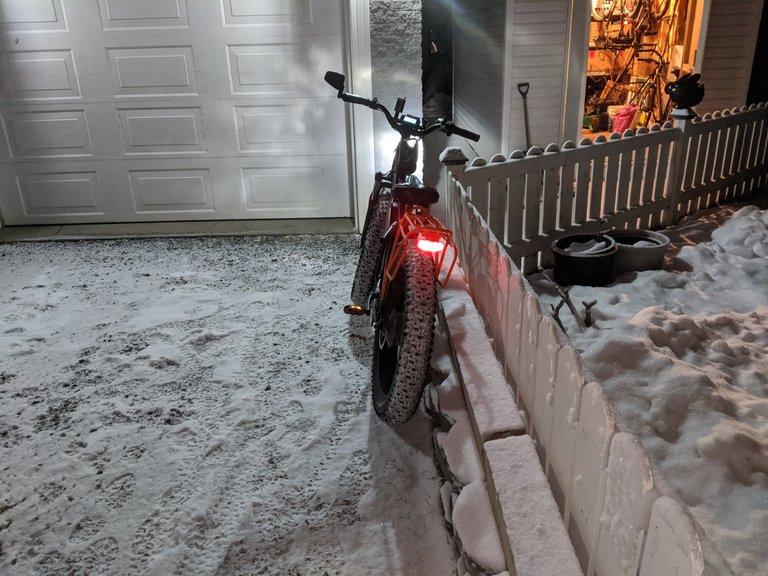
Here are the final results. Feel free to tell me what you think of it. Personally I like it.
at night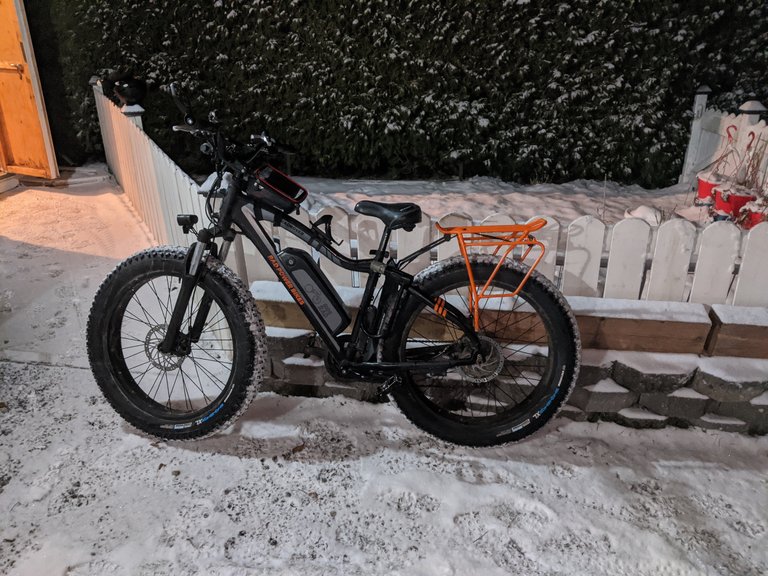
In all it ended up costing me $60.70 CAD. A saving of $91.52
PS: I may put the rack feet on the next bolt holes below once I install my full fenders depending on if it fits.
According to the Bible, What is the proper way of teaching children about the Church??
Comment what you understand of our Youtube Video to receive our full votes. We have 30,000 #SteemPower. It's our little way to Thank you, our beloved friend.
Check our Discord Chat
Follow my Steemit account on https://www.steemit.com/@hiroyamagishi
Came out pretty well and you saved some cash too...A win-win I think. Did you need to bake the painted parts or they just air-cured?
air-cured, I dont really have the space since I live in a small loft :)
Ah ok, just wondered. Well, it seemed to come out ok and you seem happy so that's the main thing.